
Call today! 704-536-6667
Tinting your car windows yourself can save hundreds of dollars, but it’s also one of the easiest ways to waste money if you get it wrong. Bubbles, peeling edges, and dust contamination are common problems for first-time installers, especially without the right tools or environment.
In this guide from Sun Stoppers Window Tinting in Charlotte, you’ll learn exactly how to tint car windows step by step, what tools you need, how to avoid costly mistakes, and when it makes more sense to hire a professional instead.
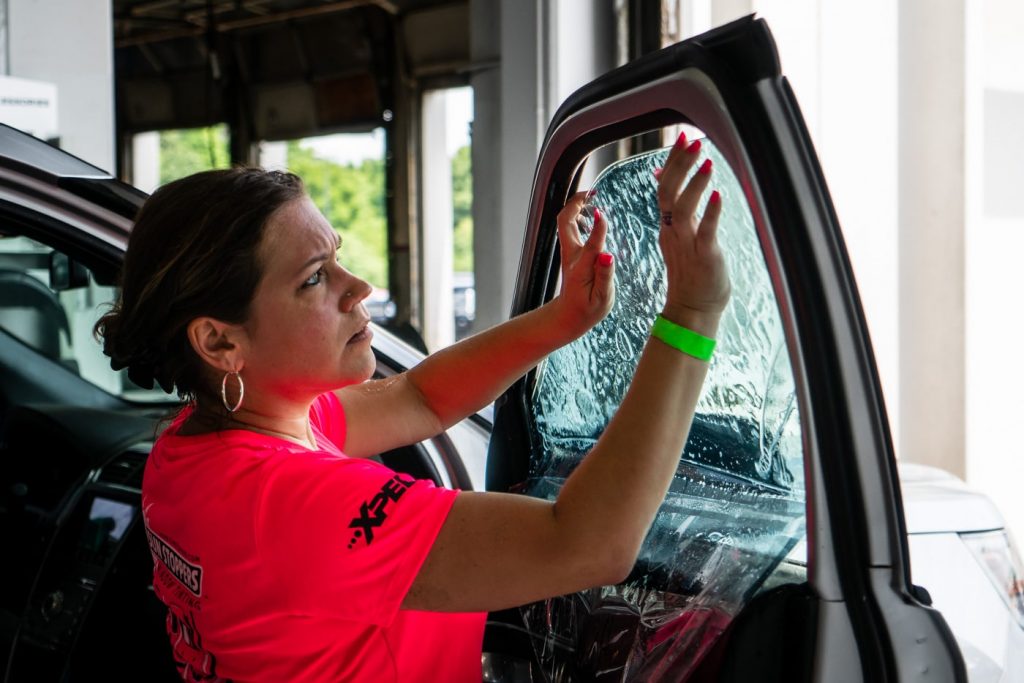
Window tint film is a thin, adhesive laminate you apply to your vehicle’s glass. You can buy it in rolls or as precut tint kits that are computer-cut to match your car’s make and model. The film reduces heat, glare, and UV radiation with high-performance ceramic films that block up to 99% of UV rays.
Visible Light Transmission (VLT) tells you how dark your tint is. It measures the percentage of visible light that passes through the film. Lower numbers mean a darker tint.
For example, a 5% VLT gives you that limo look, while higher numbers like 35% or 50% let more light through and make nighttime visibility significantly safer.
Important technical note: Some film types, particularly metallic tints, can interfere with electronic signals such as GPS and mobile reception. Ceramic tint avoids this issue entirely and is better suited for modern vehicles with built-in navigation, TPMS, or dash cameras.
Before starting, make sure you’re working in a dust-free, enclosed area. This single factor has more impact on your results than the film brand you choose.
Pro tip: Lightly mist the floor of your workspace with water before starting. This reduces airborne dust significantly during installation.
Learning how to tint car windows takes patience and attention to detail. These steps follow the same workflow used by professional installers. The difference is in your environment and practice.
Spray ammonia-free cleaner on the glass and scrape it with a fresh razor blade until the surface is completely smooth. Wipe down with microfiber towels. Run your fingernail across the glass. If you feel any resistance, scrape that area again.
Precut kits are highly recommended for beginners. They eliminate the most common source of errors: freehand cutting directly on the glass. If you’re cutting your own film, always work on a flat, clean table, never on the car.
Leave a 2 to 3 mm overlap for trimming later. Always use a new blade for cutting; a dull blade drags the film and creates jagged edges that lift over time.
Generously spray your baby shampoo solution on both surfaces. Don’t be shy with it; you need enough slip to reposition the film multiple times without it grabbing prematurely.
Place the film on the glass liner side down. Using your soft squeegee, work from the center toward each edge in smooth, overlapping strokes. Rushing this step traps moisture that takes weeks to fully disappear.
Trim with slow, controlled strokes. Swap blades every one to two windows. A fresh blade makes a cleaner cut and reduces the risk of tearing.
Use the Bottom Load Method with your hard card to minimize contamination on the lower edges. Work slowly here; forcing the edge causes micro-tears in the film that become visible lifting points within months.
Re-squeegee any trapped solution toward the nearest edge. Small water bubbles at this stage are normal; they will disappear during the curing process as moisture evaporates through the film.
Important: Do not roll your windows down for at least 3 to 5 days to allow proper curing.
Heat shrinking is the most technically demanding step in DIY window tinting, and skipping it is the #1 reason rear windshield installations fail.
The exterior shrink step is what allows the film to match the compound curve of your rear windshield; without it, no amount of interior squeegeeing will eliminate the wrinkles.
| Film Type | UV Blocking | Heat Rejection | Signal Interference | Expected Lifespan | Relative Cost |
|---|---|---|---|---|---|
| Ceramic Tint | Up to 99.9% UV | High infrared rejection | No interference | 10 to 15 years or more | High |
| Carbon Tint | About 99% UV | Strong infrared blocking | Minimal interference | 6 to 8 years | Mid |
| Dyed Tint | Up to 99% | Low to moderate | None | 3 to 5 years, prone to fading | Low |
For most DIY installers looking for a balance of performance and price, carbon tint is the practical sweet spot.
When selecting window tint for a DIY project, prioritize these factors:
If your vehicle has curved rear glass, complex window shapes, or factory sensors embedded in the glass, make sure your kit is specifically designed for your exact vehicle. Generic kits often require significant trimming that negates their main advantage.
| Factor | DIY Window Tinting | Professional Installation |
|---|---|---|
| Cost | Lower upfront cost ($50 to $200) | Higher cost ($200 to $1,000+) |
| Skill Required | Moderate to high (learning curve) | Handled by trained installers |
| Tools & Setup | You need tools + a dust-free workspace | All equipment provided |
| Risk of Errors | High (bubbles, peeling, misalignment) | Low (experience + precision tools) |
| Film Options | Best with basic or precut films | Works with all films (especially ceramic) |
| Curved Glass Handling | Difficult (requires heat shrinking) | Handled professionally |
| Time Required | 2 to 6 hours (or more for beginners) | 1 to 3 hours typically |
| Durability | Depends on skill level | More consistent long-term results |
| Warranty | Limited or none | Often includes the manufacturer’s warranty |
| Best For | Simple jobs, budget projects | Complex installs, premium results |
DIY makes sense when:
Professional installation is the better choice when:
Window tint laws vary by state, and in some cases by window position on the same vehicle. There is no single national standard in the United States.
If you’re outside the U.S., regulations can differ significantly by country and region, so always verify local laws before installation.
As a general reference:
If you’re in North Carolina, the rules are stricter than in many other states:
For drivers in the Charlotte metro area, enforcement is taken seriously, especially in Mecklenburg County, where tint compliance is commonly checked during routine stops.
Before installing tint:
Pro tip: Keep your film’s certification card or purchase receipt in your glove box. In Charlotte and across NC, this documentation can quickly resolve roadside checks without requiring film removal.
Window tint needs time for the adhesive to fully bond to the glass.
During the window tint curing period, small water bubbles or slight haziness are normal as moisture evaporates through the film’s micro-pores. As the adhesive is still bonding, avoid any interference, such as popping bubbles or re-squeegeeing, as this may cause edge lifting or permanent defects.
Cure time is also heavily influenced by environmental conditions, with warm, dry temperatures (70 to 85°F) accelerating bonding, while cold or high-humidity environments can extend full curing to 30 days or more.
| Mistake | What Goes Wrong | How To Fix It |
|---|---|---|
| Skipping glass prep | Bumps and contamination under the film | Scrape thoroughly with a fresh razor blade |
| Dusty environment | Particles trapped under the film | Work in an enclosed, dampened space |
| Using ammonia cleaners | Adhesive breakdown, bubbling | Use ammonia-free solutions only |
| Rolling windows too soon | Film lifts at the edges | Wait a minimum of three to five days |
| Overheating during the shrink | Film warps, adhesion fails | Short bursts, constant movement |
| Dull cutting blades | Jagged edges that lift over time | Replace blades every one to two windows |
The single biggest predictor of a successful DIY tint job isn’t film quality or technique: it’s environment. A clean, enclosed, dust-free workspace is critical for good results.
Removing old tint, especially film that has bonded for years, requires patience to avoid damaging your glass or defroster lines.
A steamer is significantly safer than a heat gun for defroster-equipped rear windows. It delivers moist heat that softens adhesive without the risk of overheating the defroster grid. Damage to rear defroster lines can be costly to repair, often requiring professional service.
If you don’t have a dust-free workspace, struggle with heat shrinking, or are dealing with curved glass or rear windshields, DIY tinting can quickly become frustrating, especially when working with premium ceramic films. In these cases, professional tint installation offers a cleaner finish, reduces the risk of costly rework, and ensures long-term durability with a precise, warranty-backed result from experienced installers like Sun Stoppers Window Tinting in Charlotte.
No. Laws vary by state and by window position. Always check your local DMV or state transportation authority before purchasing and installing tint.
Initial curing takes 24 to 48 hours, but full adhesive bonding can take up to 30 days, depending on temperature and humidity.
It’s moderately difficult. Using precut kits, working in a clean enclosed space, and starting with flat side windows (rather than the rear windshield) significantly improves your success rate.
Ceramic tint consistently delivers among the highest infrared heat rejection levels, depending on film quality and TSER ratings. Premium options like XPEL PRIME XR PLUS block up to 98% of infrared heat while maintaining excellent clarity.
Precut kits are engineered for specific makes, models, and years; they eliminate most cutting errors. Minor edge adjustments may still be needed depending on your vehicle’s rubber gasket tolerances.
Standard dyed and carbon films pose minimal risk. Metallic tints can interfere with GPS, radio, and cellular signals, and may affect certain sensor systems depending on placement. Ceramic tint is the recommended choice for vehicles with embedded technology.