How to Install Paint Protection Film: DIY Guide & When to Go Pro

How to Install Paint Protection Film: DIY Guide & When to Go Pro

Table of Contents

Key Takeaways

  • PPF (Paint Protection Film) protects against rock chips, UV damage, and stains, with premium films lasting 5 to 10 years when properly installed.
  • DIY PPF installation is possible on flat panels, but complex areas like bumpers, mirrors, and headlights are significantly harder and often require professional skill.
  • Surface preparation is critical – any dirt, scratches, or defects will be permanently sealed under the film if not corrected beforehand.
  • Proper technique matters: using slip and tack solutions, controlled heat applied at a low, consistent temperature, and correct squeegee methods help prevent bubbles, lifting, and distortion.
  • Professional installation offers better durability, finish quality, and warranty protection, and can be more cost-effective than fixing failed DIY attempts.
What Is Paint Protection Film (PPF)?

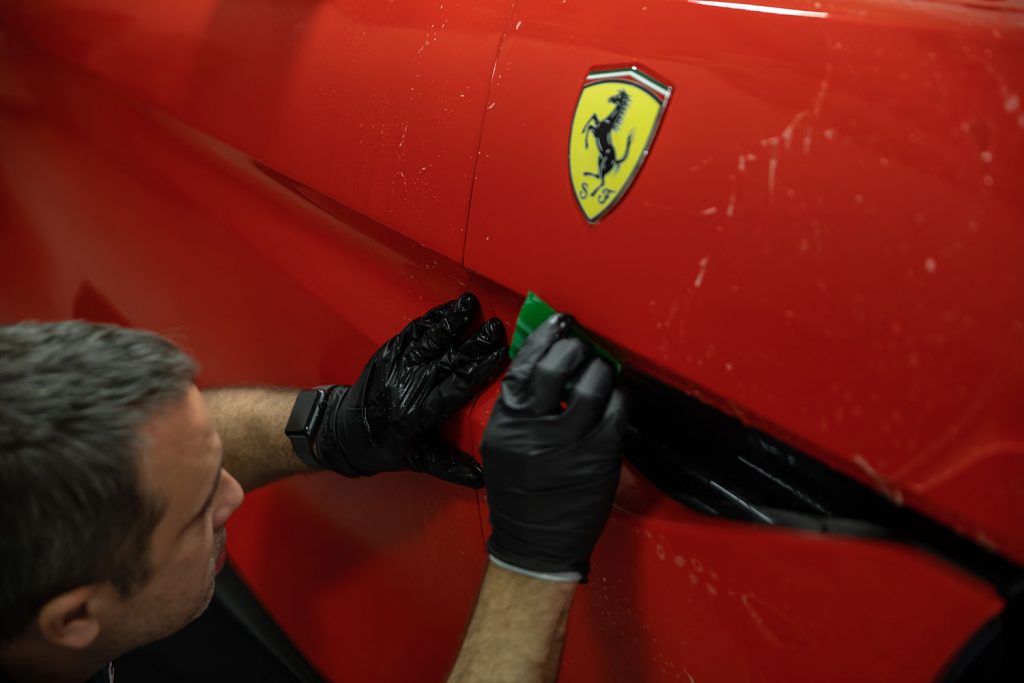
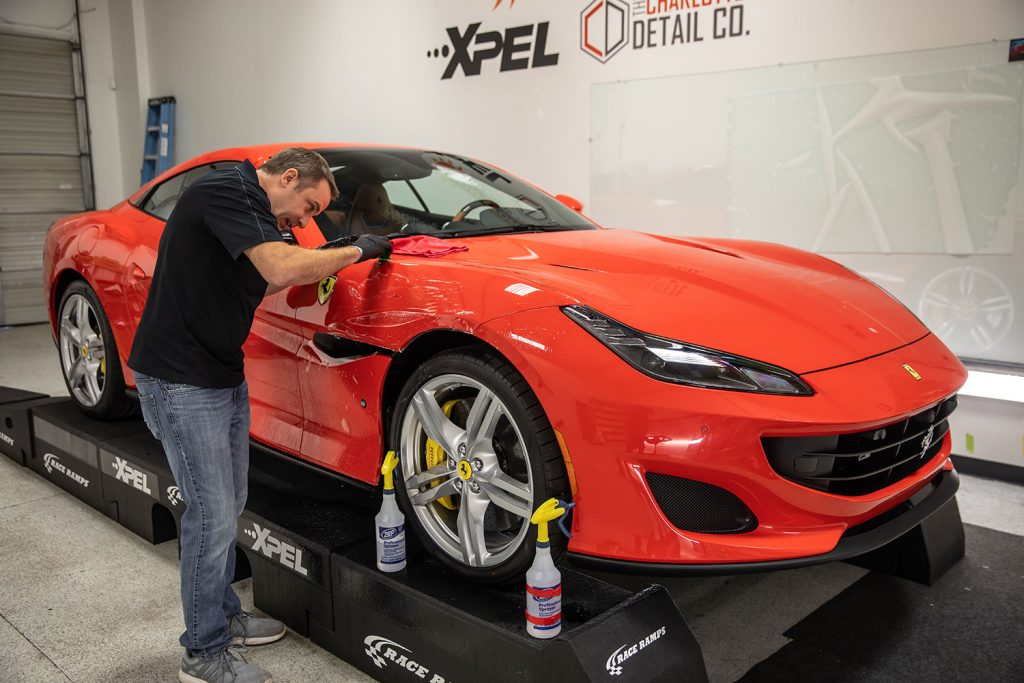
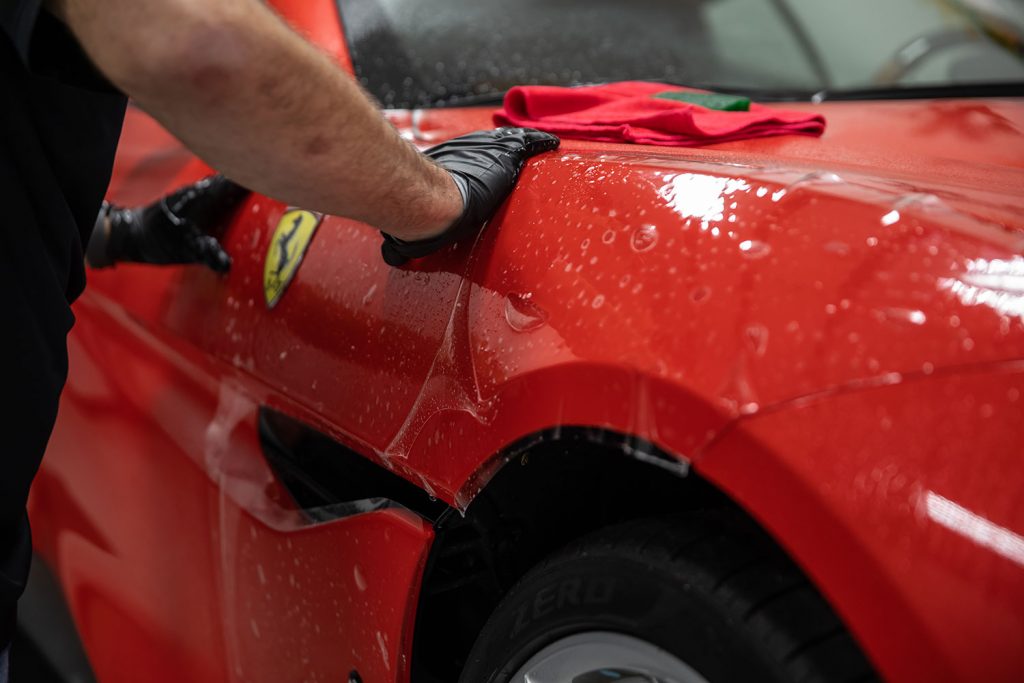
Paint Protection Film, PPF, also known as a clear bra, is a transparent urethane layer applied to your vehicle’s painted surfaces to protect against everyday damage.

It acts as a physical barrier against hazards like rock chips, road debris, bug splatter, stains, and UV exposure. Many premium brands, such as XPEL, offer advanced films with self-healing properties and UV resistance.

With proper installation and maintenance, high-quality PPF can last 5 to 10 years, making it one of the most effective long-term solutions for preserving paint condition and resale value.

Can You Install Paint Protection Film Yourself?

Yes, on the right panels. DIY PPF installation is realistic for flat or low-complexity surfaces. It becomes significantly more difficult on panels with compound curves, tight edges, or integrated components.

DIY-Friendly Panels

  • Hood – large flat surface, good starter panel
  • Fenders – moderate complexity, manageable for beginners
  • Flat door panels – straightforward if properly prepped
  • Trunk lid – similar complexity to hood

Panels Better Left to Professionals

  • Front bumper – compound curves, integrated sensors, camera cutouts
  • Mirrors – multiple angles, small surface area requiring precise relief cuts
  • Headlights – different film material, complex shapes
  • Rocker panels – low position, debris exposure, difficult edge work

Tools and Materials You'll Need

Using the wrong tools is one of the fastest ways to ruin a PPF install. Unlike basic car detailing, PPF installation requires specific tools to control pressure, heat, and alignment precisely.

ToolPurpose
Steel tape measurePrecision measurement before cutting
Squeegee (multiple hardness levels)Removes water and air during application
Heat gun (approx. 225°F / 107°C)Stretches film around curves and seals edges; follow film manufacturer guidance for temperature settings
SteamerSafer than a heat gun for removal and adhesive softening
Air release penFixes trapped air pockets after application
Plastic razor bladeLifts film edges without scratching paint
Microfiber towelsAt least 2 to 3 per panel – lint-free essential
Isopropyl alcohol (IPA)Final surface cleaning and tack solution component
Distilled waterPrevents mineral spots during application
Clay barRemoves embedded surface contaminants
Paint polisherCorrects swirl marks before film application

Do not substitute household cleaning products for IPA or distilled water. Tap water contains minerals that leave deposits under the film. Standard glass cleaners contain ammonia, which degrades PPF adhesive.

Surface Preparation

Surface preparation is where most DIY installs succeed or fail. Professionals allocate as much time to prep as to the installation itself – sometimes more.

Step 1: Two-Stage Wash

Start with a foam pre-soak to loosen surface contaminants, followed by a two-bucket hand wash. Rinse thoroughly with distilled water. Do not use automatic car washes before PPF installation – brushes introduce fine scratches that will be locked under the film.

Step 2: Clay Bar Treatment

Clay bar treatment removes embedded contaminants that washing cannot reach – industrial fallout, tar spots, tree sap residue, and brake dust. Work methodically across the panel until the surface feels completely smooth to the touch. A hood typically takes 10 to 15 minutes of clay bar work to reach the required level of cleanliness.

Step 3: Paint Correction

PPF does not hide existing paint defects; it preserves them permanently under the film. Any swirl marks, light scratches, or oxidation present at the time of installation will be visible under the film for the life of the product. Correct these issues with a machine polisher before installation.

Step 4: Final Wipe Down

Wipe the panel with an IPA and distilled water mix – typically 1 part IPA to 3 parts distilled water – to remove all oils, polish residue, and fingerprints. Allow the panel to fully dry before proceeding.

Slip Solution vs. Tack Solution

Two spray solutions are used at different stages of PPF installation. Understanding when and how to use each is critical.

Slip Solution

Slip solution allows you to reposition the film after it contacts the panel surface. Without it, the adhesive grabs immediately, and repositioning becomes extremely difficult.

  • Mix: 0.5 to 5 ml of baby shampoo per 1 liter of distilled water
  • Start conservative – around 2 ml per liter – and adjust based on how the film responds
  • Apply generously to both the panel surface and the adhesive side of the film before placement

Tack Solution

Tack solution removes the slip and allows the adhesive to begin bonding. It is used to lock edges in place and during the final squeegee pass.

  • Mix: 1 part IPA to 4 parts distilled water
  • Apply lightly to edges after the film is positioned and the water has been squeegeed out
  • Follow manufacturer guidance for specific film products – ratios can vary

Pre-Cut Kits vs. Bulk Film (What Affects Installation Difficulty)

One of the biggest factors that determines how difficult PPF installation will be is the type of film you use – pre-cut kits or bulk film.

OptionBest ForDifficultyNotes
Pre-cut kitsDIY installersLowerPre-shaped for specific vehicles, easier alignment
Bulk filmProfessionalsHighRequires hand cutting, higher risk of mistakes

For beginners, pre-cut kits are strongly recommended. Bulk film is typically used by experienced installers who are comfortable with precision cutting and complex panel shapes.

Installing PPF on Curves, Mirrors, and Headlights

Compound Curves

Use flat palm stretching to encourage the film to conform to compound curves before applying squeegee pressure. Avoid pulling the film aggressively – excessive tension creates thin spots in the film and stress lines that become visible over time.

Mirrors

Mirrors require relief cuts – small cuts into the film that allow it to wrap around angles without bunching. Most mirrors need 2 to 3 small relief cuts to sit properly. Plan cut placement before applying the film – improvised cuts through film that is already bonding are difficult to control.

Headlights

Headlight film is a different material from body panel PPF, typically thinner and optically optimized for lens clarity. Pre-cut kits for headlights are strongly recommended over bulk film for DIY installers.

Step-by-Step PPF Installation Process

Work in a clean, dust-free environment. Garages are preferable to driveways – even a light breeze can carry debris onto a wet panel mid-installation.

1. Final Surface Inspection

Inspect the panel under bright lighting, ideally with a work light held at a low angle. Any remaining contamination, dust, or polish residue should be removed before proceeding.

2. Apply Slip Solution

Spray slip solution generously across the panel surface and on the adhesive side of the film. The surface should be visibly wet.

3. Position the Film

Place the film on the panel and use one hand to maintain control while aligning edges. The slip solution gives you time to adjust.

4. Align from Center Outward

Confirm center alignment first before committing edges. A panel that looks aligned at the edges but is off-center will show gaps or overhang that are difficult to correct without pulling the film.

5. Squeegee Technique

Work from the center outward using overlapping strokes at approximately 70% overlap. Apply firm, consistent pressure to push out water and air. Do not squeegee toward the center; always work toward the edges.

6. Use Heat for Curves

Apply short bursts of heat at a low, consistent temperature to help the film conform to curved areas. Keep the heat gun moving; holding it stationary causes distortion. The film should stretch and conform smoothly; if it resists, apply more heat rather than more force.

7. Apply Tack Solution to Edges

Lightly spray tack solution along the edges and squeegee again. This removes the slip and begins the bonding process at the edges where lifting is most likely to occur.

8. Trim Excess Film

Off-car trimming, cutting the film before application using a template, produces cleaner results than on-car cutting. If on-car cuts are necessary, use a fresh blade and shallow relief cuts rather than straight cuts through curves.

9. Remove Cap Sheet

The cap sheet protects the film surface during handling. Remove it according to the manufacturer’s timing guidance. Some films require immediate cap sheet removal after application, while others benefit from a short wait.

10. Fix Air Pockets

Use an air release pen to penetrate trapped air pockets, then re-squeegee the area. Small pockets that are difficult to reach will often resolve during curing.

11. Curing Period

Keep the vehicle dry for 24 to 72 hours after installation. Avoid rain if possible during this window. Small water bubbles or haze under the film are normal during curing and will disappear as the adhesive fully bonds.

Common DIY Mistakes to Avoid

MistakeConsequence
Insufficient surface cleaningTrapped debris is permanently visible under the film
Too little slip solutionFilm bonds before correct positioning
Overheating with a heat gunFilm distorts and loses optical clarity
Rushing edge sealingEdges lift within weeks of installation
Working in a dusty environmentContamination embedded in the adhesive
Skipping paint correctionSwirl marks and scratches are locked in permanently
Using tap waterMineral deposits visible under film after curing

The most common pattern in failed DIY PPF installs is rushing. The process requires patience at every stage – prep, positioning, squeegeeing, and edge work. Speed consistently produces worse results than methodical technique.

Cure Time and Aftercare

Immediately After Installation

  • Avoid washing for 24 to 72 hours
  • Avoid rain and moisture where possible during the curing window
  • Avoid high-pressure water on edges for the first week

Ongoing Maintenance

  • Wash every 1 to 2 weeks using pH-neutral car shampoo
  • Hand washing is preferred – automatic car washes with brushes can lift edges over time
  • Apply PPF-safe sealant every 6 to 12 months to maintain surface protection
  • Avoid abrasive polishes and ammonia-based cleaners permanently

Troubleshooting: Bubbles, Debris, and Safe Removal

Air Bubbles

Use an air release pen to puncture the bubble, then re-squeegee from the puncture point outward. Small residual bubbles during curing typically resolve on their own within 24 to 48 hours.

Debris Under Film

If debris becomes trapped under the film during installation, lift the nearest edge carefully using a plastic razor blade, remove the particle, and reapply. Act quickly – the longer the adhesive bonds, the more difficult edge lifting becomes.

Safe Removal

Use a steamer to warm the film and soften the adhesive before peeling. Peel at a 45-degree angle, pulling back on itself rather than away from the panel. Do not peel cold film – it tears and leaves adhesive residue that is difficult to remove.

Adhesive Residue

Clean remaining adhesive with IPA or a dedicated adhesive remover. Test any product in an inconspicuous area first – some adhesive removers can affect paint finishes if left on too long.

DIY vs. Professional PPF Installation

FactorDIYProfessional
CostLower upfrontHigher upfront
DifficultyHigh – requires skill and practiceLow – handled by trained installers
Finish qualityInconsistent – risk of bubbles and edge liftingConsistent – smooth, precise finish
Installation time4 to 10+ hours per panel for beginners2 to 6 hours for full coverage
DurabilityLower if installation errors are presentHigher – optimized adhesion
Tools requiredMust purchase all equipmentIncluded in service
Risk of mistakesHigh on curves and edgesLow
WarrantyTypically noneManufacturer and installer warranty
Best forSimple flat panelsFull vehicle, bumpers, mirrors, complex curves

The Real DIY vs. Professional PPF Installation Cost Comparison

DIY PPF appears cheaper at first – but the cost calculation changes when you factor in tool purchases, film waste from mistakes, and the cost of professional removal and reinstallation if the DIY attempt fails. A botched installation on a bumper can cost as much as a professional installation to repair.

For panels where DIY is realistic – hoods, flat door panels – the cost savings are genuine. For complex areas, the risk-adjusted cost of DIY is typically higher than professional installation.

When to Hire a Professional Installer

Professional installation is the right choice in these situations:

  • Front bumper coverage – compound curves, integrated sensors, and camera cutouts require precise pattern cutting and experienced technique
  • Mirror and headlight coverage – small surface areas with complex angles that require controlled relief cuts
  • Full vehicle wrap – the cumulative complexity and time investment make professional installation significantly more cost-effective
  • Recently repainted panels – professional installers understand how to assess paint cure status and apply film without risk
  • Warranty requirements – professional installation by an authorized XPEL installer is required for the manufacturer’s warranty to be valid

An authorized installer uses XPEL DAP software to generate precise cutting patterns for your exact vehicle – eliminating the alignment guesswork and waste that makes DIY film cutting so difficult.

Book Your PPF Installation in Charlotte

If you’ve followed this guide, you already know that PPF installation comes down to precision – not just tools. DIY works on simple panels, but bumpers, mirrors, and full front coverage require experience and controlled conditions to get right the first time. That’s where professional installation makes the difference, not just in appearance, but in durability, edge adhesion, and long-term performance.

Sun Stoppers Window Tinting in Charlotte provides professional XPEL paint protection film installation for vehicles across Charlotte, Ballantyne, SouthPark, Matthews, and Mint Hill. Every installation uses precision-cut XPEL patterns for a clean, accurate fit on your specific vehicle – and working with an authorized installer ensures proper application and full manufacturer warranty coverage.

Get your free quote today and have your PPF installed right the first time.

FAQs

For flat panels like hoods and door panels, DIY installation can save meaningful money if you have the patience for proper prep and technique. For complex areas, such as bumpers, mirrors, and headlights, the difficulty level and risk of mistakes make professional installation more cost-effective for most drivers.

Surface preparation and edge work are where most DIY installs fail. Prep takes longer than most beginners expect, and edges are the first place lifting occurs if tack solution and squeegee technique are not executed correctly.

A hood installation takes 2 to 4 hours for a beginner with proper prep. A full vehicle DIY wrap can take multiple days spread across a weekend. Professional installers complete full coverage in 2 to 6 hours, depending on vehicle complexity.

DIY PPF installations typically carry no warranty. Manufacturer warranties on XPEL film require installation by an authorized XPEL installer. If the installation fails due to improper technique, the cost of removal and reinstallation falls entirely on the vehicle owner.

The film will preserve those defects permanently. PPF locks in the paint condition at the time of installation – it does not hide or correct existing paint damage. Correct all paint defects before applying film.

It is possible, but not recommended. Outdoor environments introduce airborne dust, pollen, and debris that contaminate the adhesive during application. A clean garage with closed doors is the minimum recommended environment for quality results.

Wait 24 to 72 hours before washing. Avoid high-pressure water directly on edges for the first week. Use pH-neutral car shampoo and hand washing during the first month to allow full adhesive curing.

PPF is a thick physical film that protects against rock chips, road debris, and UV damage. Ceramic coating is a thin chemical layer that enhances gloss and water repellency but provides minimal physical protection. Many drivers apply ceramic coating over PPF to combine both benefits.
Can You Clay Bar Paint Protection Film? Safe Methods and Risks

Can You Clay Bar Paint Protection Film? Safe Methods and Risks

If you’re asking, can you clay bar paint protection film (PPF) without damaging it? The answer is yes, when it’s done correctly. PPF can be safely treated with fine-grade clay, heavy lubrication, and light pressure. However, improper technique, especially dry claying or using aggressive clay, can permanently damage the self-healing topcoat, cause surface marring, and in some cases void manufacturer warranties.

This guide breaks down when clay barring is actually necessary, which tools and lubricants are safe, and how to perform the process step-by-step without risking damage. It also covers long-term maintenance best practices based on manufacturer-recommended care.

Table of Contents

Key Takeaways

  • Yes, you can clay bar PPF safely using ultra-fine clay, heavy lubrication, and light pressure; improper technique can cause permanent damage.
  • Always start with chemical decontamination; iron remover first, then tar remover, before any clay contact to reduce friction and risk.
  • Use the plastic bag test to confirm contamination; skip claying if the surface feels smooth.
  • Avoid common risks like dry claying, aggressive clay, or working near edges, which can cause marring, edge lifting, or topcoat damage.
  • Clay only when necessary; overuse can degrade the self-healing layer and ceramic coatings, reducing long-term PPF performance.

What Is Paint Protection Film (PPF)?

Paint Protection Film, PPF, also called Clear Bra, is a thermoplastic urethane (TPU) protective layer applied to vehicle paint surfaces. It protects against rock chips and road debris, scratches and swirl marks, UV degradation, and environmental fallout.

Most modern PPF includes a proprietary self-healing topcoat layer that uses ambient or applied heat to repair light surface scratches automatically. This topcoat is the most vulnerable layer during any mechanical decontamination process, including clay barring.

Despite this protection, PPF still accumulates bonded surface contaminants that cannot be removed by washing alone:

  • Industrial fallout (ferrous iron particles)
  • Tar and bitumen road grime
  • Tree sap and organic residue
  • Overspray from paint or construction

Understanding the film’s layer structure helps explain why technique matters so much during clay barring. For a full breakdown of how PPF protects against UV damage and environmental exposure, see our PPF UV protection guide.

Should You Clay Bar PPF or Use Alternatives First?

Clay barring should never be your first decontamination step on PPF. Chemical decontamination reduces surface friction before any mechanical contact, which directly lowers the risk of marring or topcoat damage.

Recommended Decontamination Hierarchy

StepMethodRisk To PPF
1Iron removerNone – zero mechanical friction
2Tar removerNone – chemical only
3Clay barLow – when done correctly

This sequence is not optional. Skipping chemical pre-treatment and going straight to clay is the most common cause of PPF surface damage.

When Should You Clay Bar PPF?

Clay bar PPF only when chemical decontamination has been completed, and contamination remains.

The Plastic Bag Test

Use the plastic bag test to confirm whether claying is necessary before any mechanical contact:

  1. Place a clean plastic bag over your hand
  2. Glide your fingers across the clean, dry PPF surface
  3. Rough, gritty, or catching sensation: claying is required
  4. Smooth and slick sensation: claying is unnecessary and should be skipped

Do Not Clay PPF If:

  • The surface passes the bag test (feels smooth)
  • The film was recently installed (within 30 days)
  • You can see edge lifting, bubbling, or film damage
  • Chemical decontamination fully resolved the contamination

What Clay Grade and Tools Are Safe for PPF?

PPF is generally softer and more sensitive to abrasion than automotive clear coat, which means standard or medium-grade clay will cause marring even with proper lubrication.

Safe Clay Products and Tools

ToolNotes
Fine-grade clay barXPEL-compatible formulations recommended
Ultra-fine clay barBest option for self-healing PPF
Clay mittPreferred over bars, lower drop-and-contaminate risk
Soft clay cardUseful for working near panel edges with precision

Products and Tools to Avoid

  • Medium-grade or heavy-duty clay bars will mar the self-healing topcoat
  • Aggressive clay towels with coarse texture
  • Any tool requiring significant hand pressure to function

Use the lightest possible hand pressure throughout the process. The clay lubricant does the work, not pressure.

What Lubricants Are Safe for PPF?

Insufficient lubrication is the primary cause of clay-induced marring on PPF. The lubricant layer must be thick enough to allow the clay to glide without dragging.

Recommended Lubricants

  • XPEL Detail Spray is manufacturer-approved and formulated specifically for PPF surfaces
  • pH-neutral car shampoo diluted in water (high-suds ratio)
  • Dedicated clay lubricant sprays (PPF-safe formulation confirmed)

Supporting Chemical Products for Full Decontamination

ProductPurpose
Iron removerApplied before claying to eliminate ferrous contamination
Tar remover (such as XPEL Tar-X)Spot treatment for adhesive contamination
Isopropyl alcohol (IPA)Post-clay residue removal before inspection or coating

Always test any new product on a small, non-visible section of film before full application.

How to Clay Bar PPF without Damaging It

Follow this exact sequence to minimize the risk of film damage. Work in a clean, shaded environment; direct sun causes the lubricant to evaporate too quickly.

Step 1: Wash the Vehicle

Use a pH-neutral shampoo and perform a thorough two-bucket wash to remove all loose surface contamination. Do not proceed to clay on a dirty surface.

Step 2: Apply Chemical Decontamination

Apply iron remover across all PPF surfaces. Allow full dwell time and watch for the color-change reaction indicating ferrous particle dissolution. Rinse thoroughly. Follow with tar remover on any adhesive spots and rinse again.

Step 3: Perform the Bag Test

After the surface is fully dry, perform the plastic bag test on every panel section, not just areas that appear visibly contaminated. Only proceed with clay on sections that fail the test.

Step 4: Lubricate Heavily

Spray a generous amount of lubricant across a small working section (approximately 2 square feet). The surface should appear wet and slick before the clay makes contact. Never clay a dry or lightly-misted surface.

Step 5: Clay with Light Pressure

  • Use fine or ultra-fine clay only
  • Apply minimal hand pressure; let the clay glide
  • Work in 10 to 15 short, straight passes (avoid circular motion)
  • Straight-line passes reduce the visual impact of any micro-marring

Step 6: Avoid Film Edges

Maintain at least 0.3 to 0.5 inches of clearance from all film edges. Clay pressure near edges can cause lifting, especially on older or thermally stressed installations.

Step 7: Maintain the Clay

Fold or knead the clay after each panel section to expose a clean working surface. If the clay is dropped, discard it immediately. A single drop introduces abrasive particles that will scratch the film.

Step 8: Wipe, Inspect, and Deactivate

Use a clean, high-GSM microfiber towel to wipe the section. Follow with an IPA wipe to remove any clay lubricant residue before applying coatings or sealants.

Real-World Example: Heavy Overspray on a Front Bumper

  1. Apply tar remover and allow full dwell time
  2. Apply iron remover and allow full dwell time
  3. Rinse thoroughly and dry
  4. Perform bag test; confirm claying is needed
  5. Apply a PPF-safe detail spray (such as XPEL Detail Spray) generously
  6. Clay with an ultra-fine bar, light pressure, straight passes
  7. Wipe clean and finish with IPA wipe

Can Claying Damage PPF?

Yes. The damage can be permanent if the self-healing topcoat is compromised beyond recovery.

RiskCauseResult
Surface marringAggressive clay gradeVisible haze or scratch pattern
Micro-scratchingInsufficient lubricationReduced gloss, swirl marks
Edge liftingClaying too close to the edgesFilm adhesion failure
Topcoat degradationExcessive passes or pressureReduced self-healing capability

Mechanical friction is the root cause of all clay-related PPF damage. Every decision in the process, clay grade, lubricant volume, pressure, and pass count, controls friction.

Can Claying Damage Ceramic Coating on PPF?

Yes. If your PPF has a ceramic coating applied over it, clay barring can thin or partially remove that coating layer.

Clay creates microscopic abrasion across the surface, repeated passes reduce ceramic coating thickness, and hydrophobic performance and water-beading degrade measurably over time.

Recommended Approach for Ceramic-Coated PPF

  • Prioritize chemical decontamination; iron and tar removers are coating-safe
  • Clay only when necessary, confirmed by bag test
  • Use ultra-fine clay with maximum lubrication and minimum passes
  • Re-inspect coating performance after claying and reapply if degraded

How Often Should You Clay Bar PPF?

Inspect your PPF every 6 to 12 months using the bag test, but only clay when the test confirms it is needed. The frequency of actual claying varies significantly by environment.

EnvironmentRecommended InspectionLikely Clay Frequency
Urban daily driverEvery 6 months1 to 2 times per year
Highway/interstate drivingEvery 4 to 6 months2 times per year
Near construction zonesEvery 3 months2 to 3 times per year
Charlotte, NC (high pollen and construction)Every 3 to 4 months2 times per year minimum

Never clay on a fixed schedule without performing the bag test first. Unnecessary claying accelerates topcoat wear without providing any protective benefit.

What Does XPEL Recommend for PPF Maintenance?

XPEL’s recommended maintenance process requires a fully decontaminated, contaminant-free surface before film installation or major maintenance procedures.

XPEL-Aligned Prep Sequence

  1. pH-neutral wash
  2. Chemical decontamination (iron remover, then tar remover)
  3. Clay bar (fine grade, approved lubricants only)
  4. IPA wipe
  5. Surface inspection under lighting
  6. Film application or coating reapplication

Using XPEL Detail Spray as a clay lubricant ensures compatibility with XPEL film chemistry and does not risk topcoat interaction issues.

When Should You NOT Clay Bar PPF?

Skipping clay when unnecessary is the correct decision. Avoid claying when:

  • The bag test confirms a smooth surface
  • The film was installed within the past 30 days
  • Film edges show any signs of lifting or separation
  • Chemical decontamination fully resolved the contamination
  • A ceramic coating is present and performing correctly

Every unnecessary clay session removes a small amount of topcoat and coating integrity. The goal is minimum effective treatment – not maximum effort.

Book Professional PPF Maintenance in Charlotte

If you’re unsure whether your PPF needs claying, professional maintenance helps eliminate the risk of damage.

Sun Stoppers Window Tinting in Charlotte performs manufacturer-aligned decontamination (including XPEL systems) and clay bar maintenance for vehicles across Charlotte, Ballantyne, SouthPark, Matthews, and Mint Hill. Every service includes full chemical pre-treatment before any mechanical contact, fine-grade clay with approved lubricants only, edge-safe technique on all panel sections, and post-clay IPA wipe with coating inspection.

Request your quote today and protect your PPF the right way.

FAQs

Yes. Clear Bra is PPF, and clay barring is safe when performed with fine-grade clay, heavy lubrication, light pressure, and chemical pre-treatment completed first.

Yes, but only with ultra-fine clay and proper technique. Aggressive claying can reduce the self-healing layer’s ability to recover from scratches, which is why fine or ultra-fine clay and heavy lubrication are non-negotiable.

Chemical decontamination – iron remover followed by tar remover – is always the safest first step. Clay barring is only used when bonded contamination remains after chemical treatment has been completed, and the bag test confirms it is needed.

Wait at least 30 days after installation before performing any clay bar treatment. Fresh PPF adhesive needs time to fully cure, and mechanical decontamination during this window risks edge lifting and adhesion failure.

Yes. Clay mitts are actually preferred over traditional clay bars for PPF because they are less likely to be dropped and contaminated during use. Use ultra-fine grade mitts only and apply the same heavy lubrication and light pressure technique.

Claying without sufficient lubrication will immediately mar the self-healing topcoat. The clay drags across the surface instead of gliding, creating micro-scratches that may not be repairable by the self-healing layer. If this occurs, stop immediately, flush the surface with lubricant, and assess the damage before continuing.

Yes, but only with PPF-compatible polish products and minimal correction passes. Confirm polish compatibility with your film manufacturer before use. Over-polishing can thin the self-healing topcoat.

It depends on the manufacturer. Some PPF warranties specify approved maintenance procedures. Always verify with your installer or manufacturer before performing mechanical decontamination. Sun Stoppers can advise on XPEL warranty requirements before any maintenance work begins.

How Much Does PPF Cost? Pricing Guide

How Much Does PPF Cost? Pricing Guide

Keeping your vehicle’s paint in top condition takes more than regular washing, especially with daily exposure to road debris, scratches, and environmental damage. That’s why many drivers turn to paint protection film (PPF) as a long-term solution. But before getting started, it’s important to understand how much does PPF costs and what you’re actually paying for.

In this guide, Sun Stoppers Window Tinting in Charlotte breaks down PPF pricing, typical cost ranges by coverage level, and the key factors that affect the final price, so you can choose the right level of protection for your vehicle and budget.

Table of Contents

Key Takeaways

  • PPF typically costs between $500 and $8,000+, depending on coverage level and vehicle type
  • Partial coverage is the most cost-effective starting point for everyday protection
  • Full-body PPF delivers maximum protection, but at a higher investment
  • Film quality, installer expertise, and vehicle condition all affect the final price
  • For most Charlotte drivers, front-end PPF on daily highway vehicles offers strong value
  • Pairing PPF with ceramic coating is optional, but it improves long-term surface maintenance

What Is Paint Protection Film (PPF)?

Paint Protection Film is a transparent, impact-resistant layer applied to your vehicle’s exterior surfaces. It helps protect against rock chips, scratches, road debris, and environmental damage, keeping your paint in excellent condition.

Most modern PPF products also feature self-healing technology, allowing light scratches to disappear when exposed to heat. Premium films like XPEL ULTIMATE PLUS include UV inhibitors that block 90% to 99% of UV radiation, preventing paint fading and oxidation in addition to physical protection.

How Much Does Paint Protection Film Cost?

The cost of PPF varies significantly depending on coverage, vehicle type, and installer quality. Here’s what most drivers can expect:

Coverage TypeWhat’s IncludedEstimated Cost
Partial FrontBumper, partial hood, mirrors$500 to $2,000
Full FrontBumper, full hood, fenders, mirrors$1,500 to $3,500
Track PackageHood, fenders, front bumper, mirrors, rocker panels, A-pillars$2,000 to $4,500
Full Vehicle WrapEntire vehicle$5,000 to $8,000+

Luxury or complex vehicles that are common in the Charlotte area, such as Tesla, BMW, and Porsche, often fall on the higher end due to intricate panel shapes and increased labor time.

What Affects Paint Protection Film Cost?

Not all PPF installations are priced the same. Here are the biggest factors that affect what you’ll pay:

Vehicle Size and Shape

Larger vehicles require more material and time. Vehicles with sharp curves or complex body lines increase installation difficulty.

Film Type and Brand

Premium films offer better clarity, durability, and self-healing properties, which increase cost.

Installer Experience

Experienced installers charge more but ensure a clean, bubble-free finish and long-lasting results.

Location of the Shop

Labor rates vary depending on the area and market demand.

Vehicle Paint Condition

Paint correction may be required before installation, adding to the total cost.

Installation Complexity

Custom wrapping, tight edges, and detailed panels require more time and precision.

PPF vs. Ceramic Coating: Which Is Better?

PPF and ceramic coating are often compared, but they serve different primary functions.

FeaturePaint Protection Film (PPF)Ceramic Coating
Main PurposePhysical protectionSurface enhancement
Protection TypeChips, scratches, road debrisWater, dirt, and chemical stains
Impact ResistanceYesNo
AppearanceMaintains original lookEnhances gloss and shine
Self-HealingYes (on most premium films)No
MaintenanceEasyVery easy
Durability5 to 10 years2 to 5 years

PPF is the better choice if your priority is protecting your paint from physical damage, especially from rock chips and scratches. Ceramic coating, on the other hand, is ideal for enhancing appearance and making maintenance easier.

For the best results, many Charlotte drivers combine both: PPF as the protection layer, with ceramic coating applied on top.

Can I Apply Ceramic Coating Over Paint Protection Film?

Yes. Applying ceramic coating over PPF is a common approach that provides additional benefits without compromising the film.

  • Enhanced gloss and optical depth
  • Improved water repellency and hydrophobic performance
  • Easier cleaning, contaminants release more easily from the coated surface
  • Additional protection against chemical stains and environmental fallout

Is Paint Protection Film Worth the Cost?

PPF is not necessary for every vehicle, but it provides strong value in the right situations.

SituationWorth It?
New or high-value vehicleYes, strong case for front-end or full coverage
Daily highway driving in Charlotte (I-77, I-485)Yes, high debris exposure justifies investment
Long-term ownership (5 years or more)Yes, the cost of PPF is typically lower than one repaint
Older vehicle or short-term ownershipLess likely, ROI is less clear
Low-usage or garaged vehicleOptional

For most Charlotte drivers, front-end PPF can help offset repaint costs over time by reducing damage from road debris and UV exposure. A bumper repaint typically costs $500 to $1,500, which is comparable to partial PPF coverage that helps prevent much of that damage.

Choosing the Right PPF for Your Budget

Choosing the right coverage level depends on your driving habits, vehicle value, and how long you plan to keep the car.

Budget LevelRecommended CoverageBest For
Entry level ($500 to $2,000)Partial front: bumper, partial hood, mirrorsBasic protection for everyday driving
Mid-range ($1,500 to $3,500)Full front: bumper, full hood, fenders, mirrorsDaily highway drivers, high-debris exposure
Full investment ($5,000 to $8,000+)Full vehicle wrapNew vehicles, luxury cars, and long-term ownership

Regardless of coverage level, always prioritize installation quality over price. A poorly installed premium film will fail faster than a correctly installed entry-level film. Professional installation by an authorized XPEL installer ensures correct adhesion, clean edges, and a valid manufacturer’s warranty.

Book Your PPF Installation near You Today

If you want a flawless finish without the risks of DIY, professional installation is the best choice. Sun Stoppers Window Tinting in Charlotte offers expert Paint Protection Film services, using premium materials and proven techniques to deliver long-lasting protection.

Contact us today to schedule your Paint Protection Film in Charlotte, NC, and give your vehicle the protection it deserves.

FAQs

High-quality PPF typically lasts 5 to 10 years with proper care. XPEL ULTIMATE PLUS carries a manufacturer’s warranty that covers defects, including yellowing, cracking, peeling, hazing, and staining.

They serve different purposes. PPF protects against physical damage: rock chips, scratches, and road debris. Ceramic coating enhances gloss and makes cleaning easier, but provides no physical protection. For maximum results, both are often applied together.

Yes. PPF protects headlights from scratches, oxidation, and road debris. Headlight film is a different material from body panel PPF, typically thinner and optically optimized for lens clarity. Pre-cut kits are the recommended approach for headlight installation.

Yes. PPF absorbs impact energy before it reaches the paint, preventing chips and reducing scratch depth on covered panels. The TPU core layer spreads force across the film rather than allowing it to penetrate the clear coat.

The cost comes from high-quality materials, skilled labor, and precise installation, all of which ensure long-term performance and protection.

Luxury and complex vehicles typically fall on the higher end of each pricing tier due to intricate panel shapes, camera cutouts, and tighter trim lines that require more precise cutting and longer installation time. A full front package on a Tesla Model 3 or BMW 5 Series in Charlotte typically runs toward the upper range of the full-front pricing tier. Contact Sun Stoppers for a vehicle-specific written quote.

What Is Ceramic Coating? Benefits, Cost & How It Protects Your Car

What Is Ceramic Coating? Benefits, Cost & How It Protects Your Car

Table of Contents

Key Takeaways

  • Ceramic coating is a liquid polymer that chemically bonds with your car’s clear coat
  • Provides 2 to 10 years of protection, depending on product grade
  • The hydrophobic surface effect creates contact angles above 110°, causing water to bead and roll off
  • Coating thickness adds a measurable protective layer above the clear coat
  • Does not prevent rock chips or deep scratches

What Is Ceramic Coating?

Ceramic coating is a nano-scale liquid polymer composed primarily of silicon dioxide (SiO₂), sometimes enhanced with titanium dioxide (TiO₂), that chemically bonds with the automotive clear coat to form a semi-permanent protective layer.

Once cured, it resists UV radiation, environmental chemicals, and bonded surface contaminants for 2 to 10 years, depending on product grade, SiO₂ concentration, and maintenance.

Unlike wax or paint sealants, which sit on top of the surface, the coating forms a cross-linked molecular structure that integrates with the clear coat itself.

The core chemistry:

  • SiO₂ creates a cross-linked silica network
  • Hardness reaches up to 9H on the pencil scale
  • Thickness ranges from 2 to 5 microns
  • Hydrophobic behavior produces contact angles >110°

How Does Ceramic Coating Work?

Ceramic coating bonds chemically with the clear coat by forming covalent and hydrogen bonds at the microscopic level, creating a rigid, cross-linked structure that seals surface pores.

After curing (24 to 48 hours initial cure, up to 7 days full cure), the coating:

  • Repels water through hydrophobic behavior, forcing water into beads rather than sheets
  • Reduces surface energy, making contaminants less likely to stick
  • Creates a chemical barrier against acids, bird droppings, and fallout
  • Reflects UV radiation, slowing oxidation and fading

What Are the Benefits of Ceramic Coating?

Ceramic coating provides several key advantages for protecting and maintaining your vehicle’s paint:

UV Protection and Oxidation Resistance

Charlotte averages approximately 213 sunny days per year, significantly above the national average. Prolonged UV exposure breaks down paint pigment and oxidizes clear coat, causing the chalky, faded appearance common on older vehicles. Ceramic coating reflects UV radiation at the surface, preserving color depth and preventing oxidation from developing beneath.

Protection From Environmental Contaminants

Bird droppings, tree sap, industrial fallout, and road residue are all chemically active; they etch into unprotected clear coat within hours at high temperatures. The ceramic layer acts as a sacrificial chemical barrier, absorbing that etching damage rather than allowing it to reach the paint.

Hydrophobic Surface Effect

Water, and the contaminants it carries, beads and rolls off a ceramic-coated surface rather than sitting on it. This reduces water spotting, mineral deposit buildup, and the bonded contamination that requires mechanical removal (clay bar) during decontamination.

Long-Lasting Gloss and Depth

Ceramic coating fills micro-surface irregularities and creates a uniform reflective layer. The result is enhanced light reflection and a deeper, more consistent gloss that maintains its appearance for years rather than weeks.

Reduced Long-Term Maintenance Cost

When factored over a 3 to 5 year period, ceramic coating typically costs less in total maintenance than repeated wax applications, paint correction sessions required to address contamination damage, and time spent on manual washing. This makes it a cost-efficient choice for daily drivers.

What Ceramic Coating Does Not Do

Understanding the limitations of ceramic coating is as important as understanding its benefits. Misaligned expectations are the primary source of customer dissatisfaction after coating application.

It Does Not Eliminate Maintenance

Ceramic coating significantly reduces washing frequency and effort, but it does not make your car self-cleaning. Bonded contamination, tar, iron fallout, and industrial overspray still accumulate and require periodic decontamination. Using incorrect washing methods, abrasive tools, or alkaline detergents will degrade the coating chemistry and shorten its lifespan.

It Does Not Prevent Scratches or Rock Chips

This is the most important limitation to understand. Ceramic coating adds surface hardness and minor scratch resistance, but it is not a physical impact barrier. It will not stop damage from:

  • Rock chips and road debris
  • Keying or abrasion from contact
  • Deep scratches from brushes or abrasive wash equipment

For impact and abrasion protection, Paint Protection Film (PPF) is the correct solution. Many vehicle owners apply PPF to high-impact areas (hood, front bumper, mirrors) and ceramic coating over the full vehicle for a combined protection system.

It Does Not Correct Existing Paint Defects

Ceramic coating locks in whatever surface condition exists at the time of application. Swirl marks, light scratches, water spot etching, and oxidation must be corrected through paint polishing or paint correction before the coating is applied. Coating over defects seals them permanently.

How Long Does Ceramic Coating Last?

Most professional-grade ceramic coatings last between 2 and 5 years under real-world conditions. Consumer-grade coatings sold as DIY products typically last 1 to 2 years under the same conditions.

General durability ranges by product tier:

Product TierTypical LifespanApplication
Consumer / DIY1 to 2 yearsSelf-applied
Professional entry-level2 to 3 yearsShop-applied
Professional mid-grade3 to 5 yearsShop-applied with paint correction
Professional top-grade5+ yearsMulti-layer, full paint correction required

In real-world conditions around Charlotte, daily drivers exposed to outdoor parking, seasonal pollen, and high UV load typically see coatings perform at 3 to 4 years with proper maintenance washing.

Professional installation makes a measurable difference in longevity because proper paint correction and surface decontamination before application are critical for the coating to bond correctly and uniformly.

What Affects Ceramic Coating Durability?

Several factors determine whether your coating reaches the lower or upper end of its rated lifespan:

  • Surface preparation quality: The single most important factor; contamination or defects left on the surface prevent full chemical bonding
  • Application conditions: Temperature, humidity, and dust levels during curing affect cross-link formation
  • Product grade: Professional coatings use a higher SiO₂ concentration and multi-layer systems
  • Maintenance washing method: pH-neutral soap, hand wash technique, and microfiber drying preserve coating integrity
  • Environmental exposure: Vehicles parked indoors last significantly longer than outdoor daily drivers
  • Driving conditions: Highway exposure to road debris and industrial fallout accelerates surface degradation

Ceramic Coating vs. Wax vs. PPF

FeatureCeramic CoatingCar WaxPPF
Protection TypeChemical bondSurface layerPhysical film
Durability2 to 5 years1 to 3 months5 to 10 years
Main PurposeUV & contaminant protectionShort-term shineImpact protection
Water RepellencyStrongModerateModerate
Scratch ResistanceLightMinimalHigh
Rock Chip ProtectionNoneNoneYes
Self-HealingNoNoYes (modern PPF)
MaintenanceLowHighModerate
Cost RangeMidLowHigh

The most effective protection system combines both: PPF on high-impact zones (hood leading edge, front bumper, mirrors, door edges) and ceramic coating applied over the full vehicle, including over the PPF, for hydrophobic performance and UV resistance across all surfaces.

Common Mistakes That Shorten Ceramic Coating Lifespan

The coating begins to degrade the moment these mistakes occur:

  • Washing within the cure window: Washing before full cure (typically 7 days) prevents complete cross-link bonding and dramatically shortens lifespan
  • Using automatic car washes with rotating brushes: Abrasive brush contact removes coating faster than any environmental factor
  • Skipping regular maintenance washes: Allowing contamination to sit on the coating allows chemical etching to penetrate the layer over time
  • Using alkaline or high-pH detergents: Breaks down the silica network chemistry; always use pH-neutral soap on coated vehicles
  • Applying wax or sealant over ceramic coating: Wax cannot bond to a ceramic surface and will cause streaking; it does not add protection
  • Skipping annual inspection: Professional inspection every 12 months allows early detection of coating degradation before paint damage occurs underneath

Who Should Consider Ceramic Coating?

Ceramic coating is the right investment for:

  • Daily drivers are exposed to sustained sun, road contamination, and outdoor parking
  • Vehicle owners who want to reduce washing time without sacrificing surface condition
  • Anyone planning to keep their vehicle 3+ years, the cost-per-year calculation favors coating over repeated wax applications
  • Owners of vehicles with existing paint correction, coating locks in the results of a polishing session
  • PPF owners, ceramic coating over PPF adds hydrophobic performance and UV resistance to the film surface

Ceramic coating is less suitable for:

  • Vehicles with significant paint damage that require respray; coating cannot substitute for paint repair
  • Owners unwilling to follow correct maintenance washing; improper care will degrade the coating faster than wax

Professional Ceramic Coating Process

  1. Wash & Decontaminate: Remove dirt, iron particles, and bonded contaminants
  2. Paint Inspection: Identify swirl marks, scratches, and defects
  3. Paint Correction: Polish the surface to restore clarity and remove imperfections
  4. Panel Wipe: Eliminate oils and residues for proper bonding
  5. Coating Application: Apply the ceramic coating evenly by panel
  6. Leveling & Buffing: Remove excess product for a uniform finish
  7. Curing: Allow 24 to 48 hours initial cure (up to 7 days full cure)

How to Maintain Ceramic Coating

Correct maintenance is what separates a 2-year coating from a 5-year coating:

  1. Wait the full cure period (typically 7 days) before the first wash
  2. Wash every 2 to 4 weeks using pH-neutral car shampoo and a clean microfiber wash mitt
  3. Use the two-bucket wash method: one bucket for soapy water, one for rinsing the mitt
  4. Dry with a clean microfiber towel or forced air; never allow water to air dry on the surface
  5. Apply a ceramic-compatible booster spray every 3 to 6 months to maintain hydrophobic performance
  6. Schedule a professional inspection annually to assess coating thickness and condition

Book Ceramic Coating in Charlotte, NC

If you want long-term protection, consistent shine, and less time spent cleaning your car, ceramic coating is one of the best upgrades you can make.

At Sun Stoppers Window Tinting in Charlotte, every coating service includes proper surface preparation, paint correction if needed, and precise application to ensure maximum durability.

Contact us today to schedule your ceramic coating in Charlotte, NC, and give your vehicle the protection it deserves.

FAQs

Pricing depends on vehicle size, paint condition, and the level of preparation required before application. Entry-level professional coatings start lower; multi-layer systems on larger vehicles reach the higher end.

Yes, for most vehicle owners who park outdoors, drive daily, and plan to keep their car for 3+ years. The combination of reduced maintenance effort, preserved paint condition, and long-term gloss retention makes the cost-per-year calculation favorable compared to repeated waxing and paint correction.

You should avoid washing for at least 7 days after application to allow full curing. After that, hand washing with pH-neutral soap is recommended. Touchless car washes are acceptable. Brush-based automatic washes should be avoided entirely.

Yes. Once ceramic coating is applied and cured, waxing is unnecessary and counterproductive. Wax cannot bond to a ceramic surface and will cause smearing rather than adding protection.

Professional installation typically takes one to two days, depending on vehicle size, paint condition, and whether paint correction is required beforehand. Vehicles with significant swirl marks or contamination requiring full correction may take longer.

Yes, and this is one of the most effective combined protection strategies available. Ceramic coating applied over PPF adds hydrophobic performance, UV resistance, and gloss enhancement to the film surface, while the PPF handles physical impact protection underneath.

Common signs include water no longer beading on the surface, increased difficulty removing contamination during washing, visible dullness compared to the original finish, and surface texture that feels rougher on the bag test. Annual professional inspection allows early detection of coating degradation before it reaches the paint layer.

Does Paint Protection Film Protect Against UV Damage?

Does Paint Protection Film Protect Against UV Damage?

If you’re wondering, “does paint protection film protect against the sun?“, the short answer is yes. PPF blocks 90% to 99% of UVA and UVB radiation, the primary cause of paint fading, oxidation, and clear coat degradation. It works by acting as a transparent sacrificial layer over your factory paint, absorbing UV rays before they reach the surface beneath. In high-UV environments like Charlotte, that protection can significantly extend the life of your paint.

This guide covers how PPF blocks UV damage, how it compares to ceramic coating and window tint, how long it lasts in Charlotte’s climate, and what to look for when choosing a film and installer.

Table of Contents

Key Takeaways

  • PPF blocks 90% to 99% of UVA and UVB radiation, the main cause of paint fading and oxidation
  • It acts as a protective layer, absorbing UV rays before they reach the factory paint
  • PPF helps extend paint lifespan to 5 to 10 years or more in high-UV environments
  • PPF does not reduce cabin heat, so window tint is needed for heat rejection
  • Combining PPF, window tint, and ceramic coating provides complete vehicle protection

What Type of Sunlight Damages Car Paint

Car paint is primarily damaged by ultraviolet radiation, specifically UVA and UVB rays.

UV TypeHow It Damages Paint
UVA raysPenetrate deep into the clear coat, causing long-term oxidation and chemical breakdown
UVB raysBreak down paint pigments, leading to visible fading and color loss

Without protection, sun exposure causes a gradual pattern of paint damage. UV radiation breaks down pigments, leading to fading, while the clear coat becomes dull and oxidized over time.

In high-UV areas like Charlotte, this process can begin within 1 to 3 years of regular outdoor exposure. Although the clear coat provides some UV resistance, it weakens over time. Once it degrades, the underlying paint becomes directly exposed to UV radiation, resulting in more severe and irreversible damage.

What Does Paint Protection Film Block?

Paint protection film blocks the solar wavelengths responsible for paint damage and provides an additional layer of physical protection against common contaminants.

UV Protection

  • UVA and UVB radiation: 90% to 99% blocked before reaching the clear coat
  • Oxidation is reduced by limiting UV exposure, which slows the chemical breakdown that leads to oxidation
  • Heat-accelerated chemical damage: indirectly slowed by reducing UV exposure and surface degradation

Physical and Chemical Protection

  • Bird droppings – acidic damage increases under heat; PPF prevents etching
  • Tree sap and road contaminants – film absorbs impact before paint is affected
  • Acid rain and environmental fallout – film acts as a sacrificial barrier
  • Rock chips and road debris – PPF absorbs impact energy that would otherwise chip paint

How Much UV Do Modern PPF Films Block?

Modern PPF (thermoplastic polyurethane – TPU) is engineered to reduce a large portion of UV radiation, often in the 90% range depending on film quality and testing conditions. High-quality films use built-in UV inhibitors that absorb and disperse UV energy before it reaches the paint.

The level of UV protection depends on several key factors:

FactorWhat To Look For
UV transmission ratingA lower percentage means better UV blocking
Film thickness (mil rating)Thicker film provides more physical protection
UV inhibitor qualityHigher-grade inhibitors delay film degradation
Self-healing top coatProtects the film surface from minor abrasion

As a result, premium films are engineered to maintain stronger and more consistent UV protection over time. A high-quality PPF like XPEL ULTIMATE PLUS uses UV-stable polymers and a self-healing top coat to resist discoloration over time under normal use conditions. It is backed by a manufacturer’s warranty that covers defects, including yellowing, cracking, peeling, hazing, and staining.

Does PPF Block Heat or Infrared Radiation?

PPF may provide minor surface-level heat moderation, but it does not significantly block infrared radiation or reduce cabin temperature. This distinction is important when choosing the right type of vehicle protection.

Each product serves a different purpose:

Protection GoalRight Product
Paint protection from UV and physical damagePaint protection film
Cabin heat reductionWindow tint
Gloss, hydrophobicity, and minor UV protectionCeramic coating
Complete protectionPPF plus window tint combination

Many drivers combine PPF on painted surfaces with window tint on the glass to achieve full protection. This setup protects the exterior from UV damage and road debris while reducing interior heat and improving driving comfort.

How PPF Prevents Fading, Oxidation, and Clear Coat Damage

To understand whether paint protection film protects from the sun, it helps to know how UV damage actually works. Sun damage occurs through a chemical chain reaction:

  • UV rays break down paint pigments
  • Oxygen reacts with exposed molecules
  • Oxidation leads to fading and dullness

Left unprotected, this process compounds over time, making the paint increasingly vulnerable at each stage.

Paint protection film (PPF) interrupts this process at the earliest point by limiting UV exposure to the clear coat. By blocking UV radiation before it reaches the paint layer, PPF prevents the initial pigment breakdown that triggers oxidation. This is how PPF protects against the sun – it acts as a physical barrier that:

  • Reduces UV exposure before it reaches the paint
  • Prevents pigment breakdown and fading
  • Reduces oxidation and long-term damage

As a result, PPF preserves color, maintains gloss clarity, and extends the lifespan of the clear coat.

Advanced self-healing films, such as XPEL ULTIMATE PLUS, take this protection further. The elastomeric top coat repairs light scratches and swirl marks when exposed to heat, helping maintain optical clarity and surface integrity without the need for polishing or correction.

Is PPF Worth It for UV Protection?

A common follow-up to “does paint protection film protect against the sun?” is whether it’s actually worth the investment.

Yes. PPF is worth it for UV protection, especially if your vehicle is regularly exposed to sunlight in high-UV environments like Charlotte.

Without protection, visible paint damage can begin within 1 to 3 years. With PPF, that timeline can often extend to 5 to 10+ years depending on exposure, film quality, and maintenance.

PPF is especially valuable if:

  • You park outdoors daily
  • You own a dark-colored vehicle, which fades faster
  • You want to preserve long-term resale value

What Happens to Car Paint Without PPF

Without protection, sun exposure leads to a predictable progression of paint damage over time. This damage typically follows a clear timeline:

TimelineWhat Happens
Year 1 to 2Subtle color fading begins, especially on horizontal surfaces
Year 2 to 4Clear coat oxidation is visible as dullness or haze
Year 4 to 6Clear coat peeling begins on the hood, roof, and trunk lid
Year 6+Base coat exposed; paint correction or respray required

Vehicles parked outdoors in high-UV regions, especially in south- or west-facing exposure during Charlotte’s summer months, experience faster degradation than garaged vehicles. Dark-colored cars tend to show fading more quickly, while lighter colors reveal oxidation and haze more easily.

In most cases, correcting UV damage costs more than preventing it. A quality PPF installation is typically more cost-effective than paint correction or repainting after damage has already occurred.

How Long Does PPF Last in Charlotte's Climate?

Most high-quality PPF lasts 5 to 10 years. In Charlotte’s climate, where UV index regularly reaches high to very high levels from April through September, proper film selection and maintenance significantly affect longevity.

FactorImpact On Lifespan
UV exposure intensityHigher UV index accelerates polymer stress
Installation qualityImproper installation creates edges that lift and fail early
Film brand and gradePremium films with UV inhibitors last longer
Maintenance routineRegular washing and film-safe sealants extend durability
Parking habitsCovered parking reduces cumulative UV exposure

For vehicles in Charlotte that park outdoors regularly, expect an average lifespan of 5 to 8 years from a quality installation with proper care. Vehicles with covered parking or regular application of film-safe sealants can approach the upper end of the manufacturer’s warranty period.

Maintenance That Extends PPF Lifespan

  • Wash every 1 to 2 weeks using pH-neutral car shampoo
  • Apply PPF-safe sealant every 6 to 12 months
  • Avoid abrasive polishes, acidic cleaners, and automatic car washes with brushes
  • Allow self-healing films to activate by parking in direct sun or using a heat gun on affected areas

Does PPF Yellow or Degrade in the Sun?

Over time, paint protection film can lose clarity, discolor, or degrade due to prolonged UV exposure. This happens when UV radiation breaks down the film’s polymer structure faster than its UV inhibitors can protect it.

Modern premium PPF is designed to slow this process through UV-stable polymers, advanced UV inhibitors, and self-healing top coats that help maintain surface clarity over time. Most high-quality films also include a manufacturer’s warranty covering yellowing, cracking, and delamination.

As the film ages, certain signs indicate that its UV protection is declining:

SignWhat It Means
Yellowing or browningUV inhibitors depleted; UV protection significantly reduced
Loss of optical clarityPolymer structure degrading; replacement recommended
Surface dullnessTop coat worn; self-healing capability reduced
Cracking or peelingFilm has failed; immediate replacement needed

A high-quality film like XPEL ULTIMATE PLUS includes a manufacturer’s warranty that covers defects, including yellowing, cracking, peeling, hazing, and staining. If these issues appear within the warranty period, the film can be replaced under the manufacturer’s terms.

PPF vs. Ceramic Coating vs. Window Tint

PPF, ceramic coating, and window tint each serve a different primary function. Understanding the difference helps you choose the right protection strategy for your vehicle.

FeaturePPFCeramic CoatingWindow Tint
UV protection (paint)90% to 99%LimitedNone
Physical protectionHigh – rock chips, debrisMinimalNone
Heat reduction (cabin)LowVery lowHigh
Gloss enhancementModerateHighNone
HydrophobicityModerateHighNone
Self-healingYes (premium films)NoNo
Lifespan5 to 10 years1 to 5 years5 to 10 years
Best forPaint UV and physical protectionGloss, water repellencyCabin heat and UV

How They Work Together

PPF, ceramic coating, and window tint are often used together to create a complete vehicle protection system.

  • PPF protects against UV damage, rock chips, and physical wear
  • Ceramic coating enhances gloss, adds hydrophobic properties, and makes the surface easier to maintain
  • Window tint reduces cabin heat and blocks infrared radiation through the glass

Together, these layers protect both the exterior and interior of the vehicle, improving durability, appearance, and driving comfort.

For drivers looking for full protection, combining all three offers a balanced approach that addresses paint preservation, surface maintenance, and heat reduction.

Full vs. Partial PPF: What Should You Choose for UV Protection?

PPF can be applied to the full vehicle or targeted to the areas most vulnerable to UV damage and road debris.

Coverage OptionAreas ProtectedBest For
Full vehicle wrapAll painted panelsMaximum protection, show cars, lease vehicles
Front-end packageHood, fenders, mirrors, bumper, headlightsHighway drivers, high-debris exposure
Roof and hoodHorizontal surfaces with the highest UV exposureUV-focused protection, budget-conscious
Partial panelsCustom high-impact areasTargeted protection based on driving habits

For Charlotte drivers primarily concerned with UV fading rather than rock chips, a roof and hood package targets the horizontal surfaces that receive the most direct UV exposure throughout the day. For drivers who regularly use highways or travel outside Charlotte, a full front-end package provides broader debris and UV protection.

What to Expect During PPF Installation

Professional PPF installation follows a consistent process regardless of coverage level.

Installation Process

  1. Vehicle wash and decontamination: Paint must be clean and free of contaminants before film is applied
  2. Paint inspection: Existing scratches, chips, or contamination are identified and addressed
  3. Film cutting: XPEL’s DAP software cuts film patterns precisely to your vehicle’s exact dimensions
  4. Film application: Film is wet-applied to each panel using a slip solution for positioning
  5. Squeegee and edge work: Film is pressed flat, and edges are tucked or wrapped for a clean finish
  6. Curing period: Film requires 24 to 48 hours to fully bond; avoid washing during this period

After Installation

  • Avoid washing for 48 hours after installation
  • Avoid high-pressure water directly on edges for the first week
  • Small water bubbles or haze under the film are normal and resolve during curing
  • Self-healing activation: park in direct sunlight or use a heat gun on light scratches to activate the elastomeric top coat

Professional installation by an authorized XPEL installer ensures the manufacturer’s warranty is valid. An improperly installed film, regardless of brand, voids the warranty and typically results in premature edge lifting, bubbling, or adhesion failure.

What Affects the Cost of PPF

PPF installation cost varies based on several key factors, including coverage, vehicle type, and film quality. The most important cost factors include:

FactorImpact On Cost
Coverage areaFull vehicle coverage costs more than partial packages
Vehicle size and complexityLarger vehicles and complex curves require more material and labor
Film gradePremium films with self-healing and extended warranties cost more
Paint conditionPaint correction before installation increases the total cost
Installation complexityTight trim lines and unique panel shapes require more time and precision

Pricing can vary significantly from one vehicle to another, depending on factors like size, coverage, and film quality.

To get an accurate quote, you’ll need to provide your vehicle’s make, model, and year, along with your preferred coverage option, whether that’s full vehicle, front end, roof and hood, or a custom package.

Protect Your Paint Before UV Damage Starts

Charlotte’s intense UV exposure can begin breaking down your paint in as little as 1 to 3 years. Once fading and oxidation appear, restoration becomes costly and often irreversible. Paint protection film (PPF) prevents that damage before it starts.

Sun Stoppers Window Tinting in Charlotte installs premium XPEL paint protection film engineered to block up to 99% of harmful UV radiation while shielding your vehicle from road debris and environmental contaminants. We serve drivers across Charlotte, Ballantyne, SouthPark, Matthews, and Mint Hill.

Every installation includes:

  • XPEL manufacturer’s warranty against yellowing, cracking, and delamination
  • Precision-cut patterns using XPEL DAP software for a seamless, factory-level fit
  • Professional installation by an authorized XPEL installer
  • Clear, written pricing before any work begins
  • Post-installation care guidance to maximize film lifespan

Protect your paint before damage becomes visible. Request your quote today and lock in long-term protection against Charlotte’s UV exposure.

FAQs

PPF significantly reduces fading by blocking 90% to 99% of UV radiation, but no product eliminates UV damage. High-quality PPF dramatically slows the fading process and preserves paint condition far longer than unprotected paint.

Yes. In high-UV environments, PPF slows paint damage, preserves gloss and color, and protects resale value. For vehicles parked outdoors regularly in Charlotte’s summer months, the cost of PPF installation is typically lower than the cost of paint correction or respray after UV damage has occurred.

Over time, yes. UV exposure gradually breaks down the film’s polymer structure. High-quality films use UV inhibitors to resist this degradation for the duration of the warranty period. Yellowing or loss of clarity indicates the film’s UV protection has declined, and replacement should be considered.

No. PPF protects the paint surface and does not affect cabin temperature. Window tint is the appropriate product for heat rejection and interior UV protection.

PPF provides physical protection against rock chips, road debris, and UV damage through a thick polymer film. Ceramic coating is a thin chemical layer that enhances gloss and hydrophobicity but provides minimal physical protection. Many drivers apply ceramic coating over PPF to combine the benefits of both.

Replace PPF when you notice yellowing, cracking, bubbling, or loss of optical clarity. These are signs that the film’s UV protection and physical integrity have declined. XPEL PPF carries a manufacturer’s warranty that covers defects, including yellowing, cracking, peeling, hazing, and staining.

Full vehicle PPF covers all painted panels for maximum protection. Partial coverage targets specific areas, typically the hood, fenders, front bumper, mirrors, and headlights, that receive the most UV exposure and road debris impact. The right choice depends on your budget, driving habits, and protection priorities.

Installation time depends on coverage level and vehicle complexity. A front-end package typically takes one day. A full vehicle wrap can take two to three days. Sun Stoppers will provide an estimated timeline with your written quote.

How Long Does Ceramic Coating Take to Cure? (Full Timeline Explained)

How Long Does Ceramic Coating Take to Cure? (Full Timeline Explained)

Wondering how long does ceramic coating take to cure? Ceramic coating takes 2 to 4 weeks to fully cure, but most paint damage happens in the first 48 hours when owners don’t know what to avoid.

In this guide, Sun Stoppers Window Tinting in Charlotte breaks down the complete curing timeline, the science behind each stage, and the exact steps to protect your investment from day one.

Table of Contents

Key Takeaways

  • Ceramic coating has two stages: initial hardening (24 to 48 hours) and full cure (2 to 4 weeks)
  • The first 48 hours are the most critical; any moisture or friction during this window can permanently compromise the bond
  • You should avoid washing your car for at least 7 days after application
  • Rain, heat, and humidity all affect how quickly the coating cures
  • Surface preparation before application is the single biggest factor in how well the coating cures
  • Driving carefully during the curing period protects the coating’s bond
  • Professional installation in a controlled environment gives the best results

How Long Does Ceramic Coating Take to Cure?

Ceramic coating typically takes 2 to 4 weeks to fully cure, although it begins hardening within the first 24 to 48 hours after application.

During this period, the SiO2 (silicon dioxide) compounds in the coating are cross-linking and bonding with your vehicle’s clear coat at a molecular level. This chemical process, not just surface drying, is what gives ceramic coating its hardness, hydrophobic properties, and long-term durability.

How you care for your car in the days immediately following application directly determines how long that protection lasts.

Ceramic Coating Cure Timeline at a Glance

Time After ApplicationWhat’s HappeningWhat To Do
0 to 24 hoursInitial bonding beginsKeep dry, avoid driving if possible
24 to 48 hoursSurface hardens to the touchStill no washing, limit exposure
3 to 7 daysThe coating solidifies furtherHand wash only if necessary
1 to 2 weeksHydrophobic properties strengthenGentle hand washes, avoid pressure
2 to 4 weeksFull cure reachedResume normal (careful) maintenance

Key Insight: Even if the surface feels dry after 48 hours, the coating underneath is still curing. Premature exposure is one of the main reasons coatings fail early.

The Two Stages of Ceramic Coating Cure

Stage 1: Initial Hardening (24 to 48 Hours)

This is the most vulnerable stage. The coating exists in a semi-liquid polymer state, actively bonding at a molecular level with your car’s clear coat. Any moisture, contamination, or friction during this window can permanently disrupt that bond.

Best practices:

  • Keep the car completely dry
  • Avoid driving (especially in rain or dusty conditions)
  • Store indoors or under cover
  • Do not apply any detailing products
  • Avoid parking near sprinklers, car washes, or areas with airborne dust

Pro Tip: Most coating failures traced by professional detailers originate within this 48-hour window, not months after application.

Stage 2: Full Cure (2 to 4 Weeks)

During this stage, the coating continues to harden, cross-link, and reach full chemical resistance. The polymer matrix completes its molecular bonding with the clear coat, which is why you begin noticing performance changes during this phase.

This is when you start seeing:

  • Strong water beading (hydrophobic effect)
  • Increased gloss and depth
  • Resistance to chemicals and contaminants
  • UV blocking properties become fully active

Care guidelines during Stage 2:

  • Hand wash only (pH-neutral shampoo)
  • Avoid pressure washers close to the surface
  • Avoid tree sap, bird droppings, and harsh environments
  • Do not apply wax or sealants
  • Avoid parking under direct intense sunlight for extended periods in the first two weeks

What Factors Affect Ceramic Coating Cure Time?

Understanding these variables helps you plan your installation for the best possible outcome.

1. Temperature

  • Ideal range: 15 to 25°C (60 to 77°F)
  • Cold temperatures slow the cross-linking reaction, resulting in weaker molecular bonding
  • Excess heat can cause surface flash curing; the top layer hardens before the coating beneath it properly bonds with the paint

2. Humidity

  • Moderate humidity (40 to 60% RH) supports even curing
  • High humidity can cause uneven bonding, streaking, or high-spot formation, a common issue in hot, humid climates
  • Very low humidity can cause the coating to cure too quickly at the surface

3. Product Quality

  • Consumer-grade coatings: faster cure, shorter lifespan (typically 1 to 2 years)
  • Professional-grade coatings: slower cure, stronger durability (2 to 5+ years)
  • Coatings with higher SiO2 concentration generally require longer cure times but deliver harder, more durable finishes

4. Surface Preparation (Most Important)

No curing condition or quality product can compensate for poor surface preparation. If the paint is not properly:

  • Decontaminated (iron fallout removal, clay bar treatment)
  • Polished (swirl marks and oxidation removed)
  • Paint corrected (scratches addressed before application)
  • Fully degreased (IPA wipedown before coating)

The coating won’t bond properly, no matter how well you maintain it afterward.

How Does Ceramic Coating Cure Time Compare to Wax?

FeatureCeramic CoatingTraditional Wax
Cure Time2 to 4 weeksMinutes
BondingChemical bond with clear coatSits on the surface
Durability2 to 5+ yearsWeeks to months
Protection LevelHighLow
UV ResistanceStrongMinimal
Hydrophobic LongevityYearsWeeks

The extended cure time is not a drawback; it’s the mechanism behind ceramic coating’s long-term performance advantage. A wax that cures in minutes sits on top of the paint. A ceramic coating that takes weeks to cure is chemically integrated into it.

Can You Drive Your Car Right After Ceramic Coating?

Yes, but with strict limitations.

You can drive the vehicle shortly after installation, but the following should be avoided during the first 7 days:

  • Highway driving (debris impact risk)
  • Gravel roads and construction zones
  • Areas with heavy road spray or standing water
  • Parking under trees (sap and bird droppings are highly acidic and can etch an uncured coating)
  • Automatic car washes of any kind

If you must drive, keep trips short and stay on clean, low-traffic roads. The less stress placed on the coating during the first week, the stronger the final bond.

What Happens If Rain Hits the Car During Curing?

A light rain shower after the initial 48-hour hardening period won’t ruin the coating, but it’s not ideal. Water sitting on the surface during early curing can leave mineral deposits and water spots that are extremely difficult to remove without disturbing the coating layer itself.

If your car does get rained on during the first week:

  1. Do not wipe aggressively. Dragging a towel across the surface can introduce swirl marks into an uncured coating
  2. Use a clean, soft microfiber towel and blot gently rather than wiping in any direction
  3. Let it air-dry in a clean, covered environment if conditions allow
  4. Do not use a heat gun or forced air directly on the panel. Uneven heat accelerates localized curing inconsistently

The safest approach is always to plan your ceramic coating appointment for a dry week, and park in a covered space for at least the first seven days.

Common Mistakes During the Curing Period

Even customers who follow ceramic coating installation instructions sometimes make avoidable errors in the following weeks.

  • Washing within the first 7 days: Even a light rinse disrupts early bonding
  • Using automatic car washes: Brushes and high-pressure jets physically stress the coating
  • Applying wax, quick detailers, or spray sealants too early: These create a barrier that prevents full cross-linking
  • Parking under trees: Sap and bird droppings are acidic; an uncured coating has no resistance yet
  • Ignoring water spots during early curing: Mineral deposits can bond into an uncured surface permanently
  • Using dish soap or high-pH cleaners for the first wash: These strip the developing hydrophobic layer

These mistakes reduce ceramic coating lifespan more than product quality itself.

How to Tell If Your Ceramic Coating Has Fully Cured

This section is missing from most ceramic coating guides, and it’s one of the most common questions owners have.

You can assess cure progress through these indicators:

  • Water behavior: Fully cured coatings produce tight, fast-rolling water beads. During early curing, water may sheet but bead slowly or inconsistently.
  • Surface feel: A fully cured coating feels glassy and extremely slick when dry. An uncured surface may feel slightly tacky or uneven.
  • Gloss depth: Gloss and clarity typically increase as the coating reaches full cure. If the finish still looks slightly hazy or uneven at 2 weeks, curing may still be in progress.
  • The water bead test: Pour a small amount of water on a horizontal panel. Fully cured coatings will cause water to bead up tightly and roll off with minimal contact. Do not perform this test before 14 days post-application.

Note: Environmental conditions affect these timelines. A vehicle in a cold garage may take closer to 4 weeks to exhibit full hydrophobic performance.

Why Professional Installation Matters for Proper Curing

The curing process is only as good as the preparation that precedes it.

Professional ceramic coating installation matters for three reasons:

  1. Controlled environment: Indoor installation at regulated temperature and humidity eliminates the variables that cause uneven curing
  2. Paint correction: Professionals identify and correct paint defects before application, ensuring maximum surface adhesion
  3. Product access: Professional-grade coatings such as XPEL ceramic coating products require an authorized installer application for warranty validity and are formulated for greater durability and a longer, more stable cure

DIY installations done outdoors are more likely to encounter contamination, inconsistent temperatures, and application errors, all of which compromise the curing process and the final result.

Book Ceramic Coating in Charlotte, NC

Now that you know how ceramic coating cures, you can plan and protect your vehicle the right way from day one.

At Sun Stoppers Window Tinting in Charlotte, every ceramic coating service includes thorough surface preparation, paint correction when needed, and professional-grade application in a controlled environment. Our team will also explain exactly how to care for your vehicle during the curing period so you get the best possible results.

Contact us today to schedule your ceramic coating in Charlotte, NC, and enjoy long-lasting protection, deeper gloss, and easier maintenance.

FAQs

Wait at least 7 days before washing. Use only a gentle hand wash with pH-neutral soap. Avoid automatic car washes for the first 30 days, and avoid high-pressure washers within 6 inches of the surface for the first 60 days.

Warm temperatures within the ideal range (15 to 25°C) accelerate curing. However, excessive heat above 35°C can cause flash curing, which hardens the surface prematurely before proper molecular bonding occurs underneath. Controlled indoor environments consistently produce better curing outcomes than outdoor heat.

Light rain after the first 48 hours will not destroy the coating, but it creates a risk. Water spots formed during early curing can become permanent surface defects. Keep the vehicle covered for the full first week wherever possible.

Applying wax or other surface products during the cure window creates a physical barrier that prevents the coating from completing its cross-linking process. This reduces hardness, longevity, and hydrophobic performance. Wait until full cure (2 to 4 weeks) before applying anything to the surface.

No. Consumer-grade and professional-grade coatings have different SiO2 concentrations, polymer formulations, and layering systems. Professional coatings typically require more time but deliver 3 to 5 times greater hardness ratings and significantly longer protection lifespans.

How Much Does Ceramic Coating Cost? A Complete Pricing Guide

How Much Does Ceramic Coating Cost? A Complete Pricing Guide

Ceramic coating has become one of the most sought-after paint protection solutions for car owners who want long-lasting defense against environmental damage and a deep, mirror-like finish. But before investing, there’s one question every vehicle owner asks: how much does ceramic coating cost?

In this guide, Sun Stoppers Window Tinting in Charlotte breaks down real-world pricing, what’s actually included in the cost, how ceramic coating compares to other protection options, and whether it’s the right investment for your vehicle, based on real installer experience across hundreds of applications.

Table of Contents

Key Takeaways

  • Professional ceramic coating typically costs $500 to $2,500+, depending on vehicle size, paint condition, and coating tier
  • Paint preparation and correction account for 60 to 70% of total labor time and significantly affect the final price
  • Higher-quality coatings (measured on the 9H hardness scale) last longer and offer better long-term ROI
  • Professional installation outperforms DIY kits in durability, bonding strength, and hydrophobic performance
  • Coatings with manufacturer-backed warranties provide more reliable protection than in-house guarantees

How Much Does Ceramic Coating Cost on Average?

The average cost of professional ceramic coating ranges from $500 to $2,500+, depending on the service tier, vehicle condition, and coating product used.

General Pricing Breakdown

Service TierPrice RangeTypical Durability
Entry-level professional coating$500 to $1,0001 to 2 years
Mid-range professional coating$1,000 to $1,5003 to 5 years
Premium long-term coating$1,500 to $2,500+5+ years
DIY ceramic coating kits$50 to $2006 to 18 months

Why such a wide range? The price difference comes down to coating chemistry (SiO₂ concentration), number of layers applied, paint correction requirements, and the installer’s certification level.

How Much Does Ceramic Coating Cost by Vehicle Type?

Vehicle TypeEstimated Cost Range
Compact cars (e.g., sedans, hatchbacks)$500 to $900
Mid-size sedans & crossovers$800 to $1,200
Full-size SUVs & trucks$1,200 to $2,000
Luxury & exotic vehicles$2,000 to $4,000+

Luxury and exotic vehicles cost more not only because of their size, but also due to the more delicate paint systems, tighter panel tolerances, and the higher-grade coatings required to match manufacturer finish standards.

What Factors Affect Ceramic Coating Cost?

Understanding these cost drivers helps you evaluate quotes accurately and avoid overpaying or underpaying for a subpar result.

1. Vehicle Size and Surface Area

Larger vehicles require more product volume and more labor hours. A compact car with roughly 40 to 50 square feet of paintable surface is significantly faster to coat than a full-size pickup truck or large SUV with 70 to 90+ square feet. More surface area means more material cost and more application time.

2. Paint Condition and Prep Work

Before applying ceramic coating, the paint often needs correction:

  • Removing swirl marks
  • Fixing scratches
  • Eliminating oxidation

Paint correction alone can add $200 to $1,000+ to the total cost. Skipping this step is a critical mistake; ceramic coating is semi-permanent and will lock in any existing defects, making them more visible under certain lighting conditions.

Professional installers typically spend 60 to 70% of total job time on surface preparation before a single drop of coating is applied.

3. Quality of the Coating

Not all ceramic coatings are chemically equivalent. Key differentiators include:

  • SiO₂ (silicon dioxide) concentration: Higher percentages generally mean harder, more durable coatings
  • Hardness rating: Measured on the 9H pencil hardness scale; professional-grade coatings typically rate 9H
  • Contact angle: Determines hydrophobic performance; premium coatings achieve water contact angles above 110°
  • Curing time: Professional coatings require controlled curing conditions (temperature: 60 to 80°F, humidity below 50%) that DIY application cannot replicate at home

Entry-level products may last 1 to 2 years. Premium professional-grade coatings, including industry-recognized options like XPEL FUSION PLUS, can deliver protection for 4+ years under proper maintenance conditions.

4. Professional vs DIY Application

FactorProfessionalDIY
Surface prepFull decontamination + correctionLimited
Application environmentClimate-controlledUncontrolled
Curing conditionsMonitoredVariable
Coating gradeProfessional-only formulasConsumer-grade
Durability3 to 5 years6 to 18 months
WarrantyManufacturer-backedNone

DIY kits are accessible, but the gap in real-world performance is significant. Consumer-grade coatings use lower SiO₂ concentrations and simpler polymer chains that don’t bond as deeply with the clear coat.

5. Number of Coating Layers

Some shops offer single-layer applications at lower price points, while others apply two or more layers for added depth and durability. Multi-layer packages are usually priced $300 to $600 higher but offer noticeably better hydrophobic performance.

6. Warranty and Longevity

Many professional coatings come with warranties, which can also influence how much does ceramic coating cost. Longer warranties usually mean higher upfront costs but greater peace of mind. Look for shops that offer manufacturer-backed warranties, not just in-house guarantees.

Ceramic Coating vs Other Paint Protection Options

Not sure whether ceramic coating is right for you? Here’s a quick comparison:

OptionCostDurabilityBest For
Car wax$10 to $50 DIY1 to 3 monthsBudget protection
Paint sealant$50 to $1506 to 12 monthsShort-term gloss
Ceramic coating (DIY)$50 to $2006 to 18 monthsDIY enthusiasts
Ceramic coating (pro)$500 to $2,500+3 to 5 yearsLong-term value
Paint protection film (PPF)$2,000 to $7,000+7 to 10 yearsImpact & scratch resistance

Key Insight: Ceramic coating occupies the optimal balance of cost and longevity for most daily drivers. For vehicles in high-risk environments (gravel roads, parking garage exposure, high-UV climates), combining PPF on high-impact zones with ceramic coating on full paint is the most comprehensive solution available.

Is Ceramic Coating Worth the Cost?

For most vehicle owners who plan to keep their car for 3+ years, yes.

Ceramic coating offers:

  • Long-lasting paint protection
  • Enhanced gloss and shine
  • Easier cleaning and maintenance
  • Resistance to UV rays, chemicals, and contaminants
  • Reduced water spotting and bird-dropping damage

While the upfront cost may seem high, it can reduce the need for frequent waxing and help preserve your vehicle’s resale value. A well-maintained ceramic-coated vehicle can retain higher resale value compared to unprotected paint, especially in markets where cosmetic condition matters.

How to Get the Best Value for Your Money

Choosing a ceramic coating installer is more important than choosing the lowest price. Consider:

  • Verify installer‘s certification level: ask if they are certified by the coating manufacturer (e.g., XPEL-certified installers for XPEL FUSION PLUS)
  • Review their portfolio: look for before/after paint correction work, not just finished glamour shots
  • Confirm what’s included: does the quote include paint decontamination, paint correction, and how many coating layers?
  • Ask about the coating’s 9H rating and SiO₂ content: a reputable installer should be able to answer this without hesitation
  • Clarify warranty terms: manufacturer-backed vs. in-house only
  • Avoid significantly below-market pricing: proper prep work and professional coatings have real costs; rock-bottom prices usually mean shortcuts

Ready to Protect Your Vehicle?

If you’re in the Charlotte area and ready to upgrade your car’s protection and shine, it’s worth working with professionals who know how to do it right.

Contact us to book your ceramic coating service today with Sun Stoppers Window Tinting in Charlotte and give your vehicle the long-lasting protection it deserves.

FAQs

Professional ceramic coating typically costs between $500 and $2,500+, depending on vehicle size, paint condition, number of layers, and the grade of coating used. Luxury and exotic vehicles can exceed $4,000 due to more complex preparation requirements.

The cost reflects professional-grade coating materials (high SiO₂ concentration), climate-controlled application conditions, extensive paint preparation and correction labor, and manufacturer certification requirements for the installer. Shortcuts in any of these areas directly compromise the result.

DIY kits work as a short-term solution (6 to 18 months) for owners on a budget, but they use lower-grade formulas that don’t bond as deeply with the clear coat. The lack of professional paint correction before application is also a major limiting factor.

Most professional ceramic coatings last between 2 and 5 years, with some premium options lasting even longer when properly maintained.

Yes. A properly applied ceramic coating eliminates the need for regular waxing. The semi-permanent SiO₂ layer provides superior hydrophobic performance and gloss compared to carnauba wax, without requiring reapplication every 1 to 3 months.

Yes, and this is actually a recommended combination. Ceramic coating applied over PPF enhances the film’s hydrophobic properties and makes maintenance easier, while PPF handles physical impact protection that ceramic coating alone cannot provide.

Ceramic-coated vehicles should be washed with pH-neutral car shampoo, avoiding automated car washes with abrasive brushes. Most professional coatings also benefit from an annual ceramic booster spray to maintain hydrophobic performance and extend coating lifespan.

How to Vinyl Wrap a Car: Step-by-Step Guide for a Clean Finish

How to Vinyl Wrap a Car: Step-by-Step Guide for a Clean Finish

Vinyl wrapping is one of the most effective ways to transform your car’s appearance without committing to permanent paint. Whether you want a color change, matte finish, or custom design, wrapping gives you flexibility, but the process requires precision, patience, and proper technique.

This guide from Sun Stoppers Window Tinting in Charlotte breaks down exactly how to vinyl wrap a car, from surface preparation through finishing and post-installation care, so you can achieve a smooth, durable result that lasts.

Table of Contents

Key Takeaways

  • Surface preparation determines the final result more than any other factor; contamination under the film is permanent
  • Working in small sections prevents bubbles, wrinkles, and misalignment
  • Heat control is critical; too little and vinyl won’t conform; too much and it overstretches or loses adhesion
  • Edges, corners, and recesses require the most time and the most material
  • Post-heating is non-negotiable; skipping it causes premature edge lifting
  • DIY is achievable on flat panels; professional installation is strongly recommended for full wraps with complex geometry

What Is a Vinyl Car Wrap?

A vinyl wrap is a thin, pressure-sensitive adhesive film applied directly over a vehicle’s painted surface. Unlike paint, wrap sits on top of the clear coat and can be removed without damaging the original finish, provided it is applied and removed correctly.

Vinyl wraps are used for color changes, matte or specialty finishes, commercial branding, and as a paint protection layer against light surface contamination and UV exposure. They do not provide the same level of physical impact protection as paint protection film (PPF), but they offer significant aesthetic flexibility at a lower cost than a full respray.

Key material distinction: Professional-grade wraps use cast vinyl (2 to 2.5 mil thick), which is manufactured to conform to compound curves and complex surfaces. Consumer-grade calendered vinyl (3 to 4 mil) is stiffer and suitable only for flat or simple surfaces – not recommended for full vehicle wraps.

Tools and Materials You Will Need

Having the right tools before starting is not optional – improvising mid-install leads to wasted material and poor results.

Tool / MaterialPurpose
Cast vinyl wrap filmPrimary material – choose appropriate finish and quantity
Felt-edge squeegeePressing vinyl without scratching the surface
Heat gun (1500 to 2000W variable)Softening vinyl for curves and edge work
Infrared thermometerMonitoring surface temperature during heat application
Precision knife / 45° bladeTrimming edges cleanly
Knifeless tapeClean cuts without blade contact on painted surfaces
Isopropyl alcohol (70 to 99%)Final surface decontamination
Clay bar + lubricantRemoving embedded surface contamination
Microfiber towels (lint-free)Wiping surfaces without leaving residue
Wrap gloves (nylon)Preventing fingerprints and oils from adhering to the adhesive
Adhesion promoterEdges, curves, and low-energy surfaces
Masking tapePanel protection during trimming

Environment: Work indoors in a clean, dust-free space. Ideal conditions are 18 to 25°C (65 to 77°F) with humidity below 60%. Cold vinyl is stiff and difficult to work with; hot environments cause the adhesive to tack too quickly, reducing repositionability.

Step-by-Step: How to Vinyl Wrap a Car

Step 1: Wash and Decontaminate the Surface

Start with a deep wash to remove dirt, grease, and debris. Follow with a clay bar or decontamination process to eliminate embedded contaminants. Any residue left behind can affect adhesion and final appearance.

Step 2: Remove or Prep Trim and Edges

Remove badges, mirrors, or handles if possible. If not, carefully clean around them and use masking tape to protect edges. This step improves both appearance and durability.

Step 3: Final Surface Preparation

Wipe down all panels with isopropyl alcohol to remove oils and residue. This ensures the vinyl bonds properly to the surface.

Step 4: Measure and Cut Vinyl

Cut vinyl slightly larger than each panel. If you’re unsure how much material you need, check this guide on how much vinyl to wrap a car. Extra material allows proper stretching and clean edge wrapping.

Step 5: Position and Apply the Vinyl

Place the vinyl over the panel and gradually remove the backing. Use a squeegee to press the vinyl from the center outward. Apply steady pressure to avoid air pockets.

Step 6: Use Heat to Shape the Vinyl

Apply heat to soften the vinyl and help it conform to curves and contours. This step is critical for complex areas. Avoid overheating as it can damage the material.

Step 7: Wrap Edges and Corners

Carefully wrap vinyl around edges and corners. Trim excess material using a sharp blade. Proper edge work prevents peeling over time.

Step 8: Post-Heat and Final Inspection

Go over all panels with controlled heat to lock the vinyl in place. Inspect for bubbles, wrinkles, or lifting edges and fix them immediately.

Common Mistakes to Avoid

These mistakes can reduce the lifespan of vinyl wrapping from 5 years to less than 1 year.

Skipping or Rushing Surface Prep

Contamination under the film is the leading cause of premature lifting. There are no shortcuts here.

Applying Vinyl in Unsuitable Conditions

Cold vinyl (below 15°C) is stiff and resists conforming. Hot environments (above 30°C) cause the adhesive to grab too quickly, making repositioning nearly impossible. Wind or dust indoors ruins adhesion.

Overstretching the Film

Vinyl stretched beyond approximately 130% of its original dimension creates internal stress that causes it to retract – pulling edges away from surfaces over time. Use heat and relief cuts instead of force.

Skipping Post-Heat

One of the most common DIY omissions. Without post-heating, edges will begin lifting within weeks, particularly in temperature-cycling environments.

Using Dull Blades

A dull blade drags and tears, producing ragged cut edges that are much more likely to lift. Change blades frequently.

Wrapping Around the Trim Instead of Behind It

Creates visible seam lines and dramatically reduces edge durability. Remove trim where possible.

How to Maintain a Vinyl Wrap

A properly installed wrap requires specific maintenance to reach its rated lifespan.

Washing

  • Hand wash with pH-neutral car shampoo – avoid alkaline or solvent-based products
  • Use a soft microfiber mitt, never abrasive sponges or brushes
  • Avoid automated car washes with rotating brushes – these create edge lifting and surface scratching
  • Touchless automatic washes are acceptable if the detergent is pH-neutral

Drying

  • Air dry or use a clean microfiber drying towel
  • Avoid high-pressure air drying directed at panel edges

Products to Avoid

  • Petroleum-based cleaners or dressings
  • Wax products containing carnauba or abrasive compounds
  • Silicone-based spray detailers

Products Safe to Use

  • Vinyl-specific spray detailers
  • Ceramic coating applied over wrap (extends protection and enhances gloss or matte appearance)

Immediate Attention Items

  • Bird droppings, tree sap, and fuel spills – remove immediately, as these can stain or chemically degrade the film surface if left to sit

DIY vs. Professional Vinyl Wrapping

FactorDIYProfessional
Material waste buffer15 to 25% extra10 to 15% extra
Installation time2 to 5 days1 to 2 days
Risk of bubbles/liftingHigherLower
Edge and corner qualityVariableConsistent
Film warrantyMay be voidedMaintained
Post-install supportNoneAvailable
  • Where DIY works: Flat panels, roof wraps, hood wraps, interior trim – areas with minimal compound curves and straightforward edge work.
  • Where professional installation is strongly recommended: Full vehicle wraps, bumpers, door handles, A-pillars, any panel with significant compound curves or deep body lines.

Note: The most expensive DIY mistake is buying enough material for one attempt and running short during rework. If attempting a full wrap for the first time, budget for at least one additional roll beyond your estimate.

Book Your Custom Vinyl Wrap in Charlotte, NC

If you want a flawless finish without the risks of DIY, professional installation is the best choice. Sun Stoppers Window Tinting in Charlotte offers expert custom vinyl wrap services in Charlotte, NC, using premium materials and proven techniques.

Contact us today to schedule your appointment and give your vehicle a completely new look.

FAQs

Quality cast vinyl wraps last 3 to 5 years with proper maintenance. Budget-calendered films typically last 1 to 3 years. Longevity depends on UV exposure, washing method, and whether edges were properly sealed during installation.

Quality cast vinyl removed within its rated lifespan from properly cured paint will not damage the surface. Risks increase when the wrap is left beyond its lifespan, applied over older or poorly adhered paint, or removed incorrectly without heat.

In most cases, yes. A professional full wrap typically costs $2,500 to $5,500, compared to $3,000 to $10,000+ for a quality full respray in a specialty finish like matte or color-shift.

Wait at least 48 to 72 hours before washing. Use hand washing with pH-neutral shampoo for the first two weeks, then maintain a normal routine using vinyl-safe products.

Vinyl wrap provides moderate protection against UV fading, light contamination, and minor abrasion. For maximum protection, PPF on high-impact areas combined with a vinyl wrap for color change is the most comprehensive approach.

Yes, and it is a practical combination. PPF handles physical impact protection, while vinyl wrap delivers the color or finish change. Ensure the PPF surface is clean and fully cured before applying wrap film over it.

Small bubbles under 1cm often disappear within 48 to 72 hours as the adhesive bonds. Larger bubbles should be addressed immediately by lifting the film, resqueegeeing, and post-heating. Once fully cured after 48 hours, bubbles are very difficult to fix without redoing the section.

Do tinted windows block uv

Do Tinted Windows Block UV Rays? Tint Types and Protection Guide

Many drivers assume a darker tint means better UV protection. The truth is more nuanced. Do tinted windows block UV rays? Yes, but the level of protection depends entirely on the film type, not how dark it looks. This guide from Sun Stoppers Window Tinting in Charlotte breaks down which tints actually block UV, what specs to check, and how to verify real protection before you buy.

Table of Contents

Key Takeaways

  • Tinted windows can block UV rays, but only if the film is specifically designed for UV protection.
  • Standard car windows do not fully block UVA, especially on side and rear glass.
  • High-quality ceramic and advanced films can block up to 99% of UV radiation.
  • Tint darkness does not determine UV protection, because even clear films can provide high UV rejection.
  • You should always verify UV performance using certified specifications and UV meter testing after installation.
DSC04894-Edit

How Much UV Do Car Windows Block?

Your front windshield already provides strong UV protection. Most windshields are made from laminated glass, which includes a plastic interlayer that typically blocks approximately 96% of UVA rays.

Side and rear windows are a different story.

  • Most are made from tempered glass, not laminated glass
  • Untreated side windows can allow a portion of UVA to pass through, with transmission levels varying by vehicle and glass type
  • Over time, that cumulative exposure adds up, especially for drivers with daily sun exposure on one side of their body

Most automotive glass already blocks nearly all UVB rays, which are responsible for sunburn. However, UVA penetrates glass more easily and is the primary contributor to long-term skin aging, eye damage, and skin cancer risk.

High-quality aftermarket window films can increase protection to approximately 99% UV rejection (UVA + UVB) when properly tested and certified. They also help reduce cabin temperature. If you’re wondering how much heat tinted windows can block, many modern films are designed to significantly cut infrared heat in addition to UV exposure.

Can You Still Get Sunburn Through Car Windows?

Yes, you can still get sunburn or long-term skin damage through untreated car windows.

  • UVB is mostly blocked, so immediate burning is less likely
  • UVA penetrates glass and causes deeper skin damage over time
  • Drivers often experience more damage on the window-facing side of their body

This is why dermatology studies consistently show asymmetrical sun damage patterns in long-term drivers.

Does Tint Darkness (VLT%) Actually Affect UV Protection?

This is one of the most common misconceptions about window tinting.

Visible Light Transmission (VLT) measures how much visible light passes through the window, not UV radiation. These are two entirely separate measurements.

  • A dark tint (low VLT) does not guarantee high UV protection
  • A clear or lightly tinted film can still block approximately 99% of UV if engineered with UV-absorbing technology
  • Always look for a film’s UV rejection specification, not just its tint percentage

Understanding this distinction can prevent you from buying a film that looks protective but delivers very little actual UV defense.

Which Tint Types Offer the Best UV Protection?

Ceramic and Nano-Ceramic Films

These are the highest-performing options available for most drivers.

  • Use non-metallic, nano-ceramic particles embedded in the film
  • Block approximately 99% of UV radiation (UVA + UVB)
  • Provide strong infrared heat rejection without relying on metal layers
  • Do not interfere with GPS, radio, Bluetooth, or mobile signals
  • Maintain color stability and do not fade over time

Metalized Films

  • Reflect heat and UV using metallic layers
  • Can provide strong UV rejection
  • May interfere with electronic signals in some vehicles, which is a notable drawback for modern cars with integrated tech

Dyed Films

  • Primarily used for appearance and privacy at a lower price point
  • Provide basic UV reduction, but typically underperform compared to ceramic options
  • Tend to fade, purple, and degrade faster, reducing UV protection over time, even before visible deterioration is apparent

Clear UV-Blocking Films

  • Maintain the original appearance of the glass
  • High-quality versions block approximately 99% of UV
  • Ideal for windshields or where regulations limit dark tinting, giving you protection without the visible tint

Tint Types Comparison for UV Protection

Tint TypeUV ProtectionSignal InterferenceDurabilityBest For
Ceramic~99% UVNoneHighAll-around protection
MetalizedHighPossibleMediumHeat and UV rejection
DyedLow to ModerateNoneLowAppearance only
Clear Film~99% UVNoneHighInvisible UV protection

Does Factory "Privacy Glass" Block UV Rays?

Factory privacy glass is widely misunderstood, and this misunderstanding leaves many drivers under-protected.

  • Its darker appearance comes from pigments or dyes added during manufacturing
  • It is designed primarily for privacy and aesthetics, not UV protection
  • It may block most UVB and some UVA, but typically does not achieve high UVA rejection levels on its own

If you rely on factory privacy glass for UV protection, you are likely more exposed than you realize. The glass may look protective, but without a certified aftermarket film, your side and rear windows are still allowing meaningful UVA transmission. Adding a high-quality film over factory privacy glass remains the most reliable way to achieve verified, measurable protection.

Why Windshields Block More UV Than Side Windows

The difference comes down to glass construction:

Glass TypeConstructionUVA Protection
WindshieldLaminated (two layers + interlayer)Approximately 96% UVA blocked
Side/Rear WindowsSingle-layer tempered glassOften, only 60 to 70% UVA is blocked

The laminated interlayer is what gives windshields their superior UVA filtering performance. This structural difference is why drivers frequently experience more cumulative sun exposure on the arm, hand, and face closest to the side window, a pattern consistently noted in dermatological research on UV-related skin damage.

For drivers in sun-heavy climates like Charlotte, NC, where clear sunny days are common year-round, that daily side window exposure adds up faster than most people expect.

Health and Interior Protection Benefits

Skin and Eye Protection

  • UVA is the primary driver of premature skin aging and contributes directly to skin cancer risk
  • Long-term UVA exposure through glass is linked to cataracts and macular degeneration
  • The Skin Cancer Foundation specifically recommends UV-protective window film as a preventive measure
  • Drivers and passengers with frequent, prolonged vehicle exposure may experience higher cumulative UV exposure without protective film

Window tinting is not just a comfort upgrade. For daily commuters and long-distance drivers, it functions as a consistent, passive layer of UV protection that works every time you are behind the wheel, without any extra effort on your part.

Interior Preservation

UV radiation causes:

  • Fading of leather, vinyl, and fabric upholstery
  • Cracking and discoloration of dashboards and trim
  • Accelerated material degradation throughout the cabin

High-performance films are designed to help reduce UV exposure, which can contribute to slowing interior material wear over time. For vehicle owners in Charlotte, where sun intensity is high for much of the year, this is a practical consideration beyond aesthetics.

How Long Does UV-Blocking Tint Last?

Film longevity varies by type and quality.

  • Ceramic films typically last 10 years or more with proper care, and maintain their UV rejection performance throughout their lifespan
  • Metalized films can degrade over time, with a lifespan varying based on product quality and environmental conditions
  • Dyed films are the least durable, often fading or purpling within 3 to 5 years, which also reduces their UV protection over time

The key point: A degraded film does not just look worse; it protects less. If your tint is visibly fading or changing color, its UV rejection performance has likely declined as well. Replacing an aging dyed film with a certified ceramic option is one of the most cost-effective ways to restore full UV protection.

How to Verify That Your Tint Actually Blocks UV

Do not accept marketing claims at face value. Use these methods to confirm real performance.

1. UV Meter Testing

Measures actual UV transmission through the glass after installation. This is the most reliable, quantifiable method available. A good installer will demonstrate this on-site before you leave.

2. UV Test Cards

Change color when exposed to UV radiation. Useful for quick visual comparisons, though less precise than meter testing.

3. Manufacturer Certification and Test Data

Look for:

  • Documented UV rejection percentages, with a target of approximately 99%
  • Testing against recognized standards such as ISO 9050 or equivalent
  • Reputable installers should provide this documentation on request

Ask your installer for post-installation UV meter readings. A professional operation will be able to show you the numbers. If they cannot or will not, that is a signal to look elsewhere.

What About Heat Reduction and Fuel Efficiency?

High-performance ceramic films also reject infrared radiation, which:

  • Lowers cabin temperature noticeably on sunny days
  • Improves comfort without over-relying on air conditioning
  • May modestly reduce AC load, though fuel efficiency gains are secondary and should not be the primary purchase driver

Heat rejection and UV rejection are related but separate specifications. A film can perform well on one and poorly on the other. Verify both independently when evaluating a film, and ask your installer for IR rejection data alongside UV rejection figures.

Window Tint Laws and VLT Limits (North Carolina)

Window tint regulations control minimum VLT levels to ensure driver visibility and road safety. Before scheduling an installation, make sure you understand what is and is not permitted in North Carolina.

Window PositionNC VLT Limit
Front Windshield Non-reflective tint permitted above the AS-1 line or the top 5 inches, whichever is longer
Front Side Windows35% VLT minimum
Rear Side & Rear Windows 35% VLT minimum for passenger vehicles (sedans, coupes, hatchbacks). No restriction for multipurpose vehicles (SUVs, vans, trucks)

Verify current regulations with the NC DMV before installation, as laws are subject to change.

A qualified installer should recommend compliant film options for every window position and provide VLT certification upon completion. If you are unsure whether your current tint is compliant, a professional can measure and document it for you.

FAQs

It blocks most UVB and some UVA, but typically does not reach high UVA rejection levels without additional aftermarket film.

Yes. High-quality, clear UV films can block approximately 99% of UV radiation while maintaining full, unaltered visibility.

In some vehicles, yes. Ceramic films avoid this issue entirely and are the better choice for modern vehicles with integrated electronics.

Request manufacturer test data showing UV rejection specifications, and ask for post-installation UV meter readings from your installer.

Yes. Reducing cumulative UVA exposure through vehicle glass can lower the risk of UV-related skin damage, premature aging, and certain eye conditions over time.

Ceramic films typically last 10 years or more. Dyed films degrade significantly faster, often within 3 to 5 years, and their UV protection declines as the film deteriorates.

How long after window tint to roll windows down

How Long after Window Tinting Can You Roll Your Windows Down? Safe Wait Times & Pro Tips

If you’re wondering how long after window tinting you can roll your windows down, the answer depends on how long the film needs to cure. Window tint needs time to set properly, and rolling your windows down too early is one of the most common ways to damage a fresh installation. Most professional installers recommend waiting at least 48 to 120 hours (2 to 5 days) before operating your windows normally. Exact timing varies based on film type, installation method, and environmental conditions, so always confirm with your installer.

This guide from Sun Stoppers Window Tinting Charlotte breaks down wait times by film type, weather conditions, and installation method, so you know exactly when it’s safe.

Table of Contents

Key Takeaways

  • Wait 48 to 120 hours (2 to 5 days) before rolling your windows down after tinting to avoid damage
  • Shorter wait times may be possible in ideal conditions, but only if your installer confirms it
  • Film type affects curing time: dyed (2 to 3 days), metalized (3 to 5 days), ceramic (3 to 7+ days)
  • Rolling windows down too early can cause peeling, creasing, or shifting, often requiring full replacement
  • Wait at least 7 days before cleaning tinted windows to protect the adhesive and ensure proper curing 

Can I Roll My Tinted Windows Down After 24 Hours?

Direct answer: Usually no, unless strict environmental and installation conditions are met.

Window tint is a thin film applied to the interior surface of vehicle glass using a pressure-sensitive adhesive. That adhesive cures through a process of moisture evaporation: water trapped beneath the film slowly escapes through the semi-permeable material. Until that process completes, the film is vulnerable to shifting, creasing, and edge lifting.

Rolling your windows down too early interrupts the curing process and can permanently damage the film. In most cases, installers recommend waiting at least 48 hours before any window operation. Curing time is not fixed and depends heavily on temperature, humidity, and film construction.

The criteria that can support a 24-hour roll-down are narrow:

  • Ambient temperature above 80°F (27°C)
  • Relative humidity below 50%
  • The express roll-down methods used by some installers are specialized installation methods that reduce curing time and may allow limited window use after 24 hours
  • No visible bubbles, haze, or soft edges at the 24-hour mark

Miss any one of these, and you risk permanent film damage and likely a voided warranty. According to industry guidelines from organizations such as the International Window Film Association (IWFA), adhesive cure times depend heavily on environmental conditions and should never be treated as a fixed universal number.

Example: In Charlotte on an 88°F dry summer day, an installer may allow limited early use, but regular operation should still follow the recommended curing window.

How Film Type and Thickness Affect Curing Time

Not all window films cure at the same rate. Film chemistry and layer density are the two primary variables.

  • Dyed tint is the thinnest and most straightforward formulation. Moisture escapes quickly through fewer layers, and most dyed films are ready for regular use within 48 to 72 hours under normal conditions.
  • Metalized tint uses reflective metallic particles embedded in the film. The denser structure slows moisture escape, pushing cure time to 3 to 5 days depending on temperature and humidity.
  • Ceramic tint is the premium category and typically has a more complex, multi-layer structure, which can result in longer curing times. The ceramic particle matrix generally requires 3 to 7 days for a full bond.
  • Safety and multi-layer films (laminated security films, UV-blocking composites) can require 7 days or longer due to the cumulative density of multiple adhesive and film layers.

A practical rule: if you’re choosing between film types and know you’ll need early-window use, discuss cure-time expectations with your installer before the job. Film selection and aftercare planning belong in the same conversation.

Does Rolling Windows Down Void Your Tint Warranty?

Yes, in most cases, rolling your windows down too early can void your window tint warranty.

Most professional installers include specific aftercare instructions as part of their warranty terms. These typically require:

  • Waiting a minimum cure period (3 to 7 days)
  • Avoiding mechanical stress (like rolling windows down)
  • Not cleaning the interior glass prematurely

If the film is damaged due to early window operation, the installer may refuse free replacement.

How Weather, Humidity, and Sunlight Change Wait Times

Does heat speed up window tint curing? Yes, higher temperatures accelerate moisture evaporation and reduce cure time. Environmental conditions are not secondary factors; they define the cure timeline.

1. Heat accelerates curing

In dry summer conditions above 85°F, adhesive moisture evaporates faster, and some films may reach adequate bond strength in as little as 24 to 48 hours. This is why summer installations in hot climates are often lower-risk for early use than the same film installed in the fall.

2. Cold and humidity extend curing significantly

At temperatures below 50°F or with relative humidity above 70%, moisture evaporation slows dramatically. In these conditions, even standard dyed films may need 10 to 14 days to cure fully, and ceramic films can take even longer.

3. Direct sunlight helps, but isn't a shortcut

Sunlight warms the glass surface and accelerates moisture evaporation, potentially shortening curing time under favorable conditions. However, it does not eliminate the need for a full cure period.

4. Temporary haze and small bubbles are normal

These are visual symptoms of moisture still working its way out. They’re not defects. In warm, dry air, they typically resolve within 3 to 7 days. In cold or humid conditions, expect up to 14 days.

Charlotte example: Summer installations with overnight lows staying above 65°F and daytime humidity below 50% are ideal curing conditions. Winter installs, especially during periods of rain, can add several days to even a standard dyed film’s timeline.

What Damage Can Premature Window Operation Cause?

The damage from rolling windows down too early isn’t always visible immediately, and that’s what makes it deceptive.

  • Peeling is the most common outcome. When a window moves up or down through the door seal before the adhesive has set, the film edge catches and lifts. Once an edge peels, the separation typically continues inward and cannot be re-adhered cleanly.
  • Creasing happens when film that hasn’t fully bonded bunches against a rubber gasket or window seal. Unlike bubbles, creases are usually permanent. The film is folded; it doesn’t flatten back out.
  • Shifting occurs when uncured adhesive allows the film to slide out of alignment. This is most visible in the corners and along the lower edge. A shifted film has a visibly uneven border and cannot be repositioned after the adhesive has partially set.
  • Voiding the warranty is the financial consequence. Most professional window tint warranties explicitly exclude damage resulting from premature window operation. Replacing a side window film installation typically costs several hundred dollars; the cost of waiting 3 to 5 days is zero.

How to Tell When Your Tint Is Fully Cured

Use this checklist rather than guessing by feel:

  • Bubbles: Small bubbles are normal in the first few days. They should shrink progressively and disappear entirely within 3 to 7 days for most films, and within 14 days for thicker ceramic or multi-layer films. Bubbles that remain flat and unchanged after 10 days are worth flagging to your installer.
  • Haze: A slight milky appearance in the first few days is normal. Haze that persists beyond 7 to 14 days, or that appears to be concentrated along edges, may indicate a bonding issue.
  • Edge adhesion: Run a fingertip gently along the edge of the film after the recommended wait period. The edge should feel flush and fixed with no movement or soft spots. Any lift or flex indicates incomplete curing.
  • Visual clarity: A fully cured film should appear optically uniform with no distortion, streaking, or visible seams from the interior.

If bubbles or haze persist well past the 14-day mark, contact your installer. Most professional shops will re-examine the installation at no charge within the warranty period.

Can You Drive Your Car After Window Tinting?

Yes, you can drive immediately after tinting, but you should keep the windows fully closed during the curing period. Driving does not affect the curing process, but rolling windows down or exposing edges to friction does.

What Sun Stoppers Window Tinting Charlotte Recommends After Installation

Sun Stoppers Window Tinting Charlotte uses the following baseline guidelines for all installations:

  • Dyed films: 48 to 72 hours before regular window operation
  • Metalized films: 3 to 5 days minimum
  • Ceramic films: 3 to 7 days before any heavy use
  • Safety and multi-layer films: 7 days or longer

Exact timelines may vary by installer, film brand, and weather conditions.

Cleaning Guidelines

Knowing how to clean tinted windows properly helps maintain the film’s clarity, adhesion, and long-term performance.

  • Do not clean interior tinted glass for a full 7 days after installation. 
  • Cleaning products, even mild ones, can penetrate the edge of an uncured film and weaken the adhesive bond before it has fully set.
  • After day 7, clean with a microfiber cloth and an ammonia-free, alcohol-based cleaner. 
  • Avoid paper towels (they leave micro-abrasions), scrubbing pads, and razor blades under all circumstances.

Need to Use Your Windows Earlier?

If you have a scheduling conflict that requires earlier window use, ask specifically about Express Roll Down options when you book your appointment. Not every film type or weather condition supports it, but it’s the right question to ask upfront rather than after installation.

Sun Stoppers serves Charlotte, NC, and the surrounding areas. Call for installer-specific guidance and warranty details before your appointment.

How to Care for Tinted Windows During and After Curing

Days 0 to 3

Keep all windows fully closed. Don’t touch or press the interior film surface. Park in shade or direct sun based on your installer’s specific recommendation for your film type.

Days 3 to 7

Monitor for bubble reduction and edge adhesion. Avoid any cleaning products on the interior glass. If you notice bubbles that appear to be growing rather than shrinking, contact your installer.

After day 7

Begin normal cleaning with a microfiber cloth and ammonia-free cleaner. A 70% isopropyl alcohol solution works well for stubborn residue without damaging the film surface.

Ongoing

Avoid razor blades, abrasive pads, and paper towels on tinted glass permanently, not just during curing. These materials scratch the film surface and degrade optical clarity over time.

Book Your Installation with Sun Stoppers Window Tinting Charlotte

Ready to protect your vehicle with professional-grade window film? Get expert installation from Sun Stoppers Window Tinting in Charlotte and avoid costly mistakes from improper curing. Contact now for a free quote, ask about Express Roll Down options, or schedule your appointment today. Serving Charlotte, NC, and surrounding areas.

FAQs

Most standard films allow normal window operation after 72 to 120 hours. Ceramic and thick multi-layer films may require 5 to 7 days. Always confirm the specific timeline with your installer based on the film type used and current weather conditions.

Yes. Sunlight and UV exposure heat the glass surface, which accelerates moisture evaporation and can shorten curing by 24 to 48 hours. However, this effect is most significant during the first 24 hours and doesn’t replace the minimum cure time for denser films like ceramic.

No. Wait at least 7 days before applying any cleaning product to interior tinted glass. Cleaning too early can introduce moisture and solvents that disrupt the adhesive before it has bonded fully.

Small bubbles typically clear within 3 to 7 days under normal conditions, and up to 14 days for thicker films. Bubbles that remain static or grow after 14 days may indicate a bonding failure. Contact your installer for a warranty inspection.