How Long Does Ceramic Coating Last? Factors Affecting Its Longevity

How Long Does Ceramic Coating Last? Factors Affecting Its Longevity

Ceramic coating lifespan ranges from 6 months to 10+ years, and the difference between those extremes is rarely the product alone. Application quality, environmental conditions, and maintenance routine determine whether a professional-grade coating reaches its full potential or fails within the first year.

In this guide, Sun Stoppers Window Tinting in Charlotte will break down every factor that determines “how long does ceramic coating last”, so you can make an informed decision and protect your investment properly.

Table of Contents

Key Takeaways

  • Ceramic coating typically lasts between 6 months and 10+ years; SiO2 concentration and application quality are the two biggest variables
  • Professional-grade coatings last significantly longer than DIY or spray options
  • Environment and driving conditions can significantly affect durability
  • Proper maintenance is essential to maximize lifespan
  • Ceramic coating does not wear all at once; it degrades gradually, and early signs are detectable if you know what to look for
  • Regular boosters and gentle washing help preserve performance and shine

How Long Does Ceramic Coating Last?

Not all ceramic coatings are created equal. The lifespan varies based on the type of product used:

  • Entry-level or spray coatings: around 6 months to 1 year
  • Consumer-grade coatings: about 1 to 3 years
  • Professional-grade coatings: 3 to 5 years or longer
  • Premium multi-layer systems: 7 to 10+ years

The chemistry behind this gap is significant. SiO2 concentration, the active bonding compound in ceramic coating, varies dramatically between product tiers.

Coating TypeSiO2 ConcentrationExpected LifespanApplication Method
Spray coating3 to 5%6 to 12 monthsDIY
Consumer-grade10 to 30%1 to 3 yearsDIY
Professional-grade50 to 70%3 to 5 yearsCertified installer
Multi-layer professional70 to 85%+7 to 10+ yearsCertified installer only

Professional coatings chemically bond to your clear coat at the molecular level, forming a semi-permanent layer, whereas consumer sprays sit on top of the surface and wash away over time. Higher SiO2 concentration produces a denser cross-linked polymer matrix, which is why professional coatings resist degradation significantly longer under the same conditions.

What Is Ceramic Coating Made Of?

Understanding what ceramic coating actually is helps explain why it lasts and why it eventually wears down.

A ceramic coating is a mixture of nanostructured silanes and siloxanes that, when applied, forms a covalent chemical bond with a vehicle’s paint or glass. This creates a protective silicon dioxide (SiO₂) layer that shields the surface from UV radiation, chemical contaminants, and environmental wear.

The curing process, cross-linking of the polymer matrix over 2 to 4 weeks, is what determines final hardness and durability. A coating that is disturbed or exposed to moisture before full cure will never reach its rated lifespan, regardless of SiO2 concentration.

Professional-grade coatings carry higher active SiO₂ concentrations and advanced resin formulas, which produce harder cure ratings (measured on the pencil hardness scale), stronger hydrophobic contact angles, and longer-lasting chemical resistance compared to consumer alternatives.

Factors That Influence Ceramic Coating Durability

1. Environmental Conditions

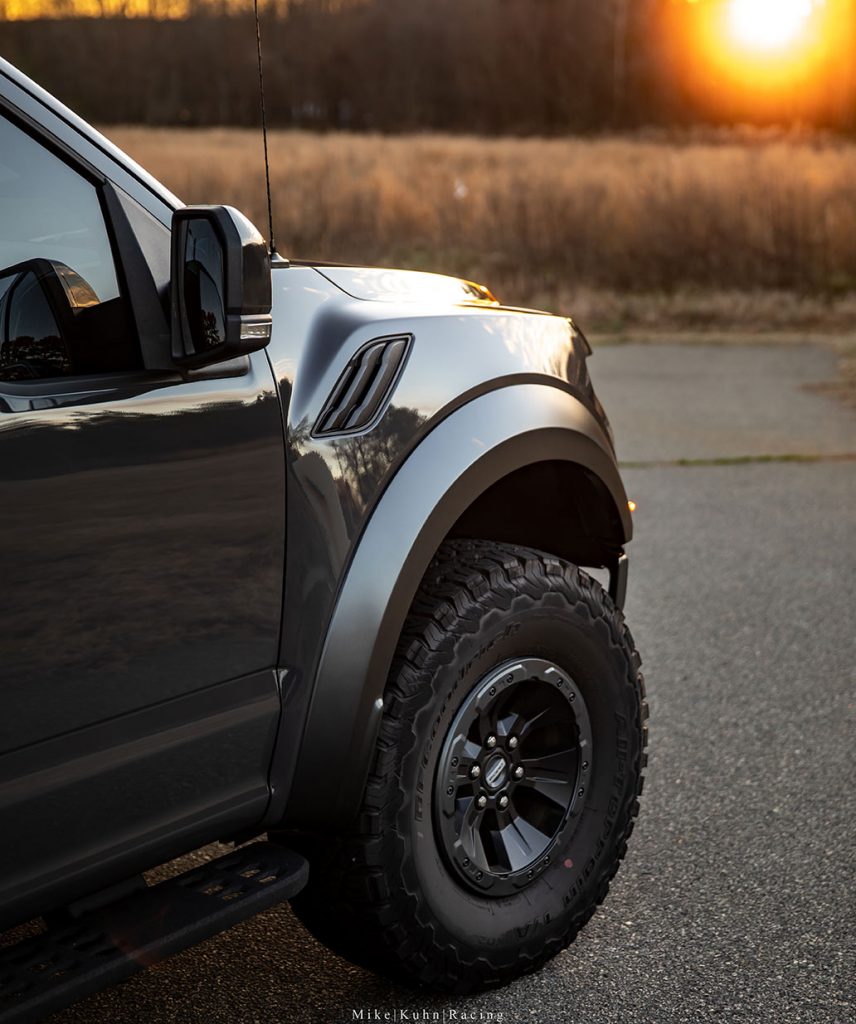
Where you live and drive has a huge impact. Vehicles exposed to intense sun, heavy rain, snow, road salt, or pollution will see faster wear. UV rays and contaminants slowly break down the coating over time.

Coastal environments introduce salt air, which accelerates surface contamination and coating breakdown. Vehicles in coastal areas typically require maintenance boosters more frequently and may see 15 to 20% shorter coating lifespan compared to inland vehicles under otherwise identical conditions.

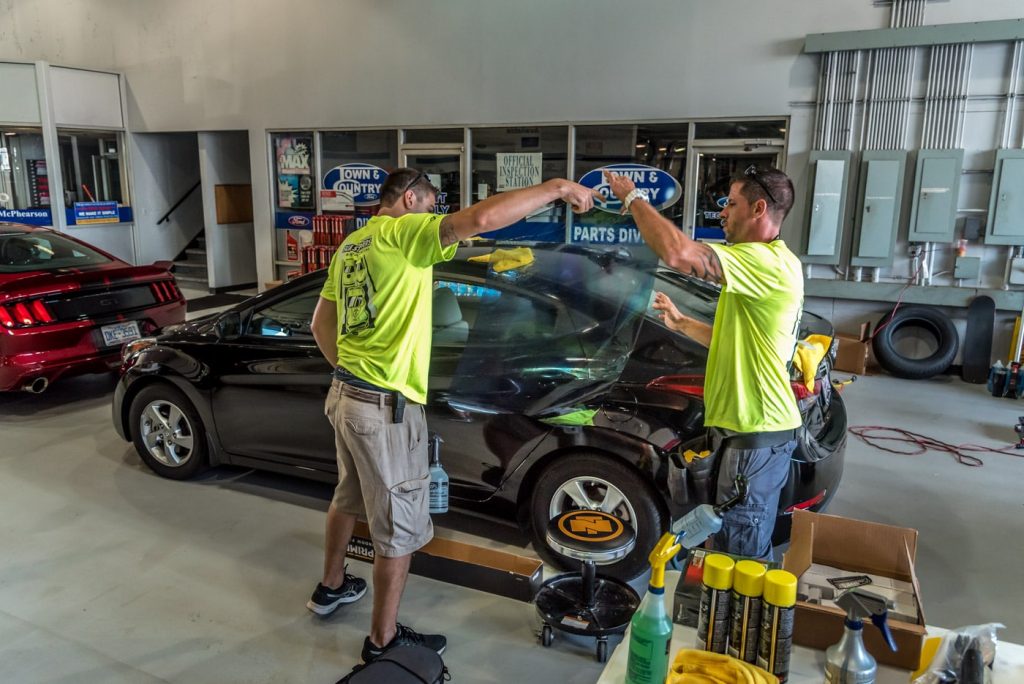
2. Application Quality

A proper ceramic coating installation involves meticulous paint correction, chemical decontamination, and precise layering. Certified technicians follow strict prep and curing protocols to ensure the coating bonds at the molecular level.

3. Number of Layers Applied

While a single layer may offer some protection, experts typically recommend two layers for maximum durability and longevity. This dual-layer approach ensures a thicker and more resilient shield against contaminants and other harmful elements.

4. Maintenance Routine

Regular washing and proper care are essential. Neglecting your vehicle allows dirt and contaminants to degrade the coating faster. Think of maintenance as protecting your protection. Every wash, every environmental exposure, and every bit of maintenance adds up to determine how long the coating lasts.

5. Product Quality

Higher quality ceramic coatings use better formulations and offer stronger resistance to chemicals, UV rays, and abrasion.

6. Driving Habits

Frequent highway driving exposes the coating to higher-velocity debris impact, increased road spray contamination, and more aggressive thermal cycling than urban or low-speed driving. Vehicles driven primarily on highways or gravel roads will typically see 20 to 30% faster coating wear on front-facing panels compared to vehicles driven mostly on clean city roads.

Maintenance Tips to Extend Ceramic Coating Life

Here are simple ways to extend the lifespan of a ceramic coating:

Wash Regularly With The Right Tools

Use microfiber mitts and soft drying towels to prevent scratches. Regular washing removes contaminants that can degrade the coating.

Use a pH-balanced ceramic shampoo

Standard car wash soaps often fall outside the safe pH range for ceramic coatings. A pH-neutral shampoo (pH 6 to 8) cleans effectively without stripping the hydrophobic layer.

Avoid Automatic Brush Car Washes

Brush contact introduces micro-scratches that thin the coating over time. A single brush car wash will not destroy a ceramic coating, but repeated use significantly reduces its lifespan.

Dry Properly After Every Wash

Always dry with a clean microfiber towel after washing. Allowing water to air-dry on the surface leaves mineral deposits that accumulate and dull the coating’s hydrophobic performance over time.

Apply a Ceramic Booster Every 3 to 6 Months

Ceramic boosters refresh the hydrophobic layer and fill microscopic gaps that develop as the coating wears. This is the single most effective maintenance step for extending coating lifespan beyond its rated period.

Park in Shade or a Covered Space When Possible

Reducing UV exposure and heat cycling slows the rate at which the coating’s protective capacity diminishes.

Signs Your Ceramic Coating Needs Renewal

The most reliable indicator is water behavior. A fully performing ceramic coating causes water to form tight, round beads that roll off the surface immediately. As the coating degrades:

  • Water beads become flatter and slower to roll, which indicates early degradation
  • Water begins to sheet across the surface without beading; coating is near the end of its life
  • Paint looks dull rather than deeply glossy; the coating gloss layer has worn through
  • Dirt and contaminants stick more easily; the hydrophobic layer is no longer effective
  • Washing feels less smooth; surface friction has increased as the coating thins

If you notice these signs before the coating’s rated lifespan, it typically indicates either a maintenance issue or a compromised application, not necessarily product failure.

Common Mistakes That Reduce Coating Lifespan

These mistakes affect long-term durability after installation, distinct from application errors.

1. Using Automatic Brush Car Washes

Repeated brush contact introduces micro-marring that gradually thins the coating from the outside in. Over time, this reduces both the visual gloss and the hydrophobic performance.

2. Using Harsh or High-pH Cleaners

Alkaline cleaners above pH 10 and acidic cleaners below pH 4 chemically attack the SiO2 layer. Even occasional use of the wrong product can strip months of lifespan from a coating.

3. Skipping Ceramic Booster Applications

A coating without periodic booster maintenance wears faster than one that is regularly refreshed. Boosters are not optional; they are part of the maintenance system the coating is designed around.

4. Letting Contaminants Sit on the Surface

Bird droppings and tree sap are acidic. Left on a ceramic coating for more than a few hours, especially in heat, they etch through the coating layer. Prompt removal is one of the most important longevity habits.

5. Applying Wax or Sealant on Top of the Coating

Wax applied over ceramic coating does not bond properly and creates an uneven barrier that traps contaminants. It does not enhance the coating; it interferes with the coating.

6. Ignoring Early Degradation Signs

Waiting until the coating has fully failed before addressing the issue results in full reapplication. Catching early degradation, flat water beading, and reduced gloss allows a booster or topcoat to restore performance without removal.

Is a Ceramic Coating Worth It?

For most vehicle owners, the answer is yes, but the ROI depends on matching the right coating tier to your situation.

A professional-grade coating is a strong investment if:

  • You plan to own the vehicle for 3+ years
  • You want to reduce long-term maintenance effort and cost
  • Paint condition and resale value matter to you
  • You drive in high-UV, high-contamination, or coastal environments

A consumer-grade coating or paint sealant may be more appropriate if:

  • You are on a lease with 2 to 3 years remaining
  • The vehicle sees heavy daily use in harsh conditions
  • The budget does not allow for professional preparation and installation

The decision framework below helps match coating choice to ownership profile:

Ownership ProfileRecommended Protection
Daily driver, 5+ year ownershipProfessional ceramic coating: strong long-term ROI
Leased vehicle, 2 to 3-year termConsumer coating or paint sealant
Collector or show carMulti-layer professional system
High-impact driving (highway, gravel)PPF on front panels + ceramic coating over top
Maximum protection, long-termFull PPF + professional ceramic coating

While the upfront cost of professional installation is higher, the reduced need for waxing, easier maintenance, and paint preservation over a multi-year period typically delivers clear value for owners who keep their vehicles.

Book Ceramic Coating in Charlotte, NC

If you’re considering ceramic coating, the most important factor is not just the product chosen but also how well it is applied.

At Sun Stoppers Window Tinting in Charlotte, our team focuses on proper prep work and high-quality coatings to deliver consistent, long-lasting results.

Book your ceramic coating service in Charlotte, NC, and give your car the protection and shine it deserves.

FAQs

Professional-grade coatings degrade gradually; no fixed reapplication schedule is needed. Apply a ceramic booster every 3 to 6 months to maintain performance. Full reapplication is typically needed every 3 to 5 years, depending on product tier and maintenance quality.

Yes, within limits. If the coating is still bonded but showing reduced hydrophobic performance, a booster or topcoat can restore function without full removal. If the coating has fully failed or was applied incorrectly, removal via machine polishing and full reapplication is required.

The water bead test is the most reliable indicator. Pour water on a horizontal panel. Tight, fast-rolling beads indicate an active coating; flat or sheeting water indicates degradation. Reduced gloss and increased dirt adhesion are secondary indicators.

Uneven wear is common. High-impact areas like the hood, front bumper, and roof degrade faster due to UV exposure and debris contact. This is why combining PPF on front panels with full-vehicle ceramic coating is often recommended for maximum longevity.

The paint returns to its base state with the clear coat directly exposed. No damage occurs from the coating wearing off, but UV exposure, oxidation, and contaminant bonding resume at the rate of unprotected paint.

PPF lasts 5 to 10 years and provides physical impact protection; ceramic coating does not. Applying ceramic coating over PPF enhances hydrophobic performance while the film handles rock chips and abrasion. For maximum longevity, the two products work best together.

How Long Does It Take to Tint Windows? Timeframes for Cars, Homes & Offices

How Long Does It Take to Tint Windows? Timeframes for Cars, Homes & Offices

Planning a window tinting appointment? You need to know how long the entire process takes. Window tinting typically takes 1 to 4 hours for cars, 2 to 8+ hours for homes, and 1 to 3+ days for commercial projects, while curing takes 2 to 7+ days, depending on the film type and weather conditions.

This guide explains “how long does it take to tint windows”, including installation time, curing duration, and removal timelines for cars, homes, and commercial buildings. Whether you’re tinting your car, home, or storefront in Charlotte, NC, you’ll find real-world timeframes and examples here.

Table of Contents

Key Takeaways

  • Window tinting takes 1 to 4 hours for cars, 2 to 8+ hours for homes, and 1 to 3+ days for commercial projects, depending on size and complexity.
  • Curing time ranges from 2 to 7+ days, with ceramic and security films requiring the longest bonding period.
  • Total project time includes installation, curing, and optional removal, which can add 30 minutes to 2+ hours if replacing old tint.
  • Film type, weather conditions, and glass complexity significantly impact timing, especially in cold or humid environments.
  • Professional installation is faster and more reliable, reducing risks like bubbling, peeling, and extended curing issues.

How Long Does It Take to Tint Windows?

Window tinting isn’t just about the installation. You’re looking at three separate timeframes: installation, curing, and sometimes removal.

  • Installation time: 0.5 to 4+ hours, depending on vehicle or property
  • Curing time: 2 to 5 days for standard films (longer for ceramic and security films)
  • Removal time: 30 minutes to 2+ hours if replacing existing tint

Window tinting duration depends on film type, glass size, adhesive curing behavior, and installation complexity.

Temperature and humidity can stretch or shrink these timeframes significantly. Your total project time equals the active installation work plus the waiting period for the film to fully bond.

How Long Does Car Window Tinting Take?

Professional car tinting usually wraps up in 1 to 4 hours, depending on vehicle type, glass complexity, and film selection.

Vehicle TypeEstimated Time
Front door windows only30 to 45 minutes
Full sedan (4-door)1.5 to 2.5 hours
SUV or crossover2 to 3.5 hours
Full-sized truck1 to 1.5 hours
Windshield tinting30 to 50 minutes
Luxury vehicle (complex seals)3 to 4 hours

A typical sedan averages around 1.5 to 2.5 hours, depending on the installer’s workflow and vehicle complexity. SUVs and crossovers take longer because of their larger window count and curved glass. Luxury vehicles with tight gaskets and complex seals can push installation to 3 to 4 hours.

DIY attempts typically take 4 to 6+ hours with no prior experience. Professional installers not only finish faster but also create cleaner edge seals that make future removal easier and reduce the risk of bubbling or peeling.

How Long Does Residential Window Tinting Take?

Residential window tinting usually takes 2 to 8+ hours, depending on the number and size of windows.

Plan on about 30 to 45 minutes per window for home installations. An average-sized house will take 2 to 4 hours, while larger properties can stretch to 3 to 8+ hours, depending on window count and size.

Here’s a real example: 20 windows at 40 minutes each equals roughly 13.5 hours of work. For larger projects, installers often divide the work across one or two days to maintain quality and accuracy.

Window count and size are your biggest time drivers. Give your installer an accurate estimate, especially for homes in areas like Ballantyne, SouthPark, or Matthews.

How Long Does Commercial and Storefront Tinting Take?

Commercial window tinting typically takes a few hours for small storefronts and 1 to 3+ days for large projects.

Small storefronts with limited glass can be finished in a few hours. Large commercial projects run 1 to 3+ days based on total square footage and installation complexity.

Variables that affect commercial tinting time include scaffolding requirements, multiple pane sizes, corporate approval processes, and security film specifications. Security film installations are thicker and often require 7+ days to fully cure and bond.

Staged installation keeps your business running with minimal disruption.

How Long Does Window Tint Take to Cure and Bond?

Window tint curing usually takes 2 to 7+ days, depending on film type and weather conditions.

Standard films cure in 2 to 5 days under normal conditions. The timeline varies by film type:

Film TypeCuring Time
Dyed film2 to 3 days
Carbon film3 to 5 days
Ceramic film5 to 7 days
Security / multi-layer film7+ days

Temperature, humidity, and sunlight all affect drying speed. Direct sunlight can accelerate the curing process and may reduce curing time under optimal conditions. Cold or humid weather can push curing out to 3 to 4 weeks.

Small water bubbles or a hazy appearance during curing are completely normal and will disappear as the adhesive bonds fully to the glass.

How Film Type Affects Installation and Curing Time

Your film choice directly affects both how long installation takes and how long curing requires.

Film TypeInstallation DifficultyCuring TimeBest For
DyedEasy2 to 3 daysBudget installs
CarbonModerate3 to 5 daysMid-range performance
CeramicHigh5 to 7 daysHeat rejection, longevity
SecurityHigh7+ daysSafety, commercial use

Thicker films take longer because the adhesive must evenly distribute and stabilize across the glass surface.

What to Expect for Removal Time and Adhesive Cleanup

Removing old window tint typically takes 30 minutes to 2+ hours, depending on film condition and window size.

  • Side windows typically take 10 to 20 minutes each
  • Rear windows with defrosters often take over an hour due to the embedded heating elements
  • Adhesive residue cleanup adds 30 to 60 minutes after the film is removed

Old or brittle film tears into small pieces instead of peeling in sheets, which significantly slows the process. Installers use heat guns or steamers to peel film cleanly. Getting the glass completely free of adhesive residue is usually the most time-consuming part of the removal process.

When Can I Roll Down or Clean Tinted Windows?

Rolling Down Windows After Tinting

Keep your vehicle windows up for at least 2 to 5 days after installation. Rolling them down too early can disrupt the adhesive bonding process and cause peeling or bubbling.

This waiting period ensures proper curing. Learn more about when to roll windows down after tinting to prevent film damage.

Cleaning Tinted Windows

Wait at least 7 days before cleaning the inside of newly tinted windows. Use a soft microfiber cloth and mild soap, and avoid ammonia-based cleaners, as they can degrade the film over time.

Learn more about how to clean tinted windows properly to avoid damage and extend film lifespan.

Washing Your Car After Tinting

Exterior washing is generally safer than interior cleaning, but avoid high-pressure water near window edges and seals for the first few days to prevent film lifting.

Pro Tip: For ceramic and security films, follow the longer end of these timelines: allow 5 to 7 days before normal use and at least 7 days before interior cleaning.

Factors That Speed Up or Delay Tinting

Window tinting time varies based on weather, film type, and installation complexity.

Factors that speed up curing:

  • Warm, dry weather
  • Direct sunlight
  • Thinner films
  • Experienced installers

Factors that delay curing:

  • Cold or humid weather (can extend curing to 3 to 4 weeks)
  • Thick or multi-layer films
  • Complex glass shapes
  • Old adhesive residue

Complex vehicle designs, including tight gaskets, may increase installation time depending on the vehicle. Removing old film or dealing with heavy adhesive buildup adds another 30 to 120+ minutes to the total project time.

DIY vs. Professional Tinting Time, Quality, and Risks

DIYProfessional
Typical time4 to 6+ hours1 to 4 hours
Edge seal qualityInconsistentClean and precise
WarrantyNoneManufacturer + installer
Risk of bubblingHighLow
Future removalMore difficultEasier

DIY tinting is significantly slower and carries a higher risk of bubbles, uneven edges, trapped moisture, and adhesive failure. Professional installation delivers faster results, proper curing, fewer defects, and longer-lasting film performance, typically backed by a manufacturer and installer warranty.

How to Prepare Before Your Tint Appointment

For Your Vehicle

  • Remove personal items and large clutter from the interior
  • Clean interior glass if your installer requests it before arrival
  • Park in shade unless the installer asks for sun exposure to accelerate curing
  • Provide clear parking access, especially important for mobile installs in areas like Ballantyne or Mint Hill

For Your Home

  • Clear window sills and remove curtains, blinds, or furniture blocking window access
  • Unlock all windows that need tinting before the installer arrives
  • Provide an accurate window count and measurements in advance for a realistic time estimate

Allocate a buffer of 30 to 60 minutes above the quoted installation time for any unexpected complexity. Confirming all details in advance (film type, VLT, and arrival time) avoids delays on the day of your appointment.

Book Your Window Tint Service Today

Ready to get your windows tinted in Charlotte? Sun Stoppers Window Tinting in Charlotte provides professional auto, residential, and commercial tinting using high-performance XPEL PRIME window films and experienced installers who understand Charlotte’s climate and North Carolina tint laws.

Most car tint jobs are completed within 1.5 to 2.5 hours. Availability for ceramic tint installations varies by schedule and demand, so earlier booking is recommended.

Request your tint quote today to lock in your preferred appointment time before availability fills up.

FAQs

Wait at least 2 to 5 days before rolling vehicle windows down after tinting. Rolling them down too early can cause peeling or bubbling before the adhesive fully bonds to the glass.

Professionals typically finish in 1 to 4 hours. Sedans average 1.5 to 2.5 hours. Larger vehicles or complex glass shapes, such as luxury vehicles with tight seals, may extend installation time to 3 to 4 hours.

Yes. Ceramic film is thicker and requires more precise trimming during installation. It also needs 5 to 7 days to fully cure, compared to 2 to 3 days for standard dyed film. The longer cure time is necessary for the adhesive to bond evenly across the glass surface.

Yes. Cold or humid weather can extend curing to 3 to 4 weeks. Warm temperatures and direct sunlight help accelerate the process and can shave 1 to 2 days off the standard curing window.

Removal varies from 30 minutes to 2+ hours depending on film age, window size, and adhesive condition. Older or brittle films take longer because they tear apart during removal instead of peeling in clean sheets.

Wait at least 7 days before cleaning interior glass. Exterior washing is acceptable sooner, but avoid high-pressure jets near window seals for the first few days. Never use ammonia-based cleaners on tinted windows.

Plan on 30 to 45 minutes per window. An average home takes 2 to 4 hours. Larger properties with 15 or more windows may require the work to be split across two days to maintain installation quality.

Complete Guide: How to Apply Ceramic Coating to Your Car

Complete Guide: How to Apply Ceramic Coating to Your Car

Your car’s paint is one of the first things people notice and also one of the hardest parts to protect, especially in Charlotte’s hot sun and humid weather. This guide from Sun Stoppers Window Tinting in Charlotte will walk you through how to apply ceramic coating properly so you can protect your vehicle and get long-lasting results.

Table of Contents

Key Takeaways

  • Ceramic coating creates a chemically bonded protective layer, not a surface film like wax
  • Paint correction before application determines 80% of the final result
  • The process requires decontamination, polishing, IPA prep, controlled application, and proper flash timing
  • Temperature (60 to 80°F) and humidity (40 to 60% RH) directly affect bonding quality
  • DIY coating is possible but carries a significant risk of high spots, streaking, and poor adhesion
  • Professional-grade coatings last up to 5 years; consumer-grade coatings average 1 to 2 years
  • Ceramic coating does not replace Paint Protection Film (PPF); they serve different functions

What Is Ceramic Coating?

Ceramic coating is a liquid SiO2 (silicon dioxide) polymer that forms a covalent chemical bond with your vehicle’s clear coat. Unlike wax or sealant, which sit on top of the paint surface, ceramic coating integrates at a molecular level, becoming a semi-permanent extension of the clear coat itself.

Once cured, the coating creates a surface with:

  • A hardness rating of typically up to 9H on the pencil hardness scale
  • Hydrophobic contact angles exceeding 100 to 110 degrees on professional-grade products
  • Chemical resistance against pH levels from approximately 2 to 11
  • UV-blocking properties that reduce paint oxidation over multi-year periods

This is why ceramic coating behaves fundamentally differently from any wax or sealant, and why the application process is significantly more demanding.

Benefits of Ceramic Coating

When applied correctly to properly prepared paint, ceramic coating delivers measurable, long-term advantages:

Scratch Resistance

Protects against light swirl marks and micro-scratches caused by washing and daily driving.

Note: Ceramic coating reduces surface marring; it does not protect against rock chips or deep scratches. For impact protection, Paint Protection Film (PPF) is the correct solution.

Hydrophobic Protection

Water beads tightly and rolls off the surface at high contact angles, carrying contaminants with it. This significantly reduces the frequency and effort required for maintenance washes.

UV Ray Blocking

Prevents paint oxidation and fading caused by prolonged UV exposure. Particularly relevant in high-UV environments where clear coat degradation accelerates significantly without protection.

Deep Gloss Finish

Adds a mirror-like, wet-look shine that enhances paint depth and clarity. The visual result is heavily influenced by paint correction quality; coating amplifies whatever condition the paint is in when applied.

Easier Cleaning

Dirt, bird droppings, and road grime rinse off with significantly less effort than untreated paint. Contaminants are less likely to bond to the hydrophobic surface.

Long-Lasting Results

Professional-grade coatings last 3 to 5 years with proper maintenance, far outlasting wax (4 to 8 weeks) or paint sealants (6 to 12 months).

Tools and Materials You Will Need

A controlled environment and quality materials are non-negotiable for a successful application.

Washing & Decontamination

  • pH-neutral car wash soap and microfiber wash mitt
  • Iron remover/fallout decontamination spray
  • Clay bar or clay mitt
  • Tar remover (if needed)

Paint Correction

  • Dual-action or rotary polishing machine
  • Cutting compound and finishing polish
  • Foam and microfiber cutting/finishing pads

Surface Preparation

  • Isopropyl alcohol (IPA) 70 to 99% or dedicated panel prep solution
  • Clean microfiber wipe-down towels

Coating Application

  • Professional-grade SiO2 ceramic coating (such as XPEL FUSION PLUS)
  • Suede or foam applicator pads
  • High-quality microfiber leveling towels
  • Nitrile gloves
  • Bright inspection lighting (LED or halogen)

Environment

  • Indoor space with temperature control: 60 to 80°F (15 to 26°C)
  • Humidity control: 40 to 60% RH
  • Dust-free or dust-minimal conditions

Why environment matters: High humidity causes the coating to flash unevenly. High temperatures cause it to flash too quickly, leaving high spots before you can level. Both conditions are common challenges in hot, humid summers, which is exactly why professional installations are performed in climate-controlled bays.

How Ceramic Coating Is Applied: Step-by-Step

Applying ceramic coating correctly requires patience, attention to detail, and controlled conditions. Every step below directly affects the adhesion, appearance, and longevity of the final coating.

Step 1: Thorough Wash and Decontamination

Goal: Remove all surface and embedded contamination before any correction begins.

Start with a thorough two-bucket hand wash to remove surface dirt. Then:

  1. Apply iron remover and allow it to dwell; purple/red color change indicates iron particle dissolution
  2. Rinse thoroughly
  3. Clay bar or clay mitt the entire vehicle to remove bonded contaminants (industrial fallout, tar, tree sap residue) that washing cannot remove
  4. Final rinse and dry with a clean microfiber

Why this matters: Any contamination left on the surface will be trapped under the coating permanently. Iron particles in particular can cause paint discoloration over time if coated over.

Step 2: Paint Correction and Surface Refinement

Goal: Achieve the best possible paint condition before locking it in with coating.

This is the most labor-intensive and most important step. Ceramic coating does not hide defects; it magnifies them under gloss. Swirl marks, oxidation, water spots, and fine scratches must be addressed here.

The correction process:

  • Inspect paint under strong LED or halogen lighting at multiple angles
  • Machine polish with an appropriate compound for defect severity; light swirls require a finishing polish; heavier oxidation requires a cutting compound
  • Work panel by panel, wiping residue after each pass
  • Re-inspect under lighting before moving to the next panel

Industry insight: In professional detailing, the coating itself often contributes only 20 to 30% of the final visual result. The remaining 70 to 80% comes from the quality of paint correction performed beforehand.

Step 3: Panel Preparation (IPA Wipedown)

Goal: Remove all polish oils, residue, and surface contaminants immediately before coating.

Wipe each panel with IPA solution or dedicated panel prep using clean, folded microfiber towels. Work one panel at a time and coat immediately after prep. Do not allow dust or oils to resettle on prepped panels.

This step is frequently skipped in DIY applications and is a primary cause of coating adhesion failures.

Step 4: Controlled Application

Goal: Apply an even, thin layer of coating across each panel without missing sections or over-applying.

  • Apply 3 to 5 drops of coating onto a suede applicator pad
  • Work in small cross-hatch sections (approximately 2×2 feet) for even coverage
  • Use light, overlapping passes; do not apply heavy pressure
  • Work panel by panel in a logical sequence (roof → hood → trunk → doors → lower panels)
  • Monitor flash time continuously; coating begins to flash within 1 to 3 minutes, depending on temperature and humidity

Critical: Never apply ceramic coating in direct sunlight. UV exposure accelerates flash time unpredictably and causes uneven curing across panels.

Step 5: Flash and Level

Goal: Remove excess coating at precisely the right moment; before it hardens, but after it has flashed.

  • Watch for the coating to develop a rainbow-like iridescence. This indicates it is ready to level
  • Use a clean, soft microfiber leveling towel to wipe off excess in straight lines
  • Flip the towel frequently; a saturated towel will smear the coating rather than remove it
  • Inspect the panel under lighting immediately after leveling for high spots or streaks

Timing is everything here. Waiting too long causes high spots that require machine correction to remove. Moving too fast removes the coating before it has properly flashed.

Step 6: Curing and Final Inspection

Goal: Allow proper initial cure in a controlled environment and verify a flawless finish.

  • Keep the vehicle indoors with climate control for a minimum of 12 to 24 hours
  • Inspect every panel under strong lighting at multiple angles for high spots, streaking, or missed sections
  • Address any imperfections within the correction window (typically within the first few hours)
  • Do not expose the vehicle to moisture, dust, or direct sunlight during initial cure

Step 7: Post-Application Care

Goal: Protect the coating during the full cure period and establish long-term maintenance habits.

  • Keep dry for 48 to 72 hours minimum after application
  • No washing for 7 days
  • Hand wash only with pH-neutral shampoo for the first 30 days
  • Full cure completes over 2 to 4 weeks
  • Apply XPEL-recommended maintenance spray periodically to extend coating performance

How Long Does Each Step Take? (Time Breakdown)

This section answers one of the most common questions before booking and sets realistic expectations.

StepTime Estimate
Wash & Decontamination1 to 2 hours
Paint Correction (light)2 to 4 hours
Paint Correction (heavy)4 to 8+ hours
IPA Panel Prep30 to 45 minutes
Coating Application1 to 2 hours
Flash & LevelingIncluded above
Initial Cure (indoor)12 to 24 hours
Total (light correction)5 to 8 hours
Total (heavy correction)10 to 16+ hours

Why it takes this long: A rushed ceramic coating application is worse than no coating; defects get sealed in, adhesion is compromised, and correction afterward requires full removal. Professional detailers typically schedule full-day appointments for this reason.

Ceramic Coating vs. Other Paint Protection Options

Protection TypeDurabilityUV ProtectionHydrophobic EffectFinish Appearance
Ceramic Coating2 to 5+ yearsExcellentStrongDeep, mirror-like gloss
Paint Protection Film5 to 10 yearsExcellentModerateNatural finish
Carnauba Wax4 to 8 weeksLowLightWarm shine
Paint Sealant6 to 12 monthsModerateModerateBalanced gloss
No ProtectionNoneNoneNoneFades over time

Key Insight: Ceramic coating and PPF are complementary, not competing. PPF protects against physical impact (rock chips, road debris). Ceramic coating provides chemical resistance, UV protection, and hydrophobic performance. The highest level of protection combines both: PPF on high-impact areas with ceramic coating applied over the top.

Can You Apply Ceramic Coating Yourself? Honest Assessment

Most guides either oversell DIY or dismiss it entirely. Here is an honest breakdown.

DIY ceramic coating is technically possible if:

  • You have access to an indoor, climate-controlled space
  • You are willing to invest in proper paint correction tools
  • You have experience with machine polishing
  • You can source a quality consumer-grade product

DIY ceramic coating carries a significant risk if:

  • You are working outdoors or in a garage without temperature/humidity control
  • You skip paint correction (the most common DIY shortcut)
  • You are using a cheap consumer kit with a low SiO2 concentration
  • You have never worked with fast-flashing products before

The honest reality: Consumer-grade ceramic coatings are formulated to be more forgiving, but they also deliver significantly less durability (typically 1 to 2 years vs. 3 to 7 years for professional products). The gap in results between a well-executed professional application and a DIY application is substantial and difficult to reverse without full paint correction.

Common Mistakes That Reduce Coating Performance

Many DIY applications fail due to avoidable errors:

  1. Skipping Paint Correction: Ceramic coating seals defects permanently; swirl marks and oxidation become more visible under gloss, not less. Correction is not optional; it determines the final result.
  2. Applying Coating in Direct Sunlight: Heat causes the coating to flash in seconds, leaving high spots before you can level. Always apply indoors in a temperature-controlled environment.
  3. Using Low-Quality Products: Lower SiO2 concentration means softer cure, weaker hydrophobic performance, and a 1- to 2-year lifespan instead of 3 to 7. Hours of prep work wasted on an inferior product.
  4. Improper Leveling Timing: Too early removes coating before it flashes. Too late leaves hardened high spots requiring machine correction. Watch for rainbow iridescence on the panel; that is your level signal.
  5. Exposing the Car to Water Too Soon: Moisture within the first 48 to 72 hours disrupts molecular bonding. Water spots during early curing can bond into the surface permanently. No water for 48 hours, no washing for 7 days.
  6. Applying Wax or Detailers During Cure: Any product applied during the 2- to 4-week cure window blocks cross-linking, reducing hardness and longevity. Nothing on the paint until full cure is confirmed.

Avoiding these mistakes is essential for achieving professional results.

Why Professional Ceramic Coating Matters

Professional installation provides advantages that go beyond product access:

1. Paint Correction Quality

Professionals identify defects that are invisible without proper lighting and correct them before they are permanently sealed in.

2. Controlled Application Environment

Indoor climate-controlled bays eliminate the temperature and humidity variables that cause high spots, uneven flashing, and adhesion failures.

3. Professional-Grade Product Access

Products such as XPEL FUSION PLUS are available exclusively through certified installers and offer significantly higher SiO2 concentrations, harder cure ratings, and longer warranty periods than consumer alternatives.

4. Warranty Coverage

Professional installations through certified XPEL installers include manufacturer-backed warranty protection, something no DIY kit can provide.

5. Correction, if needed

If something goes wrong, professional installers have the tools and expertise to correct application errors. DIY mistakes often require full paint correction to fix.

Book Your Ceramic Coating in Charlotte, NC

If you want to protect your vehicle and maintain a high-gloss finish for years, Sun Stoppers Window Tinting in Charlotte is here to help.

Our team delivers professional ceramic coating in Charlotte, NC, using advanced products and proven techniques to ensure long-lasting protection and a flawless appearance.

Contact us today to schedule your ceramic coating consultation and get a customized solution for your vehicle.

FAQs

Professional-grade coatings last up to 5 years, depending on the product, application quality, and maintenance routine. Consumer-grade DIY coatings typically last 1 to 2 years. Regular maintenance washes with pH-neutral products and periodic use of a coating maintenance spray significantly extend the lifespan.

Yes. Ceramic coating bonds to most exterior surfaces, including paint, glass, wheels, plastic trim, and bare metal. It is compatible with gloss, matte, and satin finishes, though matte and satin finishes require specific matte-safe coating formulations to preserve the finish texture.

No. Ceramic coating reduces light swirl marks and micro-marring from washing. It provides no meaningful protection against rock chips, deep scratches, or physical impacts. Paint Protection Film (PPF) is the appropriate solution for impact protection.

Use pH-neutral shampoo, avoid automatic brush car washes, rinse bird droppings and tree sap promptly (especially during the cure period), and apply a ceramic coating maintenance spray every 3 to 6 months to refresh the hydrophobic layer.

Cost varies based on vehicle size, current paint condition, correction needed, and coating tier selected. A vehicle requiring heavy paint correction before coating will cost significantly more than one in excellent condition. A professional assessment provides the most accurate estimate for your specific vehicle.

Yes, and this is actually the recommended approach for maximum protection. Applying ceramic coating over PPF enhances the film’s hydrophobic performance and makes it easier to clean, while the PPF underneath handles physical impact protection.

What Is Paint Protection Film? A Complete Guide for Car Owners

What Is Paint Protection Film? A Complete Guide for Car Owners

Paint protection film (PPF), often called clear bra, is one of the most comprehensive ways to protect a vehicle’s paint from real-world damage. However, not all PPF is the same, and understanding how it works, where it should be applied, and whether it’s worth the investment requires more than a basic overview.

In this guide from Sun Stoppers Window Tinting in Charlotte, you’ll learn what paint protection film is, how it works, and whether it’s the right investment for your vehicle.

Table of Contents

Key Takeaways

  • Paint protection film (PPF) is a transparent urethane layer that protects against chips, scratches, and environmental damage
  • It uses a multi-layer structure to absorb impacts and preserve the original paint
  • Self-healing technology allows minor scratches to disappear with heat
  • PPF provides significantly more impact resistance than ceramic coatings or wax
  • Installation quality plays a major role in long-term performance

What Is Paint Protection Film?

Paint protection film (PPF) is a clear, flexible material made from thermoplastic polyurethane (TPU) that is applied directly to a car’s painted surfaces. Its main purpose is to protect against:

  • Rock chips from highway driving
  • Scratches and swirl marks
  • Road debris and sand abrasion
  • Bug splatter and bird droppings
  • UV exposure and oxidation

Unlike wax or ceramic coatings, which sit on the surface and mainly improve appearance, PPF provides physical protection by absorbing impact before it reaches the paint. Most modern PPF is nearly invisible, meaning it protects the vehicle without changing its original look.

For a full breakdown of how PPF blocks UV radiation and extends paint lifespan, see our PPF UV protection guide.

How Does Paint Protection Film Work?

Paint protection film works through a multi-layer structure designed to absorb impact and repair minor surface damage. A typical PPF system includes:

  • Topcoat layer: A self-healing elastomeric surface that repairs light scratches with heat
  • TPU core layer: Absorbs and disperses impact energy from debris
  • Adhesive layer: Bonds securely to the paint without causing damage
  • Release liner: Removed during installation

When debris strikes the surface, the TPU layer spreads the force across the film rather than allowing it to penetrate the paint.

For light scratches, the topcoat reacts to heat from sunlight or warm water, allowing the material to return to its original shape.

Where Is Paint Protection Film Applied?

PPF is not always applied to the entire vehicle. Most installations focus on high-impact areas.

Common application zones include:

  • Front bumper
  • Hood (partial or full)
  • Side mirrors
  • Fender edges
  • A-pillars
  • Door edges and door cups
  • Rocker panels

The right coverage depends on your driving habits, vehicle type, and budget. Charlotte drivers who use I-77 or I-485 regularly are especially likely to benefit from full front-end coverage due to highway debris exposure.

Types of Paint Protection Film

Not all PPF is the same. Options vary based on coverage, finish, and quality.

Coverage Options

  • Partial front: Covers high-impact areas like the hood and bumper
  • Full front: Protects the entire front end
  • Full wrap: Covers all painted surfaces

Finish Options

  • Gloss PPF: Maintains or enhances shine
  • Matte PPF: Creates a satin or matte appearance
  • Colored PPF: Adds both protection and a custom look

Film Quality

Higher-quality films offer better clarity, longer lifespan, and improved resistance to yellowing and peeling. XPEL ULTIMATE PLUS is among the most commonly installed premium films in Charlotte for drivers who want long-term optical clarity and self-healing performance.

PPF vs. Vinyl Wrap vs. Ceramic Coating

It’s important to understand how PPF compares to other popular options:

FeaturePPF (Paint Protection Film)Vinyl WrapCeramic Coating
Main PurposePhysical paint protectionColor/style changeSurface enhancement
Impact ProtectionYes, protects against rock chips & debrisMinimalNone
AppearanceClear or slight finish enhancementWide range of colors & finishesEnhances gloss
Self-HealingYes (on most premium films)NoNo
HydrophobicYesLimitedYes
Durability5 to 10 years3 to 5 years2 to 5 years

Many car owners choose to combine PPF with ceramic coating for both protection and easier maintenance.

How Is Paint Protection Film Installed?

Below is a step-by-step guide on how to install PPF to ensure long-lasting protection and a flawless result.

Step 1: Clean and Prepare the Surface

The vehicle is thoroughly washed and decontaminated, followed by paint correction to remove imperfections.

Step 2: Cut and Position the Film

The PPF is pre-cut or custom-trimmed, then applied using a slip solution for precise alignment.

Step 3: Apply and Secure the Film

The installer uses a squeegee to remove water and air bubbles, ensuring full adhesion to the paint.

Step 4: Heat and Final Inspection

Heat is applied to seal edges and contours, followed by a detailed inspection for a flawless finish.

How Long Does Paint Protection Film Last?

High-quality PPF installed by professionals typically lasts between 5 and 10 years. Its lifespan depends on:

  • Driving conditions
  • Climate and UV exposure
  • Maintenance habits
  • Quality of film and installation

In Charlotte’s climate, where UV levels are often high during the spring and summer months, proper film selection and maintenance are especially important for maximizing lifespan.

Common PPF Problems and Failure Modes

While PPF is highly durable, it is not immune to issues, especially with poor materials or installation.

Common problems include:

  • Yellowing over time
  • Peeling or lifting edges
  • Adhesive failure
  • Visible stretch marks from improper installation
  • Reduced self-healing performance

Most of these issues can be avoided by choosing a reputable installer and high-quality film.

How to Maintain Paint Protection Film

Proper maintenance helps extend both lifespan and appearance.

Recommended care:

  • Wash regularly using pH-neutral shampoo
  • Avoid harsh chemicals and abrasive tools
  • Dry with microfiber towels
  • Avoid high-pressure water on edges
  • Inspect periodically for lifting or damage

Suggested maintenance schedule:

  • Weekly or bi-weekly wash
  • Every 6 months: inspection and decontamination
  • Annually: professional check if needed

Charlotte vehicles are especially exposed to pollen, road tar, and construction fallout from April through June. A decontamination inspection every 3 to 4 months is recommended for these conditions. For full decontamination and clay bar guidance specific to PPF, see our PPF clay bar maintenance guide.

How Much Does Paint Protection Film Cost?

The cost of PPF varies depending on coverage, vehicle size, and installation quality.

Coverage TypeTypical Price Range
Partial Coverage$500 to $1,000
Front-End Protection$1,500 to $2,500
Full Vehicle Wrap$4,000 to $7,000+ (varies based on vehicle size, film type, and installer)

While the upfront cost is higher than options like ceramic coating, PPF can help avoid expensive repainting, especially on high-impact areas like the hood and bumper. For many owners, the long-term savings justify the investment.

Is Paint Protection Film Worth It?

Paint protection film is not necessary for every vehicle, but it provides strong value in the right situations.

SituationPPF Worth It?
New or high-value vehicleYes, strong case for full or front-end coverage
Daily highway driving (Charlotte area)Yes, high debris exposure justifies investment
Long-term ownership (5 years or more)Yes, the cost of PPF is typically lower than one repaint
Older vehicle or short-term ownershipLess likely, ROI less clear
Low-usage or garaged vehicleOptional, lower exposure reduces urgency

For most Charlotte drivers who park outdoors and use highways regularly, PPF on the front end can help offset repaint costs over time by preventing rock chip damage and UV-related wear.

Book Paint Protection Film in Charlotte, NC

If you want to protect your vehicle from everyday damage while keeping it looking brand new, paint protection film is one of the most effective protection options available. Sun Stoppers Window Tinting in Charlotte provides professional paint protection film services, using high-quality materials and expert installation techniques to deliver a flawless finish.

Contact us today to schedule your appointment and give your vehicle the protection it deserves.

FAQs

Paint protection film is typically made from thermoplastic polyurethane (TPU), a flexible and durable material designed to absorb impacts and resist scratches. Premium films like XPEL ULTIMATE PLUS also include a self-healing elastomeric topcoat and UV inhibitor system.

Yes. When installed correctly by a professional, PPF can be safely removed without harming the original paint. Improper removal, especially on cold film, can leave adhesive residue. Professional removal using a steamer is the recommended approach.

No. Most PPF is optically clear and nearly invisible after installation. Some options can enhance gloss or create a matte finish. XPEL ULTIMATE PLUS maintains optical clarity for the duration of its warranty period.

Wash regularly using pH-neutral shampoo, avoid harsh chemicals and abrasive tools, and apply a PPF-safe sealant every 6 to 12 months. Avoid high-pressure water directly on edges.

For vehicles driven regularly in high-debris environments like Charlotte highways, PPF on the front end can help offset repaint costs over time by preventing rock chip damage and UV fading. The ROI is strongest on new or high-value vehicles with long-term ownership plans.

Yes. Premium PPF is designed to block a high percentage of UV radiation, helping prevent paint fading, oxidation, and clear coat degradation.

PPF is a clear protective film designed to shield paint from physical damage and UV exposure. Vinyl wrap is primarily a cosmetic product used to change a vehicle’s color or finish. PPF provides significantly stronger impact protection than vinyl wrap.

Minor surface scratches in the PPF topcoat can self-heal when exposed to heat, whether from sunlight or a heat gun. Deeper scratches that penetrate through the film to the paint require professional assessment. The self-healing capability is one of the primary advantages of premium TPU-based films like XPEL.

How Much Vinyl to Wrap a Car?

How Much Vinyl to Wrap a Car?

When calculating how much vinyl to wrap a car, even small miscalculations can lead to wasted material or unexpected costs. Whether you’re planning a full color change or a custom design, understanding real-world material usage is essential to getting it right the first time.

This guide from Sun Stoppers Window Tinting in Charlotte breaks down actual vinyl requirements by vehicle type, the factors that drive material usage up or down, cost expectations, and how to build a reliable estimate, based on real installation experience.

Table of Contents

Key Takeaways

  • Most full car wraps require 55 to 100 linear feet of vinyl (sold on 5-foot-wide rolls)
  • Vehicle shape, not just size, is often the bigger driver of material usage
  • Always order 10 to 25% extra; rework and trimming consume more material than most people expect
  • Cast vinyl outperforms calendered vinyl for curved surfaces and long-term durability
  • DIY installs typically require more excess material due to repositioning and trial-and-error
  • Professional installers optimize layout and cutting patterns to minimize waste

How Much Vinyl Do You Actually Need?

Vinyl wrap is sold in rolls, typically 60 inches (5 feet) wide, measured in linear feet. The total amount needed depends on vehicle size, panel complexity, and installation method – not just square footage.

Vinyl Requirements by Vehicle Type

Vehicle TypeTypical Vinyl NeededReal-World Notes
Micro Car25 to 30 ftMinimal waste, simple panels
Compact / Mini40 to 50 ftTight curves may increase usage
Coupe / Hatchback50 to 65 ftSports cars need extra bumpers
Mid-Size Sedan55 to 70 ftMost common wrap range
Full-Size Sedan65 to 80 ftLarger panels mean more coverage
Small SUV65 to 85 ftRoof height adds complexity
Large SUV / 4×480 to 100 ftBoxy shapes require more overlap
Pickup Truck75 to 95 ftBeds and edges increase waste
Van/Minivan90 to 110+ ftLarge flat panels but high surface area

Real-world examples: A Tesla Model 3 typically uses 60 to 65 ft. A Ford F-150 extended cab may need 85 to 95 ft, depending on bed configuration and cab size.

Factors That Affect Vinyl Usage

1. Vehicle Size and Panel Shape

Larger vehicles generally require more vinyl, but shape often has a bigger impact than size alone. Vehicles with sharp edges, deep contours, or aggressive curves, such as sports cars or modified builds, require extra material for stretching, repositioning, and proper adhesion.

One commonly overlooked detail is how much material complex areas like bumpers and corners consume. These sections often require multiple attempts to achieve a clean finish, which can increase total usage. In real installations, these factors can increase material needs by 10 to 20% compared to flatter vehicles.

2. Wrap Coverage Scope

Coverage TypeTypical Vinyl Required
Full wrap (all exterior panels)55 to 110+ ft, depending on vehicle
Partial wrap (doors, hood, sides)25 to 50 ft
Accent wrap (roof, hood, mirrors)10 to 25 ft
Single panel (hood or roof only)8 to 15 ft

Partial coverage is an effective way to achieve a custom look while significantly reducing material cost.

3. Vinyl Film Type: Cast vs. Calendered

This is one of the most important and most overlooked factors in both material performance and installation difficulty.

PropertyCast VinylCalendered Vinyl
Thickness2 to 2.5 mil3 to 4 mil
ConformabilityExcellent, stretches around curvesLimited, may lift on complex shapes
Durability3 to 5 years1 to 3 years
RepositionabilityHighLow
Best forFull vehicle wrapsFlat surfaces, short-term use
CostHigherLower

For full vehicle wraps, cast vinyl is the professional standard. Its thinner profile and superior conformability allow it to stretch around bumpers, mirrors, and door handles without lifting or creating stress points. Films with built-in air-release channels allow installers to reposition panels without trapping bubbles, directly reducing material waste during installation.

Calendered vinyl is stiffer and will resist conforming on curved surfaces, increasing the likelihood of lifting edges and rework, which increases total material consumption.

4. Installation Technique

Even with accurate estimates, the vinyl wrapping installation technique determines real-world material usage:

  • Inlaid vs. overlapping edges: inlaid (tucked) edges use slightly more material but produce a cleaner, longer-lasting result
  • Post-heating: proper heat application allows vinyl to conform without overstretching, preserving material integrity
  • Squeegee pressure and angle: incorrect technique causes micro-tears and bubbling that require section redos
  • Panel alignment: misalignment on one panel can require redoing adjacent sections

Professional installers pre-plan cut patterns to maximize yield from each roll, reducing waste compared to unplanned cutting.

5. Design Complexity

Simple color wraps are the most efficient. However, custom designs can increase material requirements due to:

  • Pattern alignment across panels
  • Multi-layer graphics
  • Panel reprints for consistency

More complex wraps often require additional vinyl to ensure proper alignment and visual consistency, especially across large or highly visible panels.

6. Installer Experience

DIY installs consistently use more material than professional installs – not because of poor planning, but because repositioning, rework, and trial-and-error consume excess vinyl that experienced installers avoid. Expect to add 15 to 25% extra buffer for DIY projects.

Types of Vinyl Wrap Film

Understanding film finish helps set realistic expectations for both appearance and installation difficulty.

Finish TypeLookHandling Notes
GlossMirror-like shineEasiest to install, most forgiving
MatteFlat, non-reflectiveShows installation errors more readily
SatinBetween gloss and mattePopular for luxury vehicles
Carbon fiberTextured, 3D appearancePattern matching required
Chrome/mirrorHigh-impact reflectiveMost difficult to install, highest waste
Color-shift / chameleonChanges hue with viewing angleRequires careful directional alignment
Textured (brushed metal, etc.)Directional grainGrain direction must align across panels

Chrome and color-shift films require the most excess material due to the precision needed for directional consistency and the difficulty of rework on misaligned sections.

How Much Does Vinyl Wrap Cost?

Material quantity is one cost variable – film type, finish, and labor are the others.

Cost ComponentTypical Range
Material only (standard cast film)$600 to $1,200
Material only (premium/specialty film)$1,200 to $2,500+
Professional installation (full wrap)$2,500 to $5,500+
DIY total cost (material + tools)$700 to $1,800

Premium finishes such as matte, satin, chrome, and color-shift cost more per linear foot and require more careful handling. First-time DIY setups should also budget $100 to $300 for tools: heat gun, felt squeegees, slip solution, cutting tape, and knifeless tape.

DIY vs. Professional Installation

FactorDIYProfessional
Material waste buffer needed15 to 25%10 to 15%
Installation time2 to 5 days1 to 2 days
Risk of bubbles / lifting edgesHigherLower
Finish consistencyVariableConsistent
Film warranty validityMay be voidedMaintained

DIY wrapping is achievable, but the learning curve is steep. The most common failure points are insufficient surface decontamination before installation, skipping post-heat on edges and recessed areas, and over-stretching film on compound curves, which causes premature lifting.

If going the DIY route, use a cast film with air-release channels to give yourself maximum repositionability and reduce wasted sections.

How to Estimate Vinyl for Your Car

Follow this process for a reliable estimate:

Step 1: Identify your vehicle category from the table above and note the base footage range.

Step 2: Adjust upward for complexity:

  • Sports car / aggressive body kit: +10 to 15%
  • Chrome or color-shift film: +15 to 20%
  • Custom pattern / graphic wrap: +10 to 20%
  • DIY installation: +15 to 25%

Step 3: Add your buffer to the adjusted total.

Example: A mid-size sedan needs around 65 ft as a base. Add 20% for DIY installation, which brings it to about 78 ft. Round up and order 80 ft to be safe.

Step 4: Verify roll width. Most professional wrap films come in 60-inch-wide rolls. Some specialty films come in 54-inch rolls – adjust your calculations accordingly.

Book Vinyl Wrapping Near Me Today

If you want a clean, consistent finish without the guesswork, working with professionals is the most efficient approach.

Ready to upgrade your vehicle’s look? Book a Custom Vinyl Wrap in Charlotte, NC with Sun Stoppers Window Tinting in Charlotte and get expert guidance tailored to your vehicle and design goals.

FAQs

Most vehicles require between 55 and 100 linear feet of 60-inch-wide vinyl, depending on size, panel complexity, and film type. Compact cars fall toward the lower end; full-size SUVs and trucks toward the upper range.

For compact cars and small coupes, 50 feet may be sufficient, but it leaves very little margin for error. For anything larger than a compact, 50 feet is likely to run short. Always order extra.

Professionals typically add 10 to 15% to their base estimate. DIY installers should add 15 to 25% to account for repositioning, trimming, and rework. Having excess material is always more cost-effective than stopping mid-install to wait for a new roll.

Yes, but it requires proper tools, the right film type, thorough surface preparation, and patience. Mistakes on compound curves and recessed areas are the most common points of failure in DIY wraps. First-time installers should practice on flat panels before tackling bumpers or door handles.

Vinyl wrap provides moderate protection against surface contamination, UV fading, and light abrasion. It does not offer the same level of impact and scratch resistance as paint protection film (PPF). For maximum paint protection, PPF on high-impact zones combined with a color-change vinyl wrap is the most comprehensive approach.

Quality cast vinyl removed within its rated lifespan, from properly cured paint, should not damage the surface. Wrapping left beyond its rated lifespan or applied over poorly adhered paint can cause adhesive transfer or paint lifting during removal.

Where Can I Get My Windows Tinted Near Me?

Where Can I Get My Windows Tinted Near Me?

If you’re wondering where you can get your windows tinted near you in Charlotte, NC, there are plenty of good options, from local shops and mobile installers to national chains. Your choice will depend on your budget, vehicle type, and the kind of film you want.

Sun Stoppers covers everything you need to know, including where to find reliable installers, how much it costs, what the law requires, and how to book. Whether you’re considering ceramic tint, carbon film, or a same-day service, you’ll be able to find the right option and get your windows done properly.

Table of Contents

Key Takeaways

  • You can get window tinting near you in Charlotte, NC, from local shops, mobile installers, or national chains, choosing based on budget, vehicle type, and film quality.
  • Ceramic tint is widely regarded as a high-performance option, offering strong heat rejection and up to 99.9% UV protection without interfering with signals.
  • Tinting costs can vary significantly depending on vehicle type, film quality, and installer, commonly ranging from lower-cost entry options to premium installations.
  • North Carolina law requires a minimum of 35% VLT, including combined factory glass and film.
  • Choose installers with verified reviews, written warranties, and certified film brands (like XPEL) to ensure long-term quality and compliance.

Where to Find Window Tinting Services in Charlotte, NC

If you’re searching locally and asking where can I get my windows tinted near me in Charlotte, the answer depends on the type of service you prefer: in-shop installation, mobile tinting, or national providers with multiple locations.

Charlotte offers a wide range of options, from independent local specialists to high-volume franchise shops, each suited for different budgets and vehicle types.

Types of Window Tinting Services

Window tinting services in Charlotte include automotive, residential, commercial, mobile, and same-day installations, depending on your needs.

  • Auto window tinting: Improves heat rejection, glare reduction, and privacy for vehicles
  • Residential window tinting: Reduces indoor heat, glare, and UV damage, especially for sunrooms and large windows
  • Commercial window tinting: Enhances energy efficiency and privacy for offices and storefronts

Some installers specialize in one service type, while others handle multiple projects. XPEL-certified installers in Charlotte focus on high-performance ceramic films, with entry-level packages starting around $249.

Tinting for Tesla & EVs

If you drive a Tesla or EV, choose an installer with EV-specific experience. These vehicles use large glass panels and integrated camera systems, which require precise cutting and careful alignment during installation.

Mobile and In-Shop Window Tinting in Charlotte

Window tinting services in Charlotte are available as both mobile installations and in-shop services, depending on the provider and your preferences.

FeatureMobile Window TintingIn-Shop Window Tinting
ConvenienceInstalled at your home or workplaceRequires visiting a shop
SchedulingFlexible, depends on availabilityFixed appointment times
Environment ControlLimited (weather, dust, lighting)Controlled environment (clean, stable conditions)
Installation QualityGood for simple jobsBest for full vehicles and precision installs
Equipment AccessLimited on-site setupFull professional tools and workspace
Best ForQuick jobs, convenience-focused usersCeramic tint, EVs, luxury vehicles, complex glass

Window tinting providers may specialize in either mobile or in-shop services, while others offer both, making availability dependent on the specific provider. For full-vehicle installations and high-performance films, in-shop application is generally preferred, as it ensures a controlled environment that supports greater precision, consistency, and long-term durability.

How to Choose the Right Window Tint Installer

Before booking, compare these key factors to ensure quality and long-term performance:

  • Customer reviews (Google, local forums)
  • Warranty coverage (lifetime preferred)
  • Film performance specs (infrared heat rejection, UV blocking)
  • Real installation photos (avoid stock images)

In general, local specialists perform better for high-end vehicles and ceramic installs, while national chains are suitable for standard jobs.

What Film Types Are Available and How Ceramic Tint Differs

Window tint films include dyed, carbon, ceramic, metalized, and hybrid options, and your choice directly impacts heat rejection, driving comfort, signal clarity, and long-term durability.

Film TypeHeat RejectionUV ProtectionSignal InterferenceDurability
DyedLowHigh (up to 99%)NoneLow
CarbonMediumHighNoneMedium
CeramicVery HighVery High (99.9%)NoneHigh
MetalizedHighHighYesHigh
HybridMedium to HighHighLowMedium to High

Why Ceramic Tint Performs Better

Ceramic tint is the top choice in hot climates like North Carolina because it provides superior heat rejection without compromising visibility or signal performance.

  • Can block a high percentage of infrared (IR) heat depending on the specific film and manufacturer specifications.
  • Reduces air conditioning usage, improving overall comfort and energy efficiency.
  • Does not interfere with electronic signals, allowing GPS, mobile, and radio functions to operate normally.
  • Maintains clear visibility day and night

XPEL ceramic films are widely used in Charlotte for high-performance installations and are among the most recognized in the industry for durability and optical clarity.

Pro Tip: For most drivers in Charlotte, ceramic tint offers the best long-term value despite the higher upfront cost.

How Much Does Window Tinting Cost Near Me

Car window tinting in Charlotte varies based on vehicle type, film quality, and installer, with entry-level options starting lower and premium installations reaching higher price points. Most full-vehicle jobs land between $100 and $400. High-end ceramic film or complex vehicles, like trucks, SUVs, and EVs with curved rear glass, can push closer to $800.

Home window tinting projects range from $316 to $941, with the average residential job coming in around $611.

ServiceTypical Price RangeNotes
Standard Car Film$100 to $250Basic dyed or entry-level carbon film
Carbon Car Film$200 to $400Matte finish with solid heat rejection
Ceramic Car Film$400 to $800High heat rejection, signal neutral
Residential Window Film$316 to $941The average project cost is $611

Some installers offer entry-level ceramic packages starting around $249 for smaller vehicles or partial installs. Ask specifically what film brand and VLT percentage is included at that price. Always get itemized quotes in writing listing film brand, VLT percentage, reflectivity rating, and full warranty terms.

How Long Does Tinting Take, and What Aftercare Is Required?

A full car window tint typically takes 2 to 4 hours, while smaller jobs, such as a single door panel, can be completed in 30 to 45 minutes.

After installation, the curing process is critical, as this is where many DIY or rushed jobs fail. You should wait 24 to 72 hours before rolling down your windows or cleaning the film to allow the adhesive to properly set.

During this period, it’s normal to see slight haziness or small water bubbles, which will gradually disappear as the film fully cures.

Aftercare Guidelines

  • Keep windows closed for 24 to 72 hours after installation
  • Avoid ammonia-based cleaners for at least 30 days
  • Use a soft microfiber cloth and mild soap once curing is complete
  • Follow your installer’s specific aftercare instructions, as tinting curing times may vary based on film type and weather conditions

What Are North Carolina Tint Laws and VLT Limits?

North Carolina tinting law requires a minimum of 35% visible light transmission (VLT) on front side windows for all vehicles, and on rear side and rear windows for passenger vehicles (sedans, coupes, hatchbacks, and similar vehicles). Multipurpose vehicles, including SUVs, vans, and pickup trucks, may use any darkness on the rear side and rear windows. VLT refers to the percentage of visible light that passes through both the glass and the applied window film combined.

Key Regulations

  • Front side windows (all vehicles): Minimum 35% VLT.
  • Rear side and rear windows (passenger vehicles): Minimum 35% VLT.
  • Rear side and rear windows (multipurpose vehicles: SUVs, vans, pickups): No darkness restriction.
  • Windshield tinting: Non-reflective tint is permitted above the manufacturer’s AS-1 line or the top 5 inches, whichever is longer. It cannot cover the full windshield.

Reflectivity Rules

Reflectivity is regulated to prevent excessive glare for other drivers. Exact limits are outlined in NC General Statute § 20-127, but enforcement can vary; confirm current requirements with your installer or directly with the NCDMV before installation.

Inspection & Compliance

As of December 1, 2025, North Carolina no longer measures window tint as part of annual vehicle safety inspections under Session Law 2025-47. However, tint laws remain in force and are still enforceable by law enforcement. Drivers with tinted windows are now required to roll down the window on the side a law enforcement officer approaches during any traffic stop.

How to Stay Within Legal Tint Limits in North Carolina

While the legal limit is 35% VLT for applicable windows, this requirement applies to the combined light transmission of your factory glass and the added window film, not just the film itself.

Common VLT Levels and Legal Status

VLT %AppearanceLegal in NC?
50%Light tint, barely noticeableYes
35%Medium tint, darkened but visibleYes (minimum legal limit)
20%Dark tint, difficult to see insideNo (passenger vehicles); Yes for rear windows on multipurpose vehicles
5%Limo tint, nearly opaqueNo (passenger vehicles); Yes for rear windows on multipurpose vehicles

The lower the VLT percentage, the darker the tint. Many drivers assume the film’s rating alone determines legality, but this is not the case.

For example, if your factory glass allows 80% of light to pass through and you install a 35% VLT film, the combined VLT drops to approximately 28%, which falls below the legal limit in North Carolina.

Important: Always ask your installer to measure the combined VLT before installation to ensure your vehicle remains compliant.

How to Choose a Reputable Installer and Verify Warranties

Check Reviews and Past Work

Check Google reviews and local community forums to build a shortlist of solid installers. Look for shops with portfolios showing real completed work, not just stock photos from film manufacturer websites.

Verify Certifications and Brand Authorization

Ask specifically whether the shop is an authorized XPEL installer if you’re requesting XPEL film. Authorized dealers are trained and certified directly by the brand, which matters for warranty validation.

Understand Warranty Coverage

Get a written lifetime warranty. Lifetime warranties from reputable brands like XPEL typically cover:

  • Peeling
  • Bubbling
  • Color shift
  • Adhesive failure

Physical damage is usually not covered; read the exclusions carefully.

Watch for Red Flags

  • No written warranty or only a verbal guarantee
  • Vague answers about the film brand or the VLT percentage
  • Significantly lower prices with no documentation
  • No examples of similar vehicle installs

Confirm Details before Booking

  • Get itemized, written quotes showing film brand and VLT
  • Confirm what’s covered and excluded in the warranty, in writing
  • Verify the installer has documented experience with your vehicle type
  • Ask for photos of completed installs on vehicles similar to yours, especially EVs, luxury sedans, or SUVs with complex rear glass curves

How to Get an Online Quote or Book Window Tinting near You

Many window tinting providers in Charlotte offer online quote tools that provide instant pricing based on your vehicle type, preferred VLT, and selected service. This allows you to easily compare options and book without unnecessary back-and-forth.

If you’re searching for window tinting near you, starting with an online quote is the fastest way to check availability and pricing, with most quotes generated in under two minutes.

What You'll Need to Book

  • Vehicle make, model, and year
  • Preferred VLT percentage
  • Film type (standard, carbon, or ceramic)
  • Service type (in-shop or mobile, if offered)

Mobile vs. In-Shop Booking Considerations

Some providers in Charlotte offer mobile window tinting services, but availability varies by company and location.

  • Mobile installation: Convenient, but requires a shaded area, access to power, and a clean, flat surface
  • In-shop installation: Faster scheduling, controlled environment, and more consistent results

If you don’t have the right setup for mobile service, in-shop installation is usually the more reliable option.

Same-Day vs. Scheduled Service

  • Same-day service: Best for small jobs when slots are available
  • Full vehicle tinting: Typically requires 24 to 48 hours of advance scheduling

Tip: Availability for ceramic tint appointments varies by provider, so requesting a quote early gives you more flexibility in film options and appointment times.

Before You Confirm Your Appointment

Always request a confirmation that includes:

  • Film brand and specifications
  • VLT percentage
  • Warranty coverage
  • Estimated installation time

Book Your Window Tint Today

Ready to get your windows tinted in Charlotte? Sun Stoppers Window Tinting in Charlotte provides professional auto, residential, and commercial tinting using high-performance XPEL ceramic films and experienced installers who understand Charlotte’s climate and North Carolina tint laws.

Whether you need a full tinting installation or same-day service, Sun Stoppers delivers reliable, in-shop solutions tailored to your schedule and budget. Most ceramic appointments book out 2 to 3 days in advance, so requesting a quote early gives you more flexibility with film options and available time slots.

Request your written quote today to secure your preferred appointment.

FAQs

Yes. North Carolina requires at least 35% visible light transmission (VLT) on front side windows for all vehicles and on rear side and rear windows for passenger vehicles. Multipurpose vehicles such as SUVs, vans, and pickups may use any darkness on rear side and rear windows. Windshields are limited to a non-reflective tint above the manufacturer’s AS-1 line or the top 5 inches, whichever is longer. Note: As of December 1, 2025, tint is no longer checked during annual inspections, but NC tint laws remain enforceable.

Wait 24 to 72 hours before rolling your windows down after tinting. This allows the film adhesive to cure properly. In humid or cold conditions, curing may take longer, so follow your installer’s specific instructions to avoid damaging the film.

Ceramic tint typically costs $400 to $800 for a full vehicle, while standard dyed film ranges from $100 to $250. The higher cost comes from better heat rejection, durability, and no signal interference, making ceramic a long-term value upgrade.

For most drivers, yes. Ceramic tint can block a high percentage of infrared heat, depending on the film used. It also doesn’t interfere with signals like GPS or mobile data, making it ideal for daily driving in hot climates.

Mobile window tinting usually costs about the same as in-shop installation. Some providers charge an additional travel fee, typically $20 to $50, depending on distance. Always confirm pricing, setup requirements, and availability before booking a mobile service.

Ask for a written warranty before installation. Confirm what defects are covered, such as bubbling or fading, and check if the installer is authorized by the film manufacturer. This ensures the warranty is valid and not just a shop-issued promise.

Carbon tint offers good heat rejection and a matte finish at a mid-range price. Ceramic tint provides superior infrared heat blocking, higher UV protection, and no signal interference. It costs more but delivers better long-term performance and comfort.

Yes. Most professional tint shops offer removal and replacement services. If your tint is peeling, bubbling, or is cited as non-compliant by law enforcement, it must be removed before installing new film. Ask for removal pricing when requesting a quote.

Passenger vehicles (sedans, coupes, hatchbacks) must maintain at least 35% VLT on all side and rear windows. Multipurpose vehicles (SUVs, vans, pickup trucks) must also maintain 35% VLT on front side windows, but rear side and rear windows have no darkness restriction. Always confirm your vehicle’s classification with your installer before choosing a film.

How Long Does a Vinyl Wrap Last? Lifespan, Factors & Pro Tips

How Long Does Vinyl Wrap Last?

Vinyl wrapping has become a go-to solution for drivers who want to change their vehicle’s look without the permanence or cost of a new paint job. With proper care, a high-quality vinyl wrap can maintain its appearance and performance for years.

In many cases, it not only enhances aesthetics but also acts as a protective layer for your original paint. In this guide, Sun Stoppers Window Tinting in Charlotte breaks down how long does vinyl wrap last, what affects its durability, and how to get the most value from your investment.

Table of Contents

Key Takeaways

  • Professional-grade cast vinyl wraps typically last 3 to 5 years under normal conditions with proper maintenance.
  • Film type matters significantly. Cast vinyl significantly outlasts calendered vinyl in real-world conditions.
  • Sun exposure, heat cycling, and driving environment are the biggest external factors affecting lifespan.
  • Proper installation quality determines whether a wrap reaches its rated lifespan or fails prematurely.
  • Maintenance habits can extend or shorten wrap life by 1 to 3 years.

Average Lifespan of a Vinyl Wrap

Lifespan varies significantly based on film type, not just usage conditions.

Film TypeTypical LifespanBest For
Professional cast vinyl3 to 5 yearsFull vehicle wraps, complex curves
Mid-grade cast vinyl2 to 3 yearsPartial wraps, daily drivers
Calendered vinyl1 to 3 yearsFlat surfaces, short-term use
High-exposure vehicles (fleets, daily highway driving)2 to 4 yearsRegardless of film grade

Vehicles that are garage-kept and well-maintained frequently exceed these averages. Constant outdoor exposure, particularly in high-UV climates, is the fastest way to reduce wrap lifespan regardless of film quality.

What Affects How Long a Vinyl Wrap Lasts?

1. Vinyl Film Type and Construction

This is the single most important factor in rated lifespan.

Cast vinyl is manufactured by spreading liquid PVC onto a casting sheet, producing a thin (2 to 2.5 mil), dimensionally stable film with built-in UV inhibitors and plasticizers that keep the material flexible over time. Cast vinyl is the professional standard for full vehicle wraps.

Calendered vinyl is produced by pressing PVC through rollers, resulting in a thicker (3 to 4 mil), stiffer film with higher internal stress. Over time, plasticizer migration causes calendered vinyl to shrink, crack, and lift at edges. This process accelerates in hot climates. For full vehicle wraps, calendered vinyl is not recommended regardless of price.

Finish type also affects longevity:

FinishLifespan Notes
GlossMost durable finish, easiest to maintain
MatteMore sensitive to contamination and abrasion
SatinSimilar to matte, it requires careful washing
Chrome/mirrorShortest lifespan, most sensitive to the environment
Color-shift / chameleonUV-sensitive, fades faster in high-sun climates

Before starting your project, it’s important to understand how much vinyl you need to wrap a car, as the required material can vary based on vehicle size, design complexity, and installation method.

2. Installation Quality

Proper installation is critical to longevity. If you’re considering doing it yourself, understanding the step-by-step vinyl wrap installation process can help prevent early wear and adhesion issues. However, a professional installer ensures:

  • Thorough surface cleaning and preparation
  • Correct stretching without overstressing the material
  • Seamless alignment and edge sealing
  • No trapped air bubbles or contaminants

Even the best vinyl can fail prematurely if installed incorrectly. Poor adhesion is one of the most common causes of wrap failure.

3. Climate and Environmental Exposure

Environmental conditions have a major impact:

  • Sun exposure: UV rays cause fading and discoloration over time
  • Heat: High temperatures can weaken adhesives
  • Cold climate: Can make vinyl brittle and prone to cracking
  • Humidity & pollution: Can degrade the surface and reduce lifespan

Vehicles parked indoors or under cover can extend wrap life by several years compared to constant outdoor exposure.

4. Driving Habits

High-impact driving conditions accelerate wear on specific areas. Front bumpers, hoods, and side mirrors take the most damage from road debris, stone chips, and insect splatter. Frequent highway driving exposes these areas to significantly more abrasive wear than urban or low-speed driving.

Vehicles used in fleet applications or covering high annual mileage should expect a lifespan at the lower end of their film’s rated range.

How to Make Your Vinyl Wrap Last Longer

With the right maintenance, you can significantly extend the lifespan of your wrap.

Wash Regularly

  • Use gentle, pH-balanced car wash soap
  • Avoid harsh chemicals and abrasive brushes
  • Hand washing is strongly recommended over automated systems

Avoid Automatic Car Washes

Brush-style car washes can scratch the surface and lift edges. Touchless washes are safer but still not as effective as careful hand washing.

Protect from Sun Exposure

Whenever possible:

  • Park in a garage
  • Use a car cover
  • Choose shaded parking spots

UV protection is one of the biggest factors in preserving color and finish.

Remove Contaminants Quickly

Bird droppings, tree sap, and bug splatter can damage vinyl if left too long. These substances are acidic and can permanently stain or etch the wrap surface. Clean them off as soon as possible.

When Should You Replace a Vinyl Wrap?

Delaying replacement beyond these signs increases the risk of adhesive transfer and paint damage during removal.

Replace your vinyl wrap when you notice any of the following:

  • Visible fading or color shift, particularly on horizontal panels (hood, roof) that receive the most UV exposure
  • Peeling edges or lifting seams that cannot be re-adhered with heat
  • Surface cracking or brittleness, especially in recessed areas
  • Significant loss of gloss on gloss finishes, or texture degradation on matte and satin films
  • Adhesive showing through at edges or panel seams

The longer a wrap is left beyond its rated lifespan, the more difficult its removal becomes. An adhesive that has fully cured and begun degrading is significantly harder to remove cleanly and increases the risk of paint damage.

Is Vinyl Wrap Worth It?

For most vehicle owners planning to keep their car for 3 or more years, a vinyl wrap offers strong value relative to its cost. A professional full wrap at $2,500 to $5,500 spread over a 5-year lifespan works out to $500 to $1,100 per year for a color change, finish upgrade, and paint protection layer combined.

Vinyl wrap makes the most sense when:

  • You want a color or finish not achievable at a comparable cost through repainting
  • You want to preserve original factory paint for resale value
  • You need the flexibility to update or remove the finish in the future
  • You are protecting a commercial or fleet vehicle where branding changes are expected

Vinyl wrap is less ideal when:

  • The vehicle has heavily degraded or poorly adhered paint that cannot support wrap adhesion
  • The vehicle will be sold within 12 months, and the wrap cost cannot be recovered in resale value

Upgrade Your Car with a Professional Vinyl Wrap in Charlotte

If you want a flawless finish without the risks of DIY, professional installation is the best choice. Sun Stoppers Window Tinting in Charlotte offers expert custom vinyl wrap services in Charlotte, NC, using premium materials and proven techniques.

Contact us today to schedule your appointment and give your vehicle a completely new look.

FAQs

Most daily-driven vehicles with professional-grade cast vinyl can expect a lifespan of 3 to 5 years, depending on climate, driving conditions, and maintenance habits. Vehicles in high-UV climates or with heavy highway exposure should expect results toward the lower end of that range.

Yes. Gloss finishes are the most durable and easiest to maintain. Matte and satin finishes are more sensitive to abrasion and surface contamination. Chrome and color-shift films have the shortest lifespan due to their sensitivity to UV exposure and the precision required to maintain their appearance.

High-quality automotive paint on a well-maintained vehicle will outlast a vinyl wrap. However, vinyl wrap offers a lower-cost entry point for custom finishes, protects the original paint underneath, and can be removed or updated without repainting.

Yes. Prolonged UV exposure is the primary cause of color fading, finish degradation, and adhesive breakdown in vinyl wraps. Cast vinyl films with built-in UV inhibitors resist this significantly better than calendered films. Garage storage and ceramic coating over the wrap are the most effective countermeasures.

The clearest indicators are fading or color shift on horizontal panels, peeling or lifting edges that cannot be re-adhered, surface cracking in recessed areas, and significant loss of finish quality. Recognizing these early signs is important, as the longer a degraded wrap remains on the vehicle, the harder removal becomes.

Yes, and it is one of the most effective ways to do so. Ceramic coating over vinyl wrap adds a UV-protective layer, significantly improves hydrophobic performance, and makes maintenance easier. It does not change the appearance of matte or satin finishes when a matte-compatible ceramic formula is used.

For full vehicle wraps, yes. Professional installation ensures proper surface preparation, correct film application without overstretching, sealed edges, and a maintained film warranty. These factors directly determine whether a wrap reaches its rated lifespan or fails within the first year.

Legal Tint in NC: VLT Limits, Enforcement & Compliance Guide

Legal Tint in NC: VLT Limits, Enforcement & Compliance Guide

Planning to tint your windows in Charlotte, NC? In North Carolina, legal window tint is defined as a minimum of 35% Visible Light Transmission (VLT) for most passenger vehicles. However, during enforcement, readings around 32% are often treated as compliant due to tint meter calibration variance, rather than as a separate legal limit. Different rules apply to SUVs, trucks, and vehicles with approved medical exemptions.

This guide from Sun Stoppers Window Tinting in Charlotte covers everything you need to know about legal tint in NC, including VLT limits by vehicle type, what changed on December 1, 2025, how officers measure tint, penalties, medical exemptions, and how to choose a compliant installer.

Table of Contents

Key Takeaways

  • The legal tint in NC requires a minimum of 35% VLT on all windows for passenger cars, measured based
  • SUVs, vans, and trucks have no minimum VLT requirement on rear side and back windows
  • As of December 1, 2025, tint is no longer tested during annual safety inspections under Senate Bill 391
  • While the law sets a 35% VLT requirement, readings around 32% are often treated as compliant in practice
  • NCDMV medical exemptions allow a darker tint for qualifying conditions and must be renewed every five years

What Is the Legal Window Tint in North Carolina?

North Carolina requires a minimum of 35% VLT (Visible Light Transmission) on most vehicle windows under G.S. 20-127. VLT measures the percentage of light that passes through your windows, and the lower the percentage, the darker the tint.

How VLT Is Measured

  • Factory glass may already reduce a portion of visible light transmission, depending on the vehicle
  • A film labeled 35% VLT does not guarantee a legal result after installation
  • Your final combined reading may fall below the legal threshold, even with a compliant film

Note: Always ask your installer for a post-installation meter reading that reflects the combined VLT of your glass and film, not just the film rating on the product sheet.

NCDMV provides official guidance, approved meter information, and medical permit forms for drivers who need documentation.

What Are the VLT Limits for Passenger Cars, SUVs, Vans, and Trucks?

North Carolina sets different VLT limits depending on vehicle classification.

Passenger Cars

All windows on passenger cars, including sedans, coupes, and station wagons, must maintain a minimum of 35% VLT. This applies to front side windows, rear side windows, and the rear window equally.

Multi-Purpose Vehicles (SUVs, Vans, and Trucks)

Front side windows on MPVs must meet the same driver visibility standards as passenger cars. Rear side windows and back windows on SUVs, vans, and trucks have no minimum VLT requirement under NC law, meaning any darkness level is permitted on those windows.

Window PositionPassenger CarsSUVs / Vans / Trucks
Front side windows35% VLT minimum35% VLT minimum
Rear side windows35% VLT minimumNo minimum
Rear window35% VLT minimumNo minimum

Practical example: A sedan with a rear window measuring below 35% VLT may violate G.S. 20-127. An SUV with 20% VLT on the rear side windows is legal for that vehicle class.

Always confirm the combined VLT reading after installation, not just the film rating on the product sheet.

What Windshield, Reflectivity, and Color Restrictions Apply?

Windshield Tint

Windshield tinting is restricted to non-reflective film applied above the manufacturer’s AS-1 line. If your windshield has no AS-1 line, you may tint the top five inches. Tint may not extend below that permitted area.

Reflectivity Limits

Reflective tint cannot exceed 20% reflectivity. G.S. 20-127 prohibits mirror-like or shimmering finishes above this threshold. Excessive reflectivity may be cited during a traffic stop if it appears to exceed legal limits.

Banned Colors

North Carolina restricts the use of red, amber, and yellow tint films. These colors are prohibited because they interfere with vehicle lighting cues and can be confused with emergency lighting. Officers can identify colored film during a visual inspection without a meter.

RestrictionRule
Windshield tintNon-reflective film above the AS-1 line or the top 5 inches only
ReflectivityMaximum 20%, no mirror or shimmer finishes
Banned colorsRed, amber, and yellow films are illegal

What Changed after December 1, 2025, under Senate Bill 391?

As of December 1, 2025, North Carolina removed window tint testing from annual safety inspections under Senate Bill 391.

What This Means for Drivers

DetailInformation
Effective dateDecember 1, 2025
SignedJuly 2025 by the NC Governor
Inspection changeNo tint meter testing or $10 fee
EnforcementOfficers can still stop and cite violations under G.S. 20-127
New procedureRoll down tinted windows when officers approach

Important: The inspection change does not make illegal tint legal. Law enforcement retains full authority to stop and cite tint violations at any traffic stop.

How Do Officers Measure Tint, and What Is the 32% Meter Threshold?

Officers use photo-optic tint meters, such as commercially available tint measurement devices, to measure VLT during traffic stops. The meter sends a light beam through the glass and measures what the sensor receives on the other side, which produces a numerical VLT percentage reading.

The 32% Threshold Explained

While the law sets a 35% VLT requirement, readings around 32% are often treated as compliant in practice due to tint meter calibration variance. This reflects how enforcement is typically applied in the field, but it is not defined as a separate legal limit.

DetailInformation
Common metersApproved tint meters used by law enforcement
General VLT rule35%
Meter enforcement thresholdNot darker than 32%

What to Do During a Traffic Stop

  1. Ask the officer for the meter brand and the exact reading
  2. Photograph the meter display if you receive a citation
  3. Request that the officer note the meter serial number and calibration date in the report
  4. Keep your installer tag and product data sheet in the vehicle at all times

What Penalties and Court Procedures Apply for Illegal Tint?

An illegal tint citation in North Carolina carries a monetary penalty and associated court costs that vary by case and jurisdiction. Court costs typically push the total above $200. Officers can issue citations at any traffic stop, regardless of whether your vehicle has passed a recent safety inspection.

Your Three Options After a Citation

OptionWhat It Involves
Pay the fineThis is the fastest resolution, approximately $50 base plus court costs
Contest in the district courtBring meter readings, installer invoice, and stamped film tag
Present NCDMV medical permitShow valid exemption documentation to demonstrate authorized compliance

Evidence to Collect Immediately after a Citation

  • Meter brand, exact reading, serial number, and calibration date
  • Installer invoice showing film brand, model, and VLT
  • Stamped installer tag from your vehicle
  • Photo of the meter display taken at the stop

Real World Example

An officer recorded a tint meter reading of 30% and cited a driver for illegal tint. The base fine was $50, but court costs brought the total above $200. The driver contested the citation and brought a recent installer tag plus a new meter reading showing 35% after replacing the film. The court dismissed the charge.

What Medical Exemptions Does NCDMV Offer and How to Apply?

NCDMV medical exemptions allow drivers with qualifying medical conditions to use a darker tint beyond the standard VLT minimums. The permit must be carried in the vehicle at all times and presented to officers on request.

Step-by-Step Application Process

StepAction
1Obtain a physician’s statement detailing the medical need for darker window tint
2Submit the completed statement to the NCDMV Medical Review Unit
3Wait for NCDMV approval and permit issuance
4Keep the permit in your vehicle at all times
5Renew every five years with an updated physician statement

Important: An expired permit provides no legal protection. If an officer checks your tint and your permit has expired, you can be cited under G.S. 20-127 as if you have no exemption. Set a renewal reminder before your expiration date.

How to Choose Compliant Window Film and a Reputable Installer in Charlotte

Film Types and Compliance

Choosing the right film means balancing performance with legal tint requirements in NC. Ceramic window tint is commonly selected by drivers seeking higher heat rejection while remaining within legal VLT limits. Ceramic films are thicker, more durable, and maintain optical clarity longer than dyed or carbon alternatives.

When selecting a film, always request the product data sheet showing the specific VLT percentage for the model being installed, not just the brand name. VLT varies between film lines within the same brand.

What Makes a Good Ceramic Film

Not all ceramic films perform equally. When comparing options, look for these specifications on the product data sheet:

  • VLT percentage for the specific film model being installed
  • Infrared rejection rate: Some ceramic films are designed to reduce a high percentage of infrared heat, depending on the manufacturer
  • UV blocking: Many premium films are engineered to block a significant portion of UV radiation
  • Signal compatibility: Ceramic films should not interfere with GPS or mobile signals
  • Warranty terms: The manufacturer’s warranty should cover peeling, bubbling, and color shift

XPEL ceramic films are among the most commonly installed in Charlotte for high-performance applications. Installers offering XPEL products may complete manufacturer training programs, depending on dealer status and certification requirements.

What to Look for in a Charlotte Window Tint Installer

A reputable tinting installer in Charlotte, whether you are in Ballantyne, Southpark, Matthews, or Mint Hill, should provide all of the following before and after your appointment:

Checklist ItemWhat To Ask
Film VLT specification“Can you provide the product data sheet for this film?”
Post-install meter reading“Will you provide a meter reading after installation?”
Stamped installer tag“Will you attach a VLT tag to my vehicle?”
Written warranty“What does your warranty cover and for how long?”
Authorized dealer status“Are you an authorized installer for this film brand?”

Watch for These Red Flags

  • The installer cannot provide a product data sheet showing VLT
  • No post-installation meter reading offered
  • Verbal warranty only, with nothing in writing
  • Cannot confirm authorized dealer status for the film brand being installed

Real-World Example

A sedan owner in Charlotte installed 35% ceramic film at a local shop. The installer provided a stamped tag, photographed the meter reading showing 35% combined VLT, and issued a written warranty. During a subsequent traffic stop, the driver presented the installer tag, and the officer reviewed the documentation as part of the compliance check.

The difference between a smooth traffic stop and a citation often comes down to documentation, not just the film itself.

Book Your Window Tint Today

Ready to get your windows tinted in Charlotte? Sun Stoppers Window Tinting in Charlotte provides professional auto, residential, and commercial tinting using high-performance XPEL ceramic films and experienced installers who understand Charlotte’s roads, climate, and North Carolina tint laws.

Every installation includes a post-install meter reading, a stamped VLT tag, and written warranty documentation, so you have the paperwork you need if you’re ever stopped.

Before you call, have the following ready:

  • Your vehicle year, make, and model
  • Your desired VLT percentage or film preference
  • Any NCDMV medical permit documentation, if applicable

Request your written quote today. Ask for XPEL ceramic film options, confirm your combined VLT reading after installation, and leave with the documentation that keeps you compliant on NC roads.

FAQs

No. As of December 1, 2025, Senate Bill 391 removed tint meter testing from annual safety inspections. The $10 tint fee no longer applies. Law enforcement can still stop and cite you for illegal tint under G.S. 20-127 at any time.

Yes. The inspection change does not affect law enforcement’s authority to cite tint violations during traffic stops. G.S. 20-127 remains fully in effect.

Ask for the meter brand, the exact reading, the serial number, and the calibration date. Photograph the meter display if you receive a citation. This information becomes your evidence if you contest the citation in district court.

While the law sets a 35% VLT requirement, readings around 32% are often treated as compliant in practice due to meter calibration variance.

Five years. You must renew with an updated physician statement before expiration. Keep the permit in your vehicle at all times. An expired permit provides no legal protection during a traffic stop.

There is no minimum VLT requirement for rear side windows and back windows on SUVs, vans, and trucks. Any darkness level is permitted on those windows.

Ask your installer before booking. A reputable shop, including authorized XPEL installers serving Charlotte, Ballantyne, Matthews, and Mint Hill, will provide a combined VLT meter reading after installation and attach a stamped tag to your vehicle.

An expired permit provides no legal protection. If an officer checks your tint and your permit has expired, you can be cited under G.S. 20-127 as if you hold no exemption. Renew before your expiration date.

Do Tinted Windows Help with Heat?

Do Tinted Windows Help with Heat?

Do tinted windows help with heat? Yes, window tint significantly reduces heat buildup in cars and homes by blocking infrared radiation, reflecting solar energy, and limiting the amount of heat transfer through the glass. Depending on film performance and environmental conditions, window films can measurably reduce interior heat buildup, though exact temperature reductions vary.

Sun Stoppers Window Tinting in Charlotte put together this guide to help you understand how tinted windows reduce heat, compare film types by TSER and VLT, and choose the right option for your car or home in Charlotte, NC.

Table of Contents

Key Takeaways

  • Ceramic films can block a significant portion of infrared radiation, with performance varying by manufacturer specifications and testing conditions
  • TSER (Total Solar Energy Rejected) is the most reliable metric for comparing heat performance across film types
  • DOE research shows energy-efficient window films can reduce home cooling costs depending on climate, installation quality, and building characteristics
  • Parked cars with high-TSER ceramic film can experience noticeably lower interior temperatures compared to untinted glass, depending on sun exposure and conditions
  • In North Carolina, front side windows must maintain at least 35% VLT; film choice must account for the combined glass and film transmission

How Do Tinted Windows Reduce Heat?

Window tint reduces heat by blocking, absorbing, and reflecting solar energy before it passes through the glass.

The Three Main Sources of Heat Through Glass

Heat Source% of Total Solar HeatHow Film Addresses It
Infrared (IR) radiation~53%Ceramic and carbon films block and reflect IR (primary heat source)
Visible light~44%Lower VLT reduces light-based heat gain
Ultraviolet (UV) radiation~3%Most films block up to 99% of UV rays

Infrared radiation is the primary contributor to solar heat gain through glass, which is why ceramic films, designed specifically to block IR, outperform dyed films that only reduce visible light.

By reducing the amount of solar energy entering the glass, window film lowers heat buildup and reduces heat transfer into the interior. Under strong sunlight, quality window films can drop interior air temperatures by up to 8°C (14.4°F), with real-world results varying based on film TSER, sun exposure, and vehicle type.

How Much Heat Can Tinted Windows Block?

The standard measurement for heat rejection performance is TSER – Total Solar Energy Rejected. TSER tells you what percentage of combined UV, visible, and infrared solar energy a film prevents from entering.

What TSER Ranges Mean in Practice

TSER RangePerformance LevelTypical Film Type
70%+ExcellentPremium ceramic
50 to 70%GoodQuality carbon or ceramic
30 to 50%ModerateStandard carbon or metalized
Below 30%LowDyed film

The U.S. Department of Energy estimates that energy-efficient window films can reduce home cooling costs depending on multiple factors such as climate, window area, and film performance. Annual homeowner savings will vary widely based on these same factors and cannot be generalized to a fixed range.

For vehicles, higher TSER means cooler cabins, less AC runtime, and lower fuel or battery consumption.

How to use this: When comparing films, check TSER for heat performance and VLT for visibility. A film with 60% TSER at 35% VLT rejects significantly more heat than a dyed film with 30% TSER at the same VLT.

Which Film Type Blocks Heat Best

Film Type Comparison

Film TypeIR BlockingTSER RangeSignal SafeDurabilityBest For
CeramicUp to 98%60 to 80%+YesHighMaximum heat rejection
CarbonHigh50 to 70%YesMedium-HighBalance of performance and cost
MetalizedHigh45 to 65%NoHighReflectivity, scratch resistance
DyedLow20 to 35%YesLowPrivacy, aesthetics, low budget

Why Ceramic Leads for Heat Rejection

Ceramic tint uses non-metallic ceramic particles to block infrared radiation before it enters the interior. It delivers high infrared rejection performance relative to other consumer film types, based on manufacturer testing data, without affecting GPS, mobile, or radio signals.

Ceramic films are commonly selected by professional installers for heat rejection performance, though usage varies by installer and region. They maintain optical clarity over time and carry manufacturer warranty coverage for peeling, bubbling, and color shift.

When Carbon Makes Sense

Carbon film offers strong heat rejection without metallic content. It provides a matte finish, stable long-term color, and solid TSER values at a lower price point than ceramic. A practical choice for drivers who want real heat performance without the premium cost of ceramic.

When to Avoid Metalized and Dyed

Metalized films reflect heat effectively but can disrupt radio, GPS, and cellular signals. Avoid them in modern vehicles with embedded antenna systems. Dyed films are the weakest performers for heat rejection. They fade over time and offer minimal TSER compared to ceramic or carbon.

What Are TSER and VLT, and Why They Matter

TSER - Total Solar Energy Rejected

TSER is the most useful number when comparing films for heat performance. It measures the percentage of total solar energy (UV, visible, and infrared combined) that the film prevents from entering.

  • Higher TSER = better heat rejection
  • Always ask for TSER data from the product data sheet, not just the brand name
  • TSER varies significantly between film lines within the same brand

VLT - Visible Light Transmission

VLT measures the percentage of visible light that passes through the combined glass and film.

  • Lower VLT = darker tint = more privacy but less natural light
  • Higher VLT = lighter tint = more natural light, but less privacy
  • In North Carolina, front side windows must meet a minimum of 35% VLT
VLT %AppearanceLegal For NC Front Windows?
70%Nearly clearYes
50%Light tintYes
35%Medium tintYes (minimum limit)
20%Dark tintNo
5%Limo tintNo

Rule of thumb: Use TSER to choose your film for heat. Use VLT to confirm it’s legal and comfortable for visibility.

Do Tinted Windows Keep Parked Cars Cooler?

Yes, but tinted windows slow heat buildup rather than stop it entirely. A tinted car in direct sunlight will always be cooler than an untinted one, but temperatures still rise when a vehicle is parked and sealed.

What Affects How Much Cooler Your Car Stays

  • Film TSER – higher TSER means more solar energy is blocked before it enters
  • Film IR blocking – ceramic films that specifically target infrared keep surface temperatures noticeably lower
  • Vehicle color – darker exteriors absorb more radiant heat
  • Ventilation – cracked windows accelerate heat escape

Real-World Temperature Difference

A high-TSER ceramic film can reduce heat buildup compared to untreated glass, with temperature differences depending on sunlight intensity, exposure time, and vehicle conditions.

For drivers in Charlotte, NC, where summer temperatures regularly exceed 90°F, the difference between a tinted and untinted car after two hours in a parking lot is substantial.

Do Tinted Windows Lower Cooling Bills?

For Homes

Window film reduces HVAC load by blocking solar heat gain through glass before it enters the living space.

The U.S. Department of Energy estimates energy-efficient window films can reduce cooling costs by up to approximately 30%, depending on conditions such as climate, window exposure, and film type.

  • Local climate and sun exposure
  • Total square footage of sun-facing glass
  • Film TSER value
  • Existing insulation and HVAC efficiency

Example: A homeowner in Charlotte with 500 sq ft of south-facing windows and a quality ceramic film can see meaningful reductions in peak cooling demand during July and August, the two most expensive months for cooling in the Carolinas.

For Cars

Cooler cabin temperatures mean less AC runtime, which translates directly to:

  • Lower fuel consumption in gas vehicles
  • Reduced battery drain in EVs and hybrids
  • Less wear on the AC compressor over time

You can measure savings by tracking AC runtime and fuel consumption before and after installation.

Do Window Tints Help in Winter?

Window tint provides modest winter benefits, though they are secondary to heat rejection performance.

Winter Performance by Film Type

Film FeatureWinter Benefit
Low-E coatingReflects thermal energy into the room
Standard solar filmModest reduction in radiant heat loss through glass
Ceramic filmSome IR retention on cold days

Films with low-emissivity (low-E) coatings perform best in winter by reflecting interior heat into the room rather than allowing it to radiate through the glass.

Expectation check: Window film is not a substitute for insulation. Winter benefits are real but modest. The primary value of window film in most climates is heat rejection in summer, not heat retention in winter.

What Are the Downsides and Legal Limits?

Performance Tradeoffs by Film Type

Film TypeMain Downside
CeramicHigher upfront cost
CarbonSlightly lower TSER than premium ceramic
MetalizedDisrupts GPS, radio, and cellular signals
DyedFades over time, lowest heat rejection

Visibility and Safety

Darker tints reduce nighttime visibility. Drivers who frequently drive at night or in low-light conditions should prioritize higher VLT values – even if that means accepting lower TSER performance.

Legal Limits in North Carolina

North Carolina tint law requires front side windows to allow at least 35% of light to pass through (35% VLT) for all vehicles. Rear side and back windows on SUVs, vans, and trucks can be tinted to any darkness.

Always confirm your combined VLT, factory glass plus film, before installation. A 35% VLT film on glass that already reduces light by 15% will produce a combined reading around 30%, which fails NC’s legal threshold.

Professional vs. DIY Installation

FactorDIYProfessional
Typical costLower upfrontHigher upfront
Installation time4 to 6+ hours1 to 4 hours
Film qualityLimited optionsFull range, including ceramic
Edge seal qualityInconsistentClean and precise
WarrantyNoneManufacturer + installer
Risk of bubblingHighLow
Long-term durabilityLowerHigher

When Professional Installation Is Worth It

High-performance ceramic films require precise cutting and alignment to achieve correct edge seals and avoid bubbling or peeling. The quality of installation directly affects how long the film lasts and whether the manufacturer’s warranty remains valid.

For basic dyed film on a low-priority window, DIY may be acceptable. For any ceramic or carbon film on a vehicle or home, professional installation protects your investment.

Book Your Window Tint Service Near You Today

Ready to reduce heat in your car or home in Charlotte? Sun Stoppers in Charlotte provides professional auto window tinting, residential, and commercial tinting using high-performance XPEL ceramic films and experienced installers who understand Charlotte’s climate and North Carolina tint laws.

Every installation includes a post-install meter reading, a stamped VLT tag, and written warranty documentation.

Before you call, have the following ready:

  • Vehicle year, make, and model (or property window count for residential)
  • Your heat rejection priority: TSER or specific film type preference
  • Any NC tint law questions: our installers can confirm VLT compliance before installation

Request your written quote today and leave with documentation that confirms both performance and legal compliance.

FAQs

Both. Quality films block infrared radiation (the main heat driver), visible light, and UV rays. Ceramic films specifically target infrared and can block up to 98% of IR at specific wavelengths, depending on the product.

Ceramic tint offers the highest heat rejection of any consumer film, with TSER values typically between 60% and 80%+. XPEL ceramic films are among the most commonly installed in Charlotte for drivers prioritizing heat performance.

A high-TSER ceramic film can lower interior temperatures by 10°F to 20°F compared to untinted glass under direct sun. Exact results depend on film TSER, vehicle color, and parking conditions.

For homes, yes. The U.S. Department of Energy estimates energy-efficient films can reduce cooling costs by up to approximately 30%, depending on conditions. Annual savings range from $30 to $450, depending on climate and window area.

Modestly. Films with low-E coatings reduce radiant heat loss through glass. Standard solar films offer minimal winter insulation benefit. The primary value of window tint in most climates is summer heat rejection.

No. Ceramic films use non-metallic particles and do not interfere with GPS, mobile, or radio signals. Metalized films can cause signal disruption. Choose ceramic or carbon to avoid this.

Yes, for the best results. Ceramic film requires precise cutting and alignment. DIY installation risks bubbling, poor edge seals, and voided warranty. Professional installation at an authorized dealer ensures the manufacturer’s warranty is valid.

TSER measures total solar energy rejected across UV, visible, and infrared bands. It tells you how much heat the film actually blocks. VLT only measures visible light transmission and tells you how dark the tint looks. Use TSER to compare heat performance; use VLT to confirm legal compliance and visibility comfort.

Solar Shades for Windows in Charlotte, NC: Cost & Best Options

Solar Shades for Windows in Charlotte, NC: Cost & Best Options

Looking for solar shades for windows in Charlotte, NC? Solar shades are roller-style window coverings made from woven mesh fabric that reduce glare, block a high percentage of UV rays depending on fabric and openness factor, and help lower indoor heat gain, while preserving your outdoor view.

Sun Stoppers Window Tinting in Charlotte installs interior and exterior solar shades for homes and offices across Charlotte, including Ballantyne, SouthPark, Matthews, and Mint Hill. This guide covers how solar shades work, which openness factor fits your room, how they compare to window tint, and what to expect for cost and energy savings.

Table of Contents

Key Takeaways

  • Solar shades reduce heat, glare, and UV exposure, blocking up to 99% of UV rays while maintaining natural light and outdoor views.
  • The openness factor (1% to 10%) controls light, privacy, and heat reduction, with 3% being ideal for glare-heavy rooms like offices.
  • Exterior solar shades offer the highest heat reduction (60 to 90%, depending on fabric and sun exposure), while interior shades provide easier installation and design flexibility.
  • Solar shades can lower cooling costs by 5 to 20% and reduce temperatures near windows by up to 5 to 10°F on peak summer days.
  • Compared to alternatives, solar shades balance visibility, energy efficiency, and flexibility, making them ideal for living spaces, offices, and sunrooms.

What Are Solar Shades for Windows?

Solar shades are roller-style window coverings made from woven mesh fabric. The mesh allows filtered light into the room while blocking infrared heat, helping reduce UV exposure and glare. Unlike blackout shades, solar shades maintain a connection to the outdoors, so you can see through them during the daytime without losing privacy or comfort.

They are commonly installed in living rooms, home offices, sunrooms, and commercial spaces where large windows create heat and glare problems. In Charlotte, NC, where summer highs often approach or exceed 90°F, solar shades are one of the most practical upgrades for south- and west-facing windows.

How Do Solar Shades Work?

Solar shades work through a woven fabric structure with tiny openings, called the openness factor. The openness factor controls how much light, heat, and UV radiation passes through the fabric.

The Openness Factor Explained

Openness FactorLight ControlPrivacyBest For
1%Maximum blockingHighBedrooms, high-glare rooms
3%Strong blockingMedium-HighHome offices, west-facing windows
5%BalancedMediumLiving rooms, dining rooms
10%Light filteringLowViews, low-glare environments

How the Fabric Reduces Heat

  • Reflects and absorbs solar radiation, reducing the amount of heat transferred into the room
  • Filters visible light to minimize glare on screens and surfaces
  • Helps block UV radiation, depending on fabric selection
  • Reduces the surface temperature of the glass, especially with exterior shades

A 3% solar shade can block a substantial amount of direct sunlight, depending on fabric, color, and openness factor, making it the most popular choice for home offices and rooms with afternoon sun exposure in Charlotte.

What Are the Benefits of Solar Shades?

Energy Efficiency

Solar shades reduce solar heat gain through glass before it warms your interior. On south- and west-facing windows, this directly lowers AC load and reduces cooling costs.

  • Cooling cost reduction: typically 5 to 20%, with higher savings possible in homes with large sun-exposed windows
  • Temperature reduction near windows: up to 5 to 10°F on peak summer days, depending on sun exposure and installation type
  • Reduced HVAC runtime: may lower peak-hour system usage by 10 to 30%, depending on window area, shade type, and climate

UV Protection

High-performance solar shade fabrics block up to 99% of UV radiation. This protects:

  • Hardwood floors and laminate from fading and warping
  • Upholstery, rugs, and curtains from discoloration
  • Artwork and photographs from UV degradation

Glare Reduction

Solar shades reduce direct glare on TVs, computer monitors, and mobile devices without darkening the room. This makes them the preferred choice for home offices, media rooms, and open-plan living spaces where screen visibility matters.

View Preservation

Unlike blackout shades, solar shades maintain your outdoor view during daylight hours. You get privacy from the outside while retaining natural light and a visual connection to the garden, street, or skyline.

Interior Protection

By reducing UV and infrared exposure simultaneously, solar shades extend the lifespan of your interior furnishings: floors, fabrics, leather, and painted surfaces all benefit from reduced sun exposure over time.

Interior vs. Exterior Solar Shades

Exterior Solar Shades: Best for Heat Control

Exterior solar shades are installed outside the window frame, where they block sunlight before it reaches the glass. This prevents heat from building up and entering your home.

  • Reduce heat gain by approximately 60 to 90%, depending on fabric, color, and sun exposure
  • More effective for peak summer heat control than interior options
  • Best for south- and west-facing windows in Charlotte, where the afternoon sun is most intense
  • Require periodic hardware inspection and cleaning due to outdoor exposure

Interior Solar Shades: Best for Convenience and Style

Interior solar shades are installed inside the window frame. They are easier to install, simpler to clean, and offer more design flexibility for matching interior décor.

  • Easier installation and maintenance
  • More fabric colors, textures, and openness options available
  • Better suited for rooms where aesthetics and flexibility matter
  • Less effective for heat control than exterior shades, as heat has already entered the glass

Which Should You Choose?

FactorExterior ShadesInterior Shades
Heat reduction60 to 90%Moderate
InstallationMore complexSimple
MaintenanceSeasonal inspectionEasy cleaning
AestheticsLimited optionsWide range
Best forHeat control, Charlotte summersComfort, style, flexibility

Recommendation: For maximum heat reduction on Charlotte’s south- and west-facing windows, exterior solar shades deliver significantly better performance. For rooms where aesthetics and ease of use matter more than peak heat control, interior shades are the practical choice.

Best Openness Factor by Room

RoomRecommended OpennessReason
Home office3%Strong glare reduction on screens
Living room5 to 10%Balance of light, view, and comfort
Bedroom1 to 3%More privacy and light control
West-facing windows3%Blocks intense afternoon sun
South-facing windows3 to 5%, light colorHeat reflection and glare control
Sunroom5 to 10%Maintain light while reducing heat
Commercial office3 to 5%Screen visibility and energy efficiency

Color matters too: Light-colored fabrics reflect more heat than dark fabrics at the same openness factor. For Charlotte’s hot summers, light gray or white fabrics on exterior-facing shades improve heat rejection performance.

Solar Shades vs. Blackout vs. Cellular Shades

FeatureSolar ShadesBlackout ShadesCellular Shades
Light controlFiltered lightTotal darknessModerate
UV blockingUp to 99%100%High
Outdoor viewYesNoLimited
Heat insulationLow to ModerateMediumHigh
Energy efficiencyGoodModerateExcellent
Best useOffices, living roomsBedrooms, nurseriesYear-round energy saving
Nighttime privacyLimitedFullFull
  • Solar shades are the best choice when you want daytime glare and UV control without sacrificing natural light or views.
  • For bedrooms or rooms requiring complete darkness, blackout shades are more appropriate.
  • For year-round thermal insulation, particularly in winter, cellular shades outperform solar options.

If you’re comparing similar styles, see the full breakdown of solar shades vs. roller shades to understand differences in light filtering, privacy, and heat control.

Solar Shades vs. Window Tint

Both solar shades and window tint reduce heat, UV exposure, and glare, but they work differently and serve different needs.

FeatureSolar ShadesWindow Tint
RemovableYesNo
AdjustableYes, raise or lowerFixed
Heat rejectionGood, blocks before glassExcellent, film on glass
UV blockingUp to 99%Up to 99.9%
View controlAdjustable by positionFixed VLT
InstallationInterior or exteriorProfessional, permanent
Nighttime privacyLimitedFixed tint level
Best forFlexible light controlPermanent heat and UV protection

Which is right for you?

  • Choose solar shades if you want adjustable light control, the ability to remove or change the treatment, and flexibility for different times of day.
  • Choose window tint if you want permanent, low-maintenance heat and UV protection that requires no daily adjustment.

Many Charlotte homeowners use both: window tint as a permanent base layer for UV and heat protection, and solar shades for adjustable glare and light control on top. Sun Stoppers installs both services and can help you determine the right combination for your specific windows and exposure.

How Much Do Solar Shades Cost?

Typical Cost Per Window

TypePrice Range
Manual interior solar shades$60 to $380
Motorized interior shades$160 to $520
Exterior solar screens$40 to $200 (DIY)
Professional exterior installation$150 to $400+

What Affects the Price

  • Fabric quality and openness factor: Specialty fabrics cost more
  • Window size: Larger windows require more material
  • Motorization: Remote and smart home integration adds cost
  • Interior vs. exterior: Exterior installation is more complex
  • Number of windows: Multi-window projects often reduce per-window cost

Energy Savings Potential

  • Cooling cost reduction: Typically 5 to 20%, with higher savings possible in high sun-exposure homes
  • Estimated savings: $10 to $30 per month, depending on window area and climate
  • Typical payback period: 1 to 3 years, depending on installation cost, energy usage, and climate

Motorized Solar Shades and Smart Home Integration

Motorized solar shades offer automated control of light, heat, and privacy throughout the day without manual adjustment.

What Motorization Enables

  • Remote control via smartphone app
  • Voice control through Alexa or Google Assistant
  • Scheduled automation lowers shades during peak sun hours automatically
  • Sensor integration: shades adjust based on sunlight levels

Why It Matters for Energy Efficiency

Automated shades can be programmed to lower during the hottest part of the day, typically between 12 p.m. and 4 p.m. on south- and west-facing windows in Charlotte, and raise again in the evening. This reduces AC load during peak cooling hours without requiring any manual intervention.

How to Measure Windows for Solar Shades

Accurate measurement is critical for a proper fit. If you’re unsure where to start, follow this step-by-step guide on how to measure for blinds to avoid gaps and sizing errors.

Inside Mount

  1. Measure the width at the top, middle, and bottom of the window opening
  2. Use the smallest measurement
  3. Deduct 1/8 to 1/4 inch for clearance on each side

Outside Mount

  1. Measure the total width of the area you want covered
  2. Add 2 to 3 inches of overlap on each side beyond the window frame
  3. Measure height from the desired top position to the sill or below

Pro tip: Professional measurement eliminates fit errors that reduce shade performance. Sun Stoppers provides free measurements for solar shade installations across Charlotte, Ballantyne, Matthews, and Mint Hill.

How Long Do Solar Shades Last?

Well-maintained solar shades typically last 10 to 15 years for interior installations. Exterior shades may require hardware inspection and fabric replacement sooner due to weather exposure.

Maintenance Guidelines

TaskFrequency
Dust or vacuum the fabricMonthly
Spot clean with mild soapAs needed
Inspect hardware and bracketsEvery 6 months
Check exterior mounting and tensionSeasonally
Full fabric inspectionAnnually

Avoid harsh chemicals or abrasive cleaning; they degrade the mesh fabric and reduce UV blocking performance over time.

Solar Shades in Charlotte, NC

Charlotte’s climate creates specific challenges for window treatments. Summer highs often approach or exceed 90°F during peak months, with significant afternoon sun on west- and south-facing windows. The combination of heat, humidity, and intense UV exposure accelerates interior fading and increases cooling costs throughout the season.

What Works Best for Charlotte Homes

  • West-facing windows: 3% openness, light-colored fabric, exterior installation for maximum afternoon sun control in neighborhoods like Ballantyne and SouthPark
  • South-facing windows: 3 to 5% openness with a light reflective fabric to balance heat and natural light
  • Sunrooms and screen porches: Exterior solar screens provide the most effective heat control for fully glazed spaces
  • Home offices: 3% interior shades reduce screen glare during work hours without eliminating daylight

When to Install

The best time to install solar shades in Charlotte is before peak summer, March through May, so you have full heat and UV protection in place before June and July when cooling costs spike. That said, professional installation is available year-round.

Book Your Solar Shade Installation Today

Reduce heat, glare, and UV exposure with custom solar shades in Charlotte, NC. Sun Stoppers Window Tinting in Charlotte provides professional measurement and installation tailored to your window size and sun exposure.

Not sure which option fits your needs? Tell us your window details and main goal: heat reduction, glare control, or UV protection, and we’ll recommend the right solution.

Get your free quote today and upgrade your windows with high-performance shades.

FAQs

Yes. High-quality solar shade fabrics block up to 99% of UV radiation. This protects floors, furniture, and fabrics from fading and UV degradation over time.

Yes. Solar shades reduce solar heat gain through glass, which lowers AC load and cooling costs. Most homeowners see cooling cost reductions of 5 to 20%, depending on window exposure, fabric choice, and climate.

During the day, solar shades provide privacy from the outside while maintaining your view. At night, the effect reverses; interior lighting makes it easier for people outside to see in. Pairing solar shades with curtains or a privacy liner solves this for rooms where nighttime privacy is important.

For home offices and west-facing windows with strong afternoon glare, 3% is the most effective choice. For living rooms where you want more natural light and a clearer view, 5 to 10% works well. For maximum privacy and UV blocking, 1% provides the highest performance.

Yes. Exterior solar shades reduce heat gain by 60 to 90% before sunlight reaches the glass. Interior shades provide moderate heat reduction. Both options lower indoor temperatures and AC runtime compared to untreated windows.

Motorized solar shades typically range from $160 to $520 per window, depending on the system, fabric, and installation complexity. Motorized options allow scheduling and smart home integration, which can improve energy efficiency by automating shade position during peak sun hours.

Interior solar shades typically last 10 to 15 years with regular maintenance. Exterior shades may require hardware inspection and fabric replacement sooner due to weather exposure. Monthly dusting and periodic hardware checks extend the lifespan significantly.

Solar shades are adjustable and removable; you can raise or lower them throughout the day. Window tint is a permanent film applied directly to the glass. Both reduce heat and UV exposure, but tint requires no daily adjustment while shades offer more flexibility. Many homeowners use both together for layered protection.

Exterior shades significantly reduce heat (60 to 90%) by blocking sunlight before it hits the glass, offering superior heat control. Interior shades are easier to install, maintain, and offer more design options. For Charlotte’s intense summer heat, exterior shades on south- and west-facing windows are best.