How to Measure for Blinds: Inside and Outside Mount Guide (Charlotte, NC)
Getting accurate measurements is the difference between blinds that fit perfectly and ones that gap, bind, or cannot be installed at all. This guide from Sun Stoppers Window Tinting in Charlotte walks you through the exact steps for how to measure for blinds, covering inside mounts, outside mounts, bay windows, squareness checks, manufacturer deductions, and how to record everything correctly for ordering.
Table of Contents
Key Takeaways
- Measure blinds using the three-point method; record width and height at three positions, and use the smallest width and largest height for inside mounts, unless the manufacturer specifies otherwise
- Check window depth before ordering. Most inside mount blinds require 2 to 3 inches of depth, but the exact requirements vary by product type and headrail design
- Add 2 to 3 inches per side for outside mounts to improve light control, coverage, and privacy, especially for blackout blinds
- Account for manufacturer deductions (1/8 to 1/2 inch) and always round measurements to the nearest 1/8 inch for accuracy
- Avoid costly mistakes by verifying squareness, obstructions, and mount type before ordering, or book a professional measurement for complex windows like bay or angled frames
What Tools Do You Need to Measure for Blinds
To measure blinds with precision, you need a steel tape measure, marking tools, and basic leveling equipment.
| Tool | Purpose |
|---|---|
| Steel tape measure (25 ft recommended) | 1/8 inch precision, essential for accuracy |
| Pencil and notepad | Record measurements for each window |
| Step stool or ladder | Access higher windows safely |
| Small level | Check frame alignment and squareness |
| Masking tape | Mark measurement points on the frame |
| Smartphone or camera | Document window openings and obstructions |
| Cardboard template | Simulate headrail depth before ordering |
The cardboard template is especially useful for bay windows and angled configurations where headrail clearance must be confirmed before placing an order.
How to Measure Width and Height for Inside Mounts
For inside mounts, measure width and height at three points and use the smallest width and largest height.
Width: Three-Point Method
Measure the width at the top, middle, and bottom of the window opening. Record each value to the nearest 1/8 inch. Use the smallest measurement for ordering.
Example:
- Top: 36 1/16″
- Middle: 35 7/8″
- Bottom: 35 15/16″
- Order width: 35 7/8″
Height: Three-Point Method
Measure the height on the left side, center, and right side of the window opening. Use the largest measurement for ordering.
This method accounts for uneven window frames, which are common in older homes where frames may have shifted or settled over time.
Note: Always measure the window opening itself, not the existing blind or shade, for accurate results.
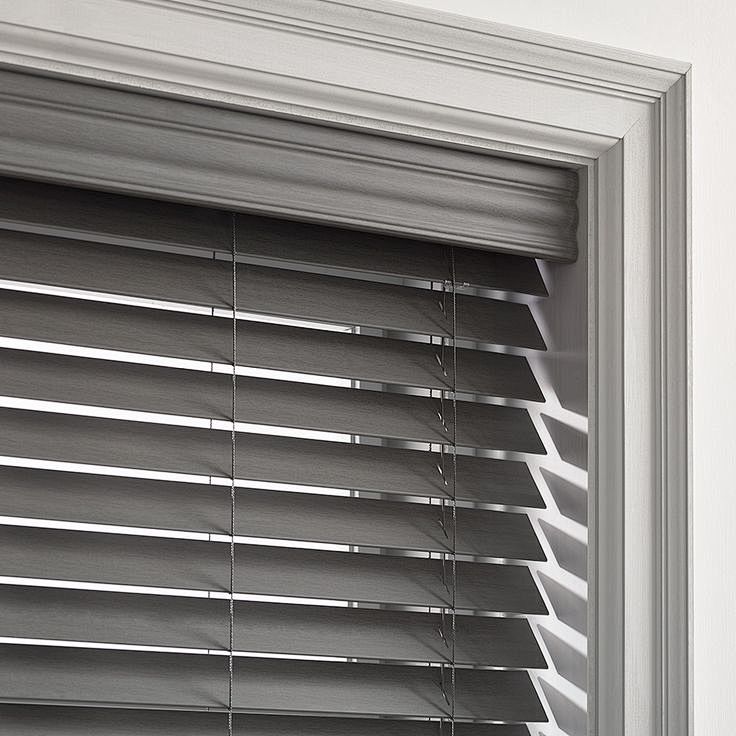
What Depth Is Required for Inside Mounts and Flush Mounts?
Most inside mount blinds require approximately 2 to 3 inches (5 to 7.5 cm) of depth from the glass surface to the front edge of the frame, but actual requirements vary by product type and headrail design. Always check the manufacturer’s specifications before ordering.
| Mount Type | Depth Required |
|---|---|
| Standard inside mount | 2 to 3 inches |
| Slim profile blinds | 3/4 inch (approx. 2 cm); the headrail protrudes partially outside the frame |
| Flush mount (headrail fully inside frame) | Full headrail depth |
A flush mount means the headrail sits completely inside the window frame without protruding into the room, which requires the greatest depth of any mounting option. If your window frame doesn’t provide enough depth for this type of installation, switching to an outside mount is the most practical alternative.
How to Measure for Outside Mounts and Add Overlap
For outside mounts, measure the full width of the area you want covered, not just the window opening, and add overlap on each side.
Standard Overlap Guidelines
- Add 2 to 3 inches per side (4 to 6 inches total width)
- Add 2 to 3 inches above the window frame for the headrail
- Add 2 to 3 inches below the sill for full coverage
Example: 36″ window opening; order approximately 40 to 42″ width for standard coverage, or 42 to 48″ for blackout applications requiring maximum light control.
When to Use a Larger Overlap
Larger overlaps (3+ inches per side) are recommended for:
- Blackout blinds where light gaps are a concern
- Windows with trim that interferes with bracket placement
- Rooms requiring maximum privacy: bedrooms, nurseries, home offices
Ensure there is sufficient flat wall space for bracket installation on both sides before ordering an outside mount.
How to Measure Bay and Angled Windows
For bay windows, treat each panel as a separate window and measure independently using the three-point method.
Step-by-Step for Bay Windows
- Identify each panel in the bay configuration
- Measure width and height for each panel using the three-point method
- Cut a cardboard template to match the headrail and test fit at each angle
- Photograph the angles and corners before ordering
- Label each measurement clearly by position: left panel, center panel, right panel
Testing headrail clearance with a cardboard template is critical for bay windows. Without this step, headrails can collide at corners after installation, requiring costly returns and remeasuring.
How to Check Squareness and Identify Obstructions
Is Your Window Square?
Measure diagonally from corner to corner in both directions. If the two diagonal measurements differ by more than 1/4 inch (approx. 6 mm), the window is not square.
- 1/4 inch or less: inside mount is suitable
- More than 1/4 inch: outside mount is recommended, although some blind types can tolerate slight variation
Common Obstructions to Check Before Ordering
Even if your frame has sufficient depth, obstructions can prevent inside-mount installation:
- Window handles and cranks
- Security sensors or alarm contacts
- Decorative trim edges
- HVAC vents built into the sill
- Tilt mechanisms on double-hung windows
Photograph any obstructions and note their position before ordering. Some obstructions can be worked around with the right headrail design; others require switching to an outside mount.
What Rounding Rules and Manufacturer Deductions Apply
Manufacturers apply deductions to inside mount blinds to ensure smooth operation without binding against the frame.
| Blind Type | Typical Deduction |
|---|---|
| Standard inside mount | 1/8 to 1/2 inch from the width |
| Vertical blinds | Often require approximately 1/2 inch from the height |
| Roller shades | Fabric deduction varies by brand |
Rounding Rules
- Round measurements to the nearest 1/8 inch unless the manufacturer specifies a different level of precision
- Never round up on inside mount width; use the smallest measurement as recorded
- Check the specific product page for exact deduction amounts before ordering
Deductions vary by manufacturer and product line. Always confirm before submitting your order.
How to Record and Submit Width x Height Measurements
Always submit measurements in Width x Height format. This is the industry standard for blind and shade ordering.
Correct Format
W x H = 35 7/8″ x 58 1/4″
Submission Checklist
- Label each window by location (for example, “Living Room Left” or “Bedroom South”)
- Specify mount type, inside or outside
- Note any obstructions identified during measurement
- Include photos of each window opening when submitting to your installer
- Confirm whether the manufacturer or installer applies deductions; don’t deduct twice
Clear labeling prevents ordering mistakes, speeds up production, and ensures the right blind goes to the right window during installation.
What Measurement Differences Apply to Blackout, Roller, and Vertical Blinds?
Different blind types have specific measurement requirements beyond the standard three-point method.
| Blind Type | Key Measurement Consideration |
|---|---|
| Blackout blinds | Require a larger outside mount overlap to eliminate light gaps |
| Roller shades | Include fabric deduction; confirm with the manufacturer before ordering |
| Vertical blinds | Require 1/2 inch height deduction for floor clearance |
| Cellular shades | Check the headrail depth, often deeper than standard blinds |
| Solar shades | The openness factor affects light control, privacy, and glare reduction |
Always confirm product-specific measurement requirements on the manufacturer’s spec sheet before finalizing your order.
If you’re comparing options, see our detailed guide on solar shades vs roller shades to understand the key differences in light control, privacy, and fabric design.
Avoid Measuring Mistakes and Get the Right Blind Size
Even a small mistake when measuring blinds, such as choosing the wrong width point, overlooking depth requirements, or miscalculating overlap for outside mounts, can result in blinds that don’t fit properly, leave light gaps, or cannot be installed at all.
To ensure your inside or outside mount blinds are measured the first time accurately, professional on-site measuring helps eliminate guesswork, especially for bay windows, angled frames, or uneven openings.
Sun Stoppers Window Tinting in Charlotte provides precise, on-site measurement services for solar shades and blinds in Charlotte, NC, helping ensure every width, height, and depth is recorded correctly for a perfect fit.
Book your blind measurement today and avoid costly reorders.
FAQs
What is the most common mistake when measuring blinds?
The most common mistakes are measuring only once instead of using the three-point method, ignoring depth requirements for inside mounts, and submitting the largest width instead of the smallest for inside mounts. A steel tape measure and the three-point method eliminate most of these errors.
What if my window is not square?
If the diagonal measurements differ by more than 1/4 inch (approximately 6 mm), the window is not square. An outside mount is usually the better option; it hides uneven edges and ensures smooth operation without binding.
Can I use a cloth tape measure for blinds?
No. Cloth tape measures stretch over time and produce inaccurate readings. Always use a steel tape measure for precision to the nearest 1/8 inch.
Which measurements should I submit for inside mount blinds?
Submit the smallest width and the largest height from your three-point measurements. This ensures the blind will fit inside the window frame without binding against uneven edges.
How much overlap should I add for outside-mount blinds?
Add 2-3 inches per side, 4-6 inches total, for standard coverage. For blackout blinds where light gaps are a concern, 3+ inches per side provides better coverage and privacy.
Do roller shades and vertical blinds require different measurements?
Yes. Roller shades typically include a fabric deduction to fit inside the brackets. Confirm the exact deduction with the manufacturer before ordering. Vertical blinds require approximately 1/2 inch of height deduction for floor clearance.
How do I test headrail depth before ordering?
Cut a piece of cardboard to the same dimensions as the headrail and test-fit it inside the window frame. If it fits without contacting the glass or obstructions, the depth is sufficient for an inside mount.
Should I measure my existing blinds or the window opening?
Always measure the window opening, not the existing blind or shade. Existing blinds may have been ordered incorrectly or may be a different mount type than what you’re ordering.
Do I need professional measurements for standard windows?
For straightforward rectangular windows with sufficient depth and no obstructions, careful DIY measurement using the three-point method is usually sufficient. For bay windows, angled frames, uneven openings, or any configuration where you’re unsure of the mount type, professional measurement eliminates costly ordering mistakes.